Introduction:
There are many version controls are available in market, like Visual Source Safe (VSS), Subversion (SVN), Concurrency Version System (CVS) etc. Only the SVN is in the scope of this article.
SVN has two different flavors:
1. Command Line SVN
2. Visual SVN (TortoiseSVN).
TortoiseSVN is the visual interface of SVN, which is really very cool. You can easily get SVN and TortoiseSVN as they are free.
After downloading TortoiseSVN, just install it in your machine where you want to make your repository for version control. Now right click to blank place on desktop and check if you are able to see TortoiseSVN options in context menu.
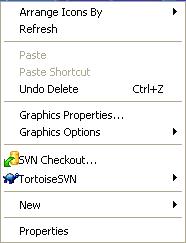
Figure 1:
These TortoiseSVN options may come in different position, depends on your operating system. This image is taken from OS Windows XP Professional with SP 2. SVN options shows that you have successfully installed TortoiseSVN in your system. Now you are ready to work with TortoiseSVN. Here are the steps you have to follow to create your repository.
Step 1:
To create your repository, Fix a location to your system where you want to create your repository, Say your repository path in system would be "C:\SVN\MyProject". Right click on the folder "MyProject" and select "Create repository here", and select "Native filesystem (FSFS)".
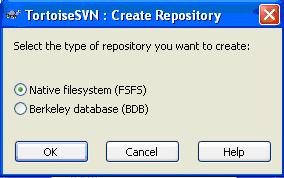
Figure 2:
After "OK", it will show a message for successful repository creation. Some files and folder will create automatically to this folder "MyProject".
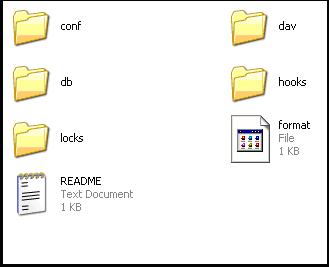
Figure 3:
Step 2:
1. Now you have to add your code in this repository, avoiding risk with your original code, create folder hierarchy somewhere in your system like "C:\Temp\branches", "E:\Temp\tags" and "C:\Temp\trunk".
2.Place your all project content within folder "C:\Temp\trunk".
3. Import "Temp" directory into your repository, for this right click on folder "C:\Temp\trunk" and select "Import".
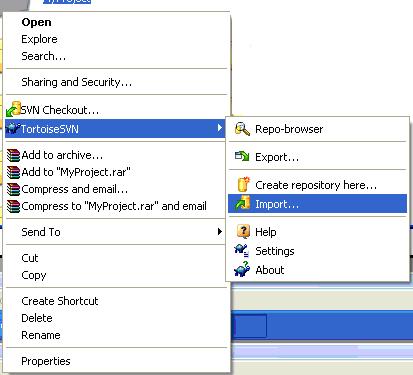
Figure 4:
It will ask you now "URL for repository", locate it to "C:\SVN\MyProject".
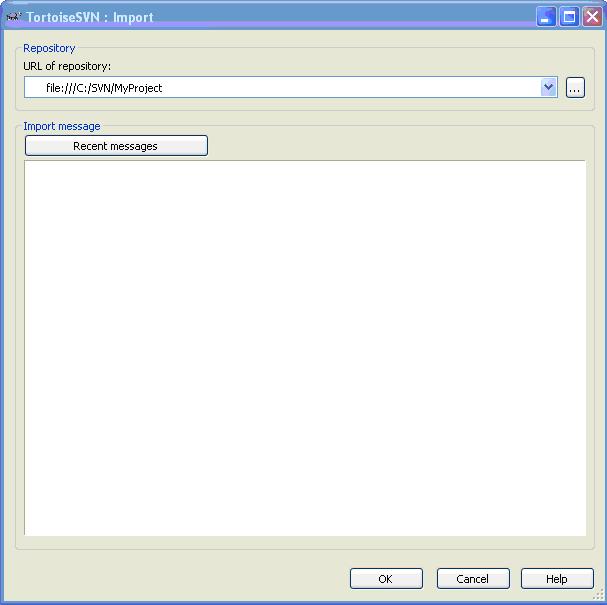
Figure 5:
Click "OK", your next screen will be as follows:
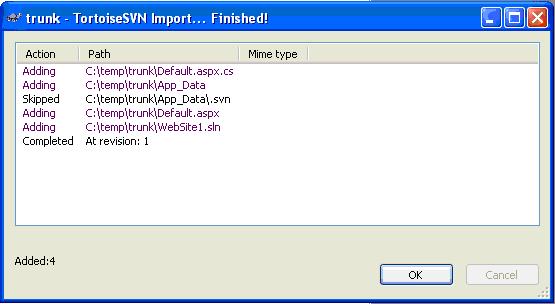
Figure 6:
This shows your code has been saved to TortoiseSVN repository. Now you can even delete "C:\Temp" folder from your disk.
4. Now its time to get your working folder, for this you have to follow this. Right click on your "C:\SVN\MyProject" folder and select "SVN checkout"
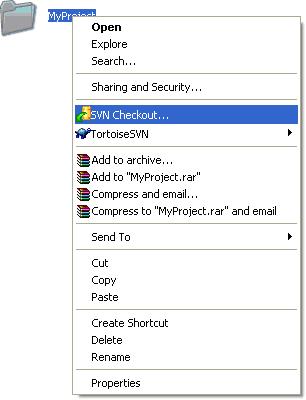
Figure 7:
Locate it to your working folder path, say working folder path is "C:\Working_Folder", then it will look like:
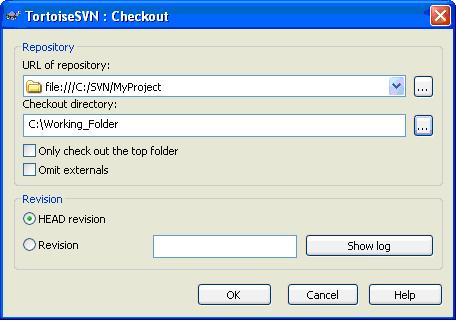
Figure 8:
Click "OK", it will show you message for successful creating working folder with version 1.
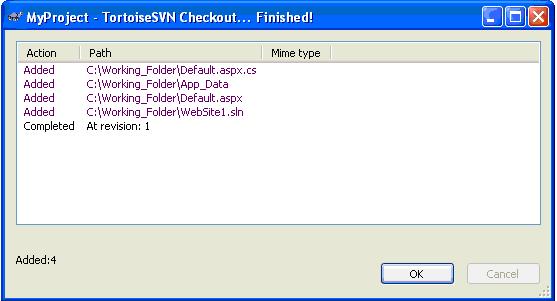
Figure 9:
Great!!! Now you are ready to work with TortoiseSVN.
If you will do some changes on your code file, it will show like this:

Figure 10:
You can commit this file changes to repository, simply right click on checkout file and select "SVN commit". This will commit your changes to repository.
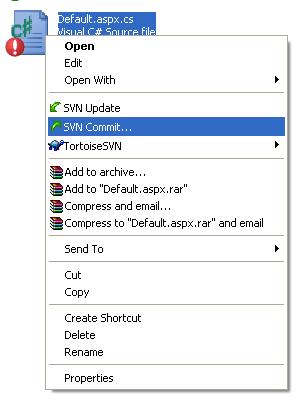
Figure 11:
There is one more option i.e. "SVN Update", this will get latest version from repository.
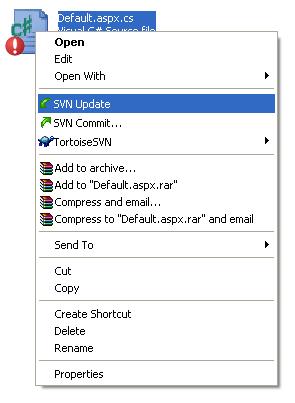
Figure 12:
That's it. I believe this article will help you to setting up this repository to your system.