|
|
|
|
|
Similar ArticlesMost ReadTop RatedLatest
|
|
|
|
|
|

|
|
|

|
|
|
|
|
|
|
|
|
|
|

|
|
|

|
|
The final stage of the development of an application is deploying the project on client machines, which should be managed carefully. To organize everything in a proper fashion and install the required files on the required folders we were provided with Setup and Deployment project under .Net. This has to be added under the same solution where we developed our application.
To add Setup and Deployment Project, open "Add New Project" window and in LHS panel expand the option "Other Project Types" and select Setup and Deployment, now in RHS panel choose "Setup Project" for any type of application or "Web Setup Project" for web applications.
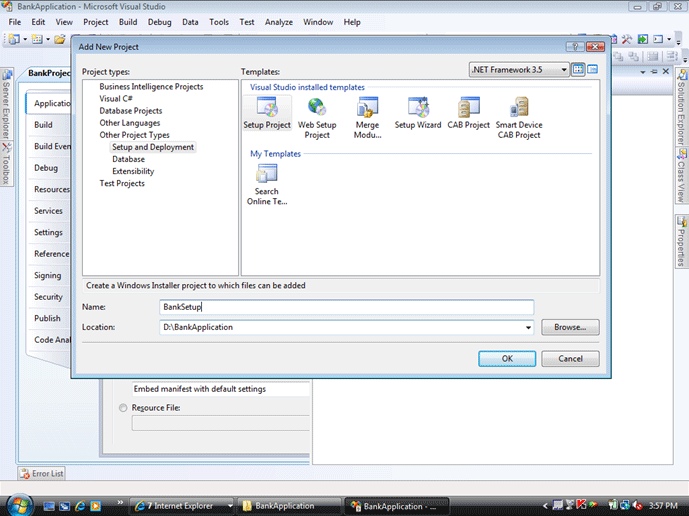
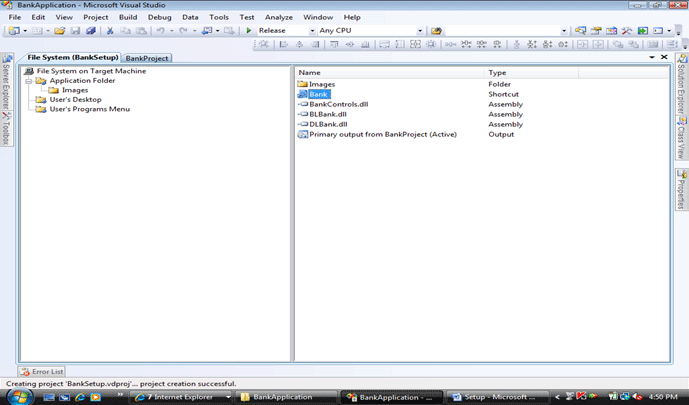
When Setup Project is selected and opened it shows the options as follows:
File System on Target Machine
- Application Folder
- User's Desktop
- User's Programs Menu
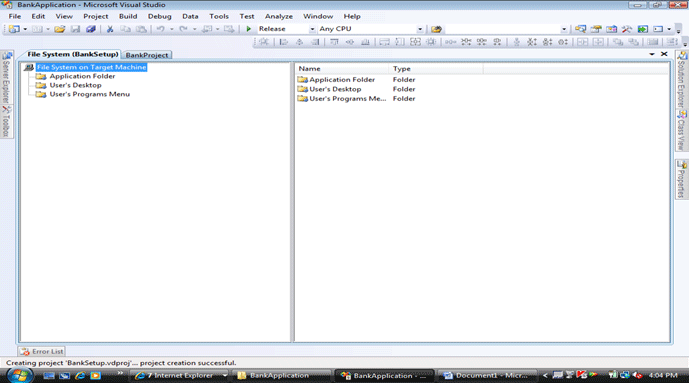
File System on Target Machine refers to the target system where the project is being installed; in other words, the folders on that machine. Application Folder refers to the project installation folder, which has to be specified while installing. User's Desktop refers to the desktop folder of the target machine. User's Programs Menu refers to the program's menu folder of target machine.
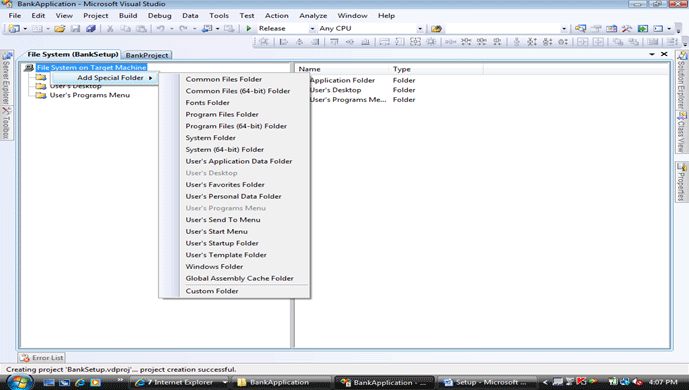
We can still add other folders referring to the target machine like Program Files, Fonts, GAC Folders etc. To add a new folder right click on "File System on Target Machine" and select "Add Special Folder" and then choose from the list of folders displayed:
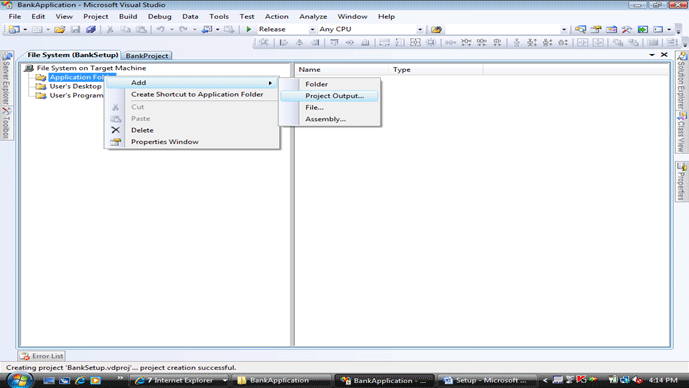
Now copy the appropriate content into the appropriate folders so that they get installed on the target machine in appropriate locations.
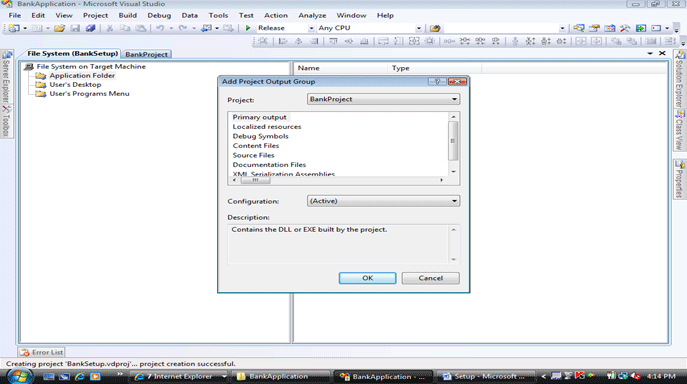
Under Application Folder copy the assemblies (exe's, dll's) and config file that has to be installed on the target machine; to do this right click on the Application Folder & select the option Add -> Project Output:
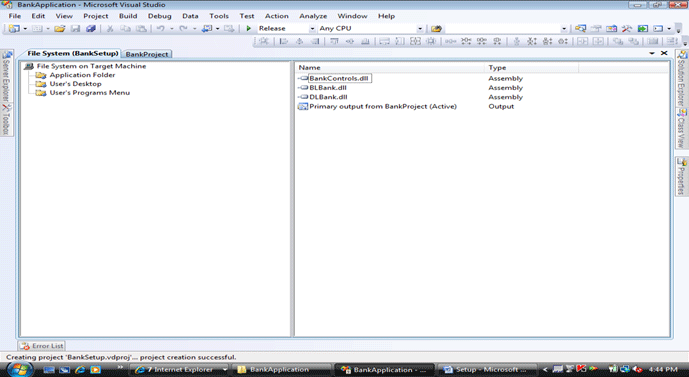
This opens a window showing the list of projects, select the exe project from it:
This will add the necessary exe's, dll's and config file:
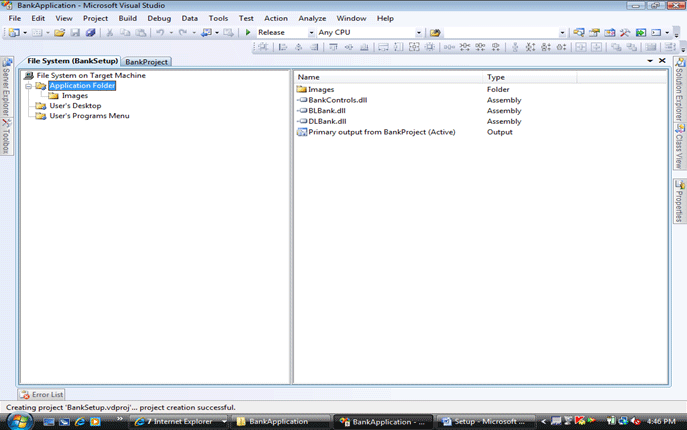
Apart from Project Output we can also choose Folder or File or Assembly and add them under the Application Folder. Add Folder is used for adding a new folder for storing any images. Add File is used for adding any help documents. Add Assembly is used for adding any assemblies that are created outside of the solution.
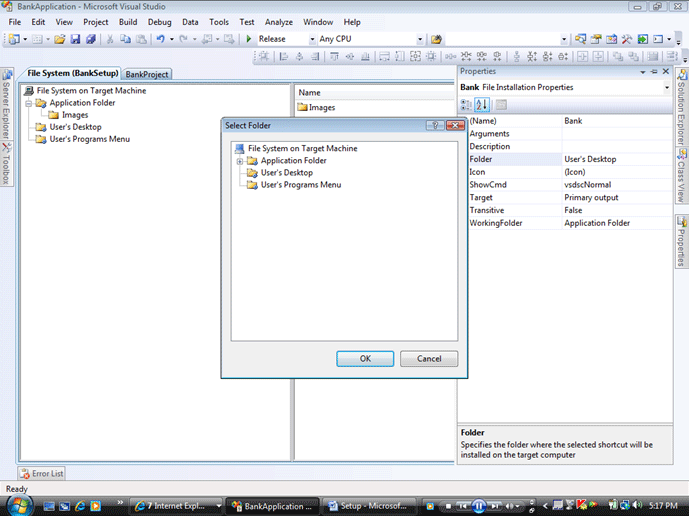
If we want any shortcuts to be created for our application and place them either on desktop or added to programs menu do the following: Right click on the exe assembly (item of type output) under the application folder and select "Create Shortcut":
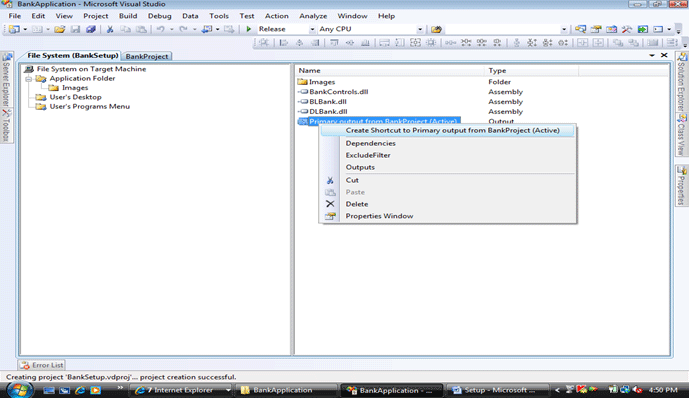
This will create a shortcut to specify a name to it.
For a shortcut we need to bind a display image of type Icon (.ico), to add an icon image go to the properties of shortcut -> select icon property and select browse from the list, which opens a window -> click on browse -> select application folder -> Images folder -> click on the add file button -> select the image from its physical location -> click on ok button -> again ok button.
Now to place the shortcut on the desktop or the program's menu folder, go to properties of shortcut again and select the property "Folder" -> click on the button beside it which opens a window, from it select user's desktop or user's programs menu folder which copies the shortcut to the selected folder.
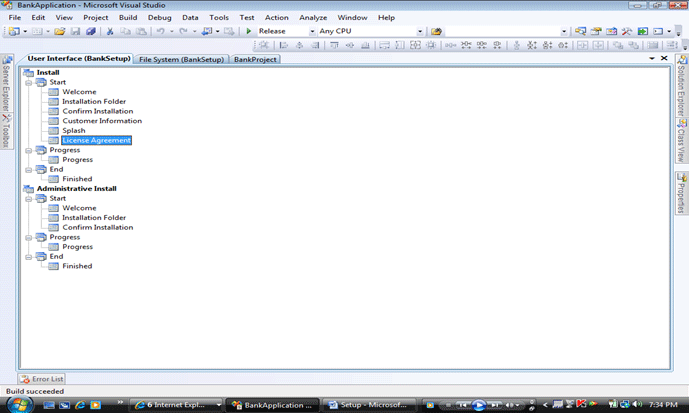
Installation user interface dialog boxes: setup project provides a number of predefined dialog boxes that you can use to display information or gather input during an installation. The following is a list of available dialog boxes. Not all dialog boxes are available for all deployment project types or for Admin installers. To view the current interfaces in the setup go to view menu -> Editor -> Select User Interface.
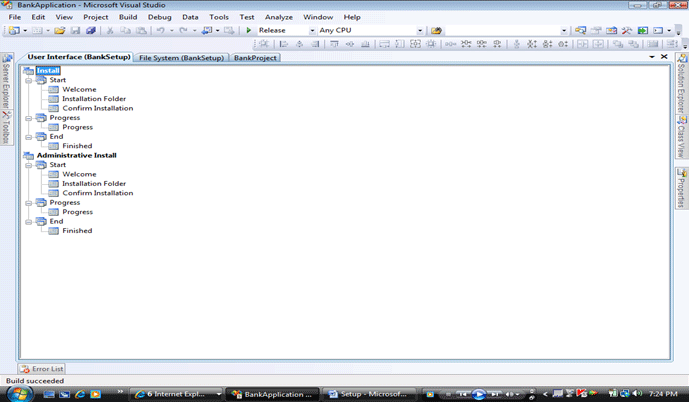
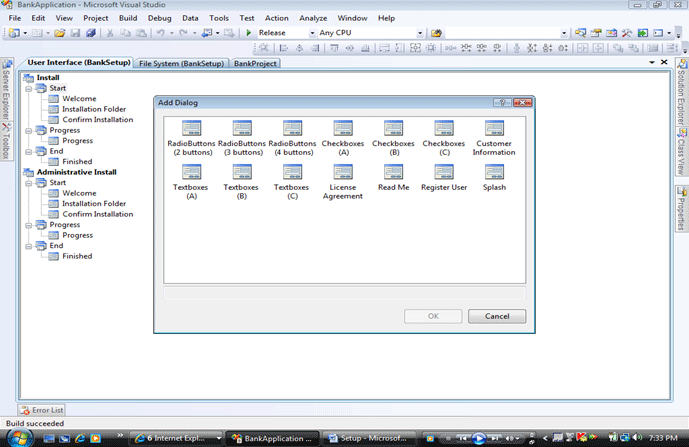
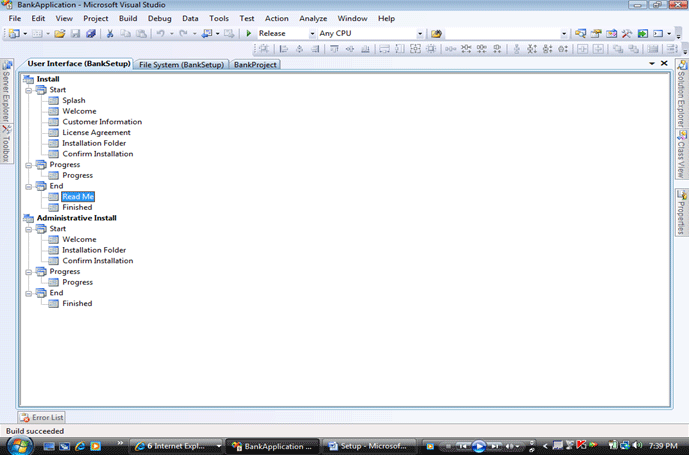
You can still add new user interfaces like Splash, License Agreement, Register User, Read Me, Customer Information etc. To add a new user interface right click on the node Start -> select add dialog which displays the list of interface, choose what u require. e.g.: Splash, License Agreement.
After adding the required user interfaces, we can order them by right clicking on them and select MoveUp and MoveDown options.
Splash requires a bitmap image to be set that has to be displayed, to set it go to the properties of splash interface -> under SplashBitmap property -> select browse -> choose an .bmp or .jpg image from its physical location same as we selected the .ico image previously for the shortcut.
License Agreement & ReadMe requires any .rtf file to be set for displaying, which needs to be added the same as above using the LicenseFile property and ReadMeFile properties of the interfaces.
Customer Information will prompt for Name, Organization & Serial Number options; by default Serial Number Options will not be visible to make it visible set the ShowSerialNumber property as true:
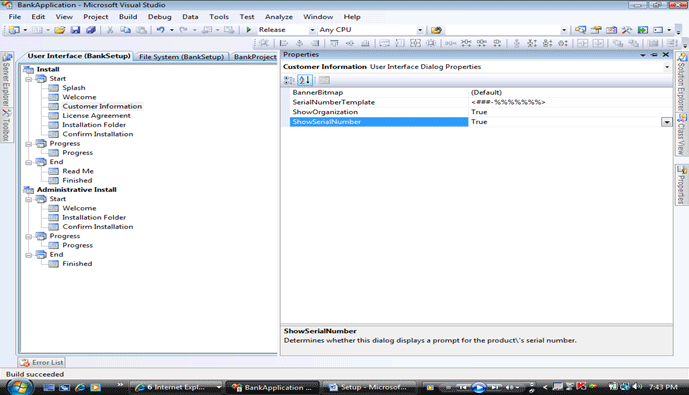
Setting the SerialNumberTemplate property to "<### - %%%%>" creates two text boxes separated by a dash surrounded by spaces. Validation for the first box (###) simply verifies that the user has entered three digits. The second box (%%%%) is validated by an algorithm that adds the digits together and divides the sum by 7. If the remainder is 0, validation succeeds; otherwise, it fails.
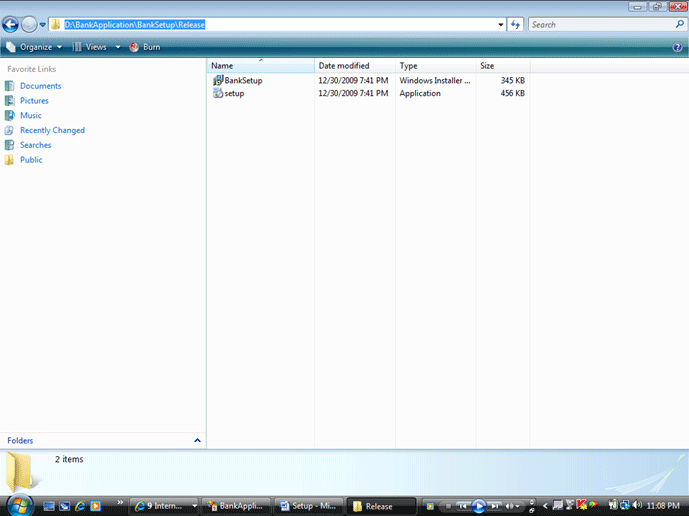
After configuring everything under the Setup project, in the top of the Visual Studio is the Solution Configurations ComboBox with the options for Debug or Release; the default will be Debug, change it to Release and then right click on the SetUp Project in the solution explorer and Select Build, which will compile all the Projects and prepare the SetUp File which you can find them under the SetUp Projects, Release Folder which can be copied to a CD or a DVD, which is carried to the client system for installing.
Note: Before installing the Setup on the Client Machine make sure that the .Net Framework is installed on it.
|