The preview version of the next version of Visual Studio 2003 is called Visual Studio codename Whidbey. Visual Studio Whidbey has a support for building applications for Windows codename Longhorn, which is a new addition to the Windows operating systems series and successor of Windows XP.
To build Windows Longhorn applications, you don't have to run Windows Longhorn. You can simply use Visual Studio Whidbey but prior to that, you must have install Longhorn SDK on the development machine.
In this article, you will get a glimpse of Whidbey and support of Windows Longhorn applications.
Visual Studio Whidbey Supports Windows Longhorn Development
When you create a new project using Whidbey, you will notice new Longhorn templates. You can select from various templates such as Longhorn Application, Longhorn Custom Control, Longhorn Document Application, Longhorn Hosted Application, Longhorn Screen Saver, Longhorn Library and so on. These templates are shown in Figure 1.
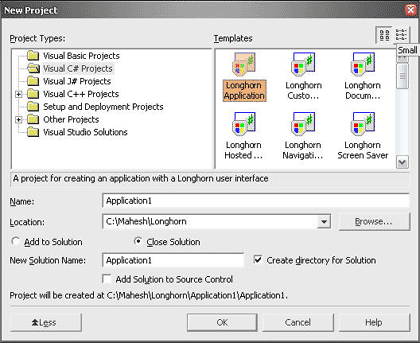
Figure 1. Windows Longhorn project templates in Visual Studio Whidbey
After selecting Windows Application template, Whidbey creates the project. The project items contain an two XAML files and the codebehind files (.cs for C#, .vb for Visual Basic) for them. The expanded view of Solution Explorer looks like Figure 2.
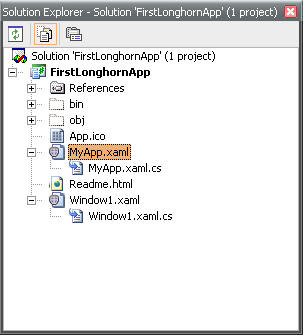
Figure 2. Project items
You may have noticed that there is no Form class in project items, which is by default in the current Windows Forms applications. The reason for that is XAML and Avalong replaces Windows Forms in Longhorn programming model. Yes, that's correct. There will not be any Windows Forms classes in default Longhorn programming model but you can use Windows Forms with XAML and mix them up together. To add a Windows Form to the application, you can use Add New Item and select a Form item.
Figure 3 shows MyApp.xaml file, which stores the information and settings for the application and resources.
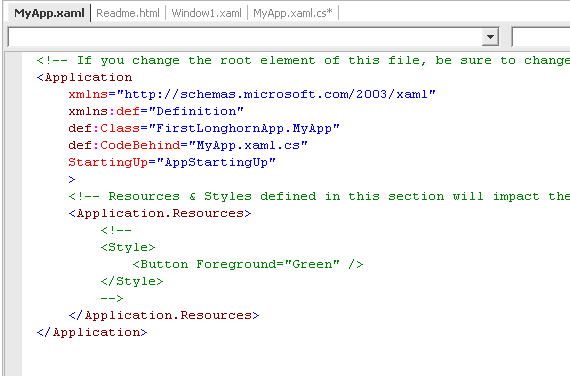
Figure 3. MyApp.xaml
As you can see from Figure 3, MyApp.xaml has a codebehind .cs file called MyApp.xaml.cs. This file can contain the source code for the UI. This is the Avalon file which can be compared with Windows Forms files. This file is shown in Figure 4. As you can see from Figure 4, MyApp class is inherited from MSAvalon.Windows.Application class. MSAvalon is the namespace that contains all the Avalon classes. The Window1 is the class for the default form in the application and Window.Show method is responsible for rendering the windows on the screen.
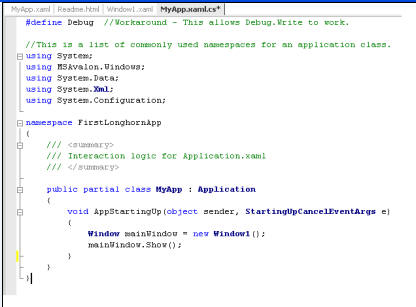
Figure 4. MyApp.xaml.cs file
You saw from Project items, Window1.xaml and Window1.xaml.cs are two other classes added by Whidbey. Window1.xaml is the default form and Window1.xaml.cs is the codebehind file. Window1.xaml is shown in Figure 5. As you can see from this figure, it stores the elements of a window such as panels and other Windows controls. By default, you can see FlowPanel is available in xaml. We add a SimpleText tag which says "Hello World".
Note: To understand XAML better, see XAML Programming section. I am also writing an article on Programming XAML Panels. It should be available sometime next week.
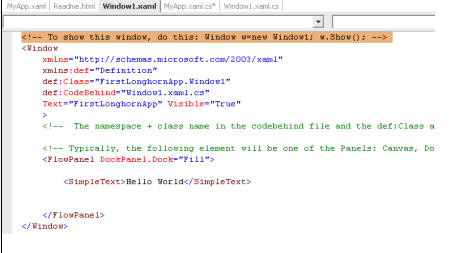
Figure 5. Window1.xaml file
Now let's take a look at Window1 class, which is shown in Figure 6. As you can see from this figure, Window1 class is inherited from MSAvalon.Windows.Window class, which represents a window and is equivalent to System.Windows.Forms.Form class.
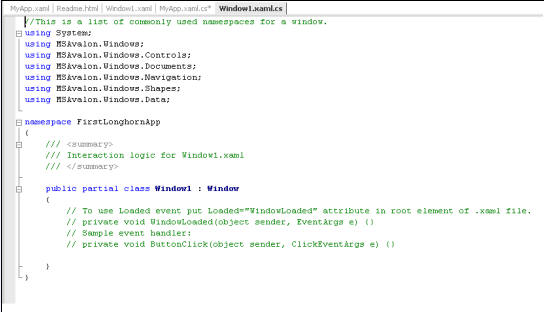
Figure 6. Window1 class
Now if we run the application, the final output looks like Figure 7.
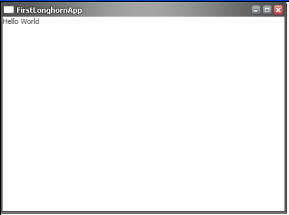
Figure 7. Hello World in Windows Longhorn
Summary
In this article, you saw a glimpse of first Windows Longhorn application using Whidbey. I also covered the basic elements of a typical Longhorn application and how they are related to one another.