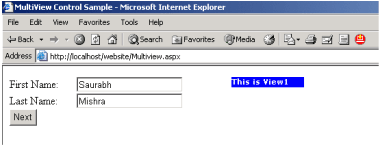
One task common to web applications is data collections. For example one may need to collect some information from the end user, as in some sort of registration or some survey process. A rated good practice has been to often split the questions across multiple pages, so that the end user doesn't have jitters scrolling down the pages and by seeing the number of questions he/she would be made to answers. After all who likes to answers questions!!!
ASP.Net1.x offered developers to accomplish this by using panels and then selectively hiding and unhiding a set/group of controls. Or the way around was to create separate pages altogether, which sometimes became too cumbersome. ASP.Net2.0 offers the all new Multiview control to takes out the drudgery of creating multiple pages and thereby making life easier for the developers.
How To Do That?
Drag the Multiview control (located in the Standard Tab) from the toolbox onto the form, and drag two more view controls onto the Multiview. Populate the two view controls as shown below in the figure.

In the properties for the Multiview control set the ActiveViewIndex = 0. This means that view1 will be shown by default when the page gets loaded. All the views appearing in the Multiview control are a part of the view collection which itself is a part of the Multiview control. So by setting the ActiveViewIndex to 0 we make the first view (zeroth in the collection) to be the default view.
To add some functionality to the Next button (btnNext) double click button in the design view, and Visual Studio2005 generates the event for you in the code-file (Multiview.aspx.cs, in my case). Add the following code to the generated event: -
MultiView1.ActiveViewIndex += 1; //Make view2 as the next visible view
In the above code we are making the ActiveViewIndex of the Multiview to be 1. This is to make view2 visible, and hide view1.
Similarly double click the Back button (btnBack) and add the following line of code to the generated event:-
MultiView1.ActiveViewIndex -= 1; //Make view1 to be visible again.
Similar to the code for btnNext click event, here also we have set the ActiveViewIndex to -1, to make view1 visible and hide view2 on clicking btnBack.
The above is just some very elementary code written for illustrative purpose. Complex business logic can be written in a similar way. And any number of views can be added to the Multiview control, suiting to ones individual requirements.
Seeing It Work, Finally!!
Hit the F5 key on your keyboard to run the sample, and to see it work in completeness.

