Description of the Article:
Microsoft Visual Studio .NET (VS.NET afterwards) is full with Data-bound controls and wizards. These controls and wizards help you to generate your applications in no time. You just set some properties of these controls and use wizards to generate your code. In couple of minutes, you develop a full-fledged working application.
In this series of articles, my first article is OleDb Data Adapter Controls in VS.NET. In this article, I'll show you how to display data in a DataGrid control by writing only one line of code. You just follow these simple steps:
Step 1: Create Project
Pick Visual C#->Windows Application project and type your project name and pick a directory. See Figure 1.
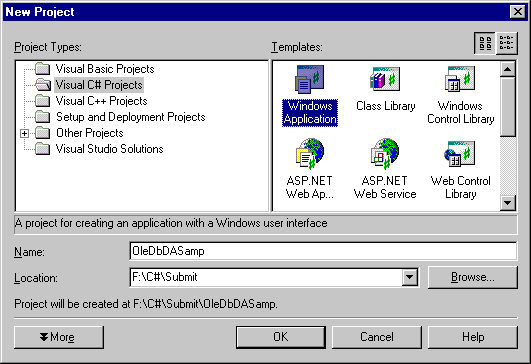
Figure 1.
Step 2: Add OleDb Data Adapter
Drag an OleDbDataAdapter control from Toolbox->Data to your form. Data Adapter Configuration Wizard appears and it guides you towards to create your Data Adapter object.
First screen is about the wizard. See Figure 2.
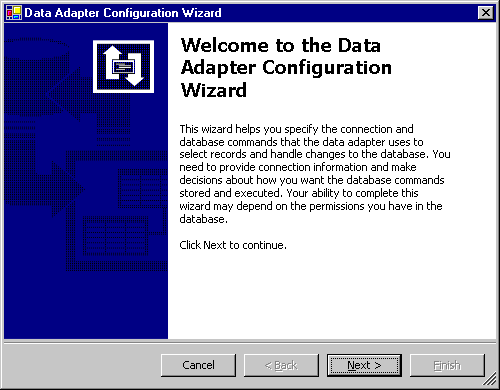
Figure 2.
Second screen will let you create a connection. If you already have connections, they are available in a drop down list. You either pick a connection from your list or create a new connection. New Connection button will launch Data Link Properties Dialog, which lets you create a new connection. I'm using Northwind database (Microsoft Access 2000) comes with Office 2002. See Figure 3.

Figure 3.
Next page provides you options to use SQL Statements or stored procedures. For Microsoft Access databases, only "Use SQL statements" option is available. See Figure 4.
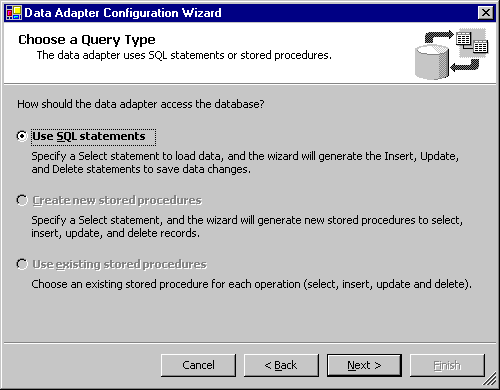
Figure 4.
Next step is to generate SQL statement. You use Query Builder button to build a query. See Figure 5.
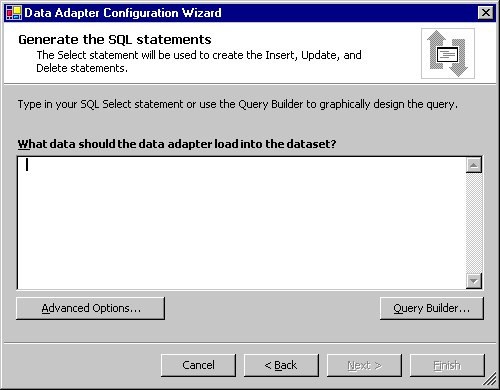
Figure 5.
This option let you pick your database tables. I pick Employees table. The Add button adds the table to the listing. You can even pick more than one tables. See Figure 6.
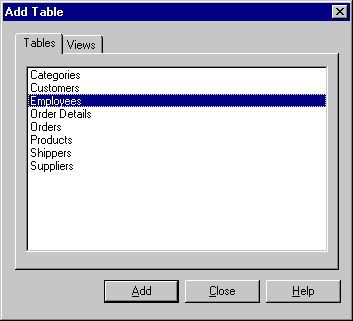
Figure 6.
And now you pick what columns you want to get data from the database to the DataAdapter. I pick some columns Address, City, EmployeeID, FirstName, LastName and Title. See Figure 7.
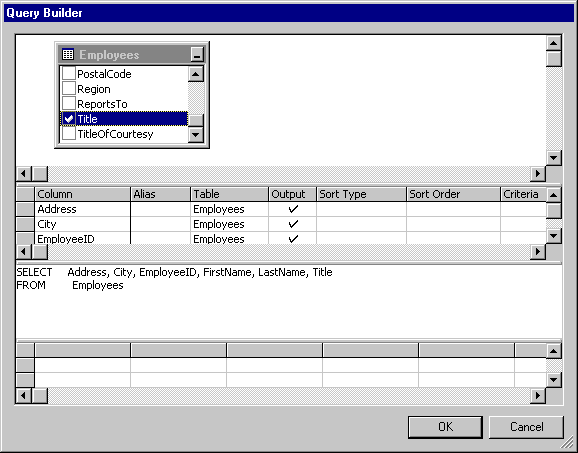
Figure 7.
This page shows you your SQL Statement. You can even write SQL statement by yourself (with no help of Query Builder). See Figure 8.
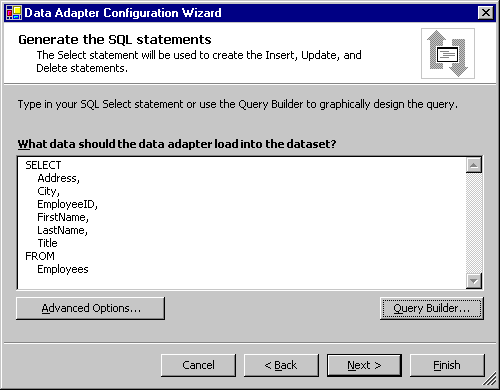
Figure 8.
Last page shows you the activities wizard finished. See Figure 9.
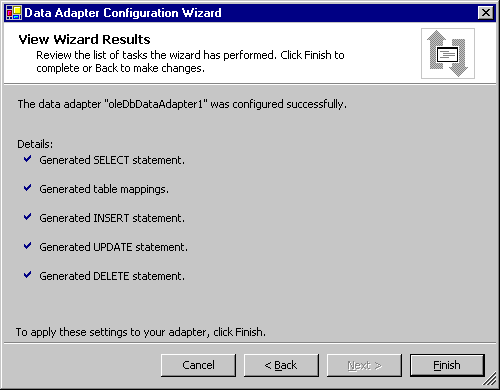
Figure 9.
Step 3: Generate DataSet
Next step is to generate DataSet and connect DataSet to a DataView component. You generate a DataSet by using "Generate DataSet" option in DataAdapter's Properties dialog. See Figure 10.
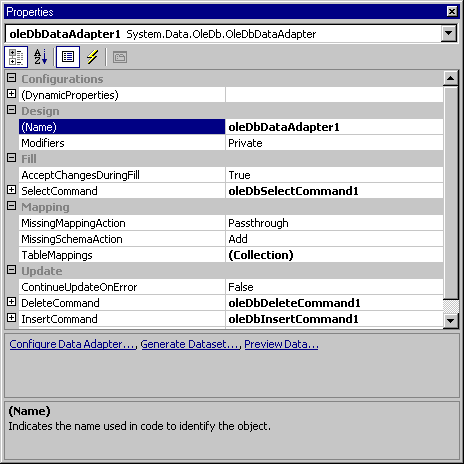
Figure 10.
The Generate DataSet option is also available from the right click on a data adapter. See Figure 11. You can also call DataAdapter Configuration Wizard from here if you wish to change your data source or want to make any changes using Configure Data Adapter option. See Figure 11.
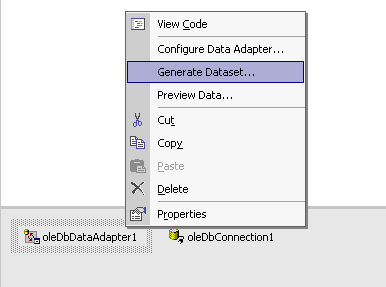
Figure 11.
Generate DataSet link shows you dataset. Pick "New" option and type your dataset name. You can pick as many as tables you want from the list. I keep default option. See Figure 12.
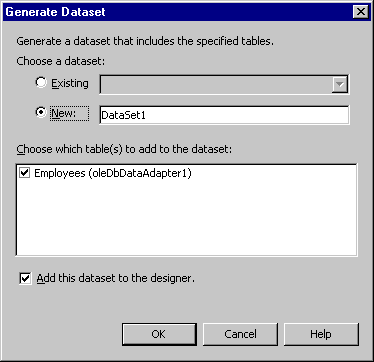
Figure 12.
By clicking "OK" button, wizard generates a dataset and shows you it's properties dialog. You can change DataSet name and other properties. "View Schema" option shows you the XML Schema for this dataset added by the wizard and "DataSet Properties" option shows you the properties. See Figure 13.
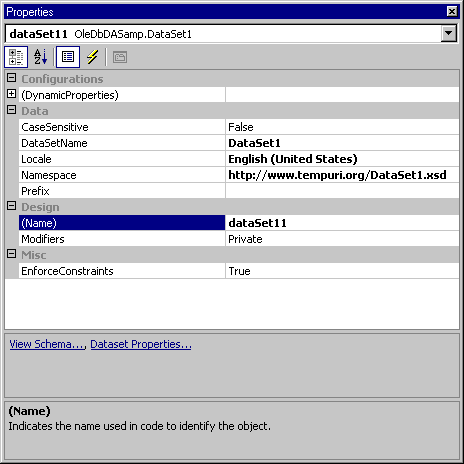
Figure 13.
This action adds one DataSet derived class to your project. We're not going in to details of this class. See Figure 14.
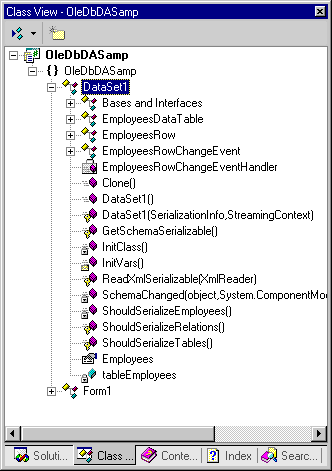
Figure 14.
Step 4: Attach DataSet with a DataView
Now we're going to view data in a DataGrid control. We'll use recently generated dataset to fill a DataGrid control.
Now attach this dataset with a DataView. To attach a dataset to a DataView, first you need to add a DataView control to the form. Drag a DataView control from Toolbox->Data and set its table property to your DataSet's table. See Figure 15.
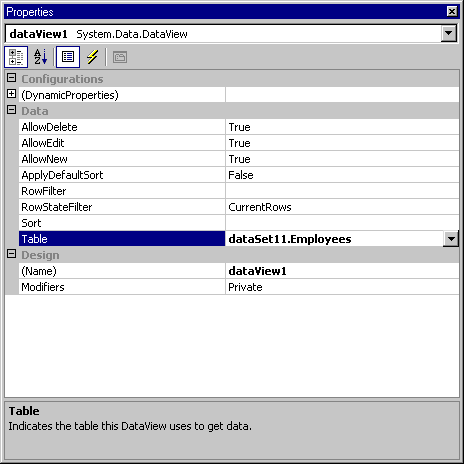
Figure 15.
Now you can bind this DataView with any data-bound controls.
Step 5: Attach DataView with the DataGrid Control and Fill the DataSet
Now drag a DataGrid control from Toolbox->WinFroms to the form and set its DataSource property to DataView. See Figure 16.
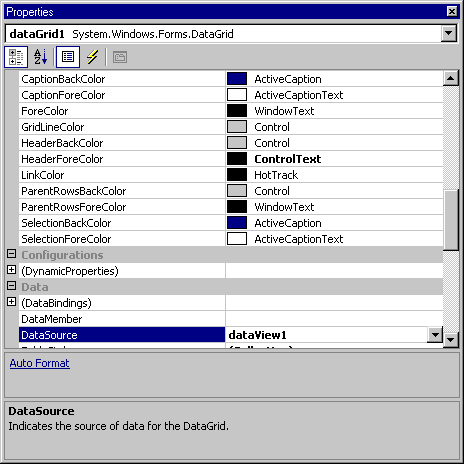
Figure 16.
Last step is one and only one line of code to add.
Now fill the data from DataAdapter to the DataSet by calling DataAdapter's Fill method. I write this code after InitializeComponent(); See BOLD like in the following listing.
InitializeComponent();
oleDbDataAdapter1.Fill(dataSet11);
Build and run the project and see the result. I see my data in the DataGrid control. See Figure 17.
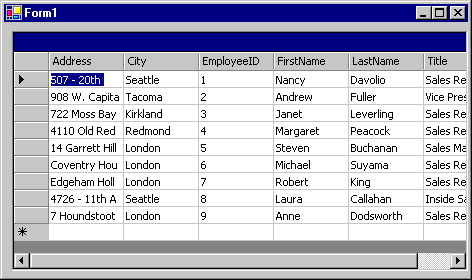
Figure 17.
Conclusion
You just saw how VS.NET provides tools, which you can use to write database applications merely writing few lines of code.