The FormView control is the control (.NET 2), that displays the values of s single record and allows us to edit, delete and insert data. We can customize the FormView control by adding templates, that allow to modify the displayed data. Of course, we can use all kind of validators (RequiredFieldValidator, RangeValidator, etc) to validate edited (and/or inserted) data. In this case we use validation not to validate our business object “as a whole”, but just use separate validator (for example, RequiredFieldValidator) for separate control (for example, TextBox). Now, let’s suppose that we are very “obedient” programmers and try to use OOP and three-layer data access model as far as we can. This is: there are at least four projects in our solution: BO (Business Object) project, DAL (Data Access Layer) project, BL (Business Logic) project, and project with all our forms and additional classes . If our solution named FH (for example, “First Hand”), we will get something like this:

Figure 1.
Now, let’s suppose, that we execute all our data access by means of typed DataSets, which, of course are in the FH.DAL project. All our business processes we have to “execute” in the FH.BL project. In the FH project we only modify and display our business object. Of course, using validators in FH project, we “leave” our model. In fact, we “bypass past” our FH.BL and just validate only (as we have said before) separate property of some control (for example, Text property of some TextBox), without any connection with our business object (may be only holding in memory, that, for example, the FirstName of our object must be between 1 and 50 characters). Using the Enterprise Library 3 Validation Block we are not be “beyond” our business model. We can create a validator with some rules, run it to validate our BO, for example, directly in the BL project and then, depending on result, return some message to the FH or transfer data to the DAL. And so on. In this article I will show how you can use the Enterprise Library 3 Validation Application Block (VAB) to validate data, edited with the help of the FormView control. The examples are written using C#.
Let’s name “FormView with the Validation Application Block” as FVVAB. We can implement FVVAB by two ways. The first one is using the PropertyProxyValidator in the FH project and the second way is just addition of some code into the FH.BL project.
The first way. Using the PropertyProxyValidator for FVVAB.
Let’s suppose, that we have some BO Person to validate. The Person object has the following properties : PersonID (type of the string), FirstName (string), LastName (string), DateBirth (DateTime), DateUpdate (DateTime), Comments (string). Our class will look like this (don’t pay attention to the comments: this is ”green code”; we will discuss that later):
using System;
using System.Collections.Generic;
using System.Text;
//using Microsoft.Practices.EnterpriseLibrary.Validation;
//using Microsoft.Practices.EnterpriseLibrary.Validation.Validators;
namespace FH.BO
{
//[HasSelfValidation]
public class Person
{
#region "ForClass"
private string personID;
private string firstName;
private string lastName;
private DateTime? dateBirth;
private string comments;
private DateTime? dateUpdate;
#endregion
public string PersonID
{
get { return personID; }
set { personID = value; }
}
public string FirstName
{
get { return firstName; }
set { firstName = value; }
}
public string LastName
{
get { return lastName; }
set { lastName = value; }
}
public DateTime? DateBirth
{
get { return dateBirth; }
set { dateBirth = value; }
}
public DateTime? DateUpdate
{
get { return dateUpdate; }
set { dateUpdate = value; }
}
public string Comments
{
get { return comments; }
set { comments = value; }
}
//[SelfValidation(Ruleset = "rsPerson")]
//private void DoValidate(ValidationResults results)
//{
// if (dateBirth.Equals(DateTime.Parse("12/12/2000")))
// {
// if (!firstName.Equals("Michael"))
// {
// ValidationResult resultMic = new ValidationResult
// ("Must be only Michael", this,
// "FirstName", null, null);
// results.AddResult(resultMic);
// }
// }
//}
}
}
Certainly, you should add some additional references:
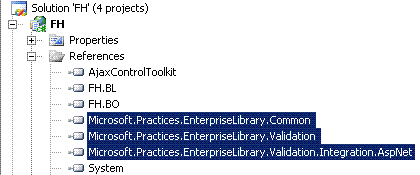
Figure 2.
Now, add the Validation Application Block to your Web.config and add new Type “Person” (see fig. 3, fig. 4).
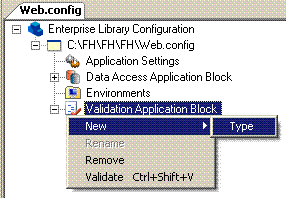
Figure 3.
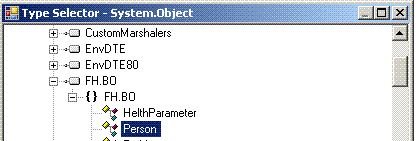
Figure 4.
To the type Person add new rule set (named, for example, “rsPerson”) and choose members that you want to validate, for example, FirstName, LastName, etc (fig 5., fig. 6).
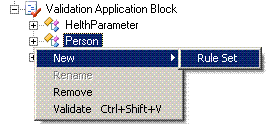
Figure 5.
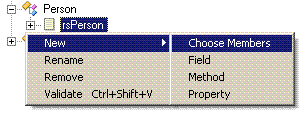
Figure 6.
Now, just add a validator, that you need, and set properties of this validator (fig. 7). For example, to set the validator’s message I use such property as MessageTemplateResourceName and MessageTemplateResourceTypeName (for this I use the Resources File “ErrorMessages”, which is in the FH.BO project), but not simplely the MessageTemplate property:
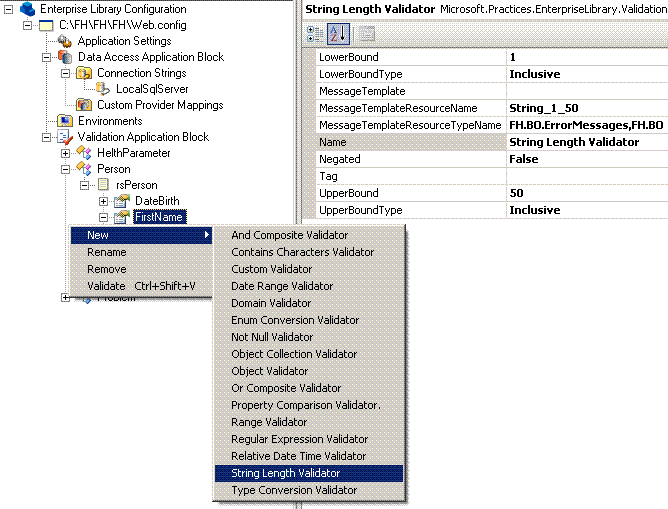
Figure 7.
OK, in fact we have finished to build “basis” to validate our business object Person. Now we are ready to use the Proxy Validator with a FormView.
Suppose, you have on some web form (or user control) such controls as : GridViewPerson (to display all our persons), ObjectDataSourcePerson, FormViewPerson (to display, edit, insert and delete the object Person ) and, of course, ObjectDataSourcePersonDetails. All works perfectly and you just need to add validation of the data (this is “update” case; “insert” case we will discuss later). Our update method in the PersonBL class is very simple and doesn't need any addition code for validation:
namespace FH.BL
{
[DataObject]
public static class PersonBL
{
[DataObjectMethod(DataObjectMethodType.Update, true)]
public static void UpdatePerson
(Person person, Person Original_Person)
{
string original_PersonID = Original_Person.PersonID;
PersonTableAdapter personAdapter =
new PersonTableAdapter();
personAdapter.Update(
person.PersonID, person.FirstName,
person.LastName, person.DateBirth,
person.Comments, DateTime.Today,
original_PersonID).ToString();
}
////or if you return some value
//[DataObjectMethod(DataObjectMethodType.Update, true)]
//public static string UpdatePerson
// (Person person, Person Original_Person)
//{
// string original_PersonID = Original_Person.PersonID;
// PersonTableAdapter personAdapter =
// new PersonTableAdapter();
// return personAdapter.Update(
// person.PersonID, person.FirstName,
// person.LastName, person.DateBirth,
// person.Comments, DateTime.Today,
// original_PersonID).ToString();
//}
……………………………………………………
In Template Editing Mode of the FormViewPerson choose EditItemTemplate and drug and drop PropertyProxyValidators (as many as you need) . Of course, if you don’t have on your toolbox the PropertyProxyValidator control, you have to choose it from .NET Framework Components. Now, set the properties of the validator to needed values. You don’t have many choice for four properties: ControlToValidate (ID of the control to validate), PropertyName, RulesetName and SourceTypeName. For example, if the FirstNameTextBox is bound to the property FirstName of the Person, then you must set the ControlToValidate property to” FirstNameTextBox”, PropertyName to “FirstName”, RulesetName to “rsPerson” and SourceTypeName to “FH.BO.Person,FH.BO” (fig. 8).
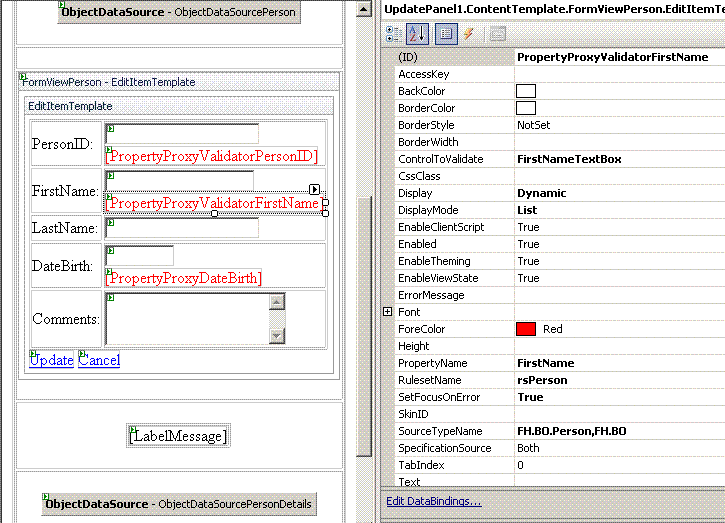
Figure 8.
Now, click “End Template Editing” button of the FormViewPerson. That is all what should be done (no a line of code!). Run the project and test our validation. For our setting (see above) you should get something like this:
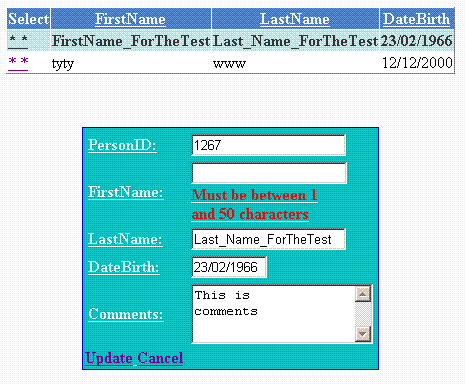
Figure 9.
The second way. Create a validator in BL class.
In our BL class we should create a validator with our validation rules for the insert method (“insert method” is only for an example, of course, you can do it for update, etc.):
Validator<BO.Person> validator = ValidationFactory.CreateValidator<BO.Person>("rsPerson");
Then we run validation:
ValidationResults results = validator.Validate(person);
If a result is not valid we don’t execute our insert procedure and return some message to a user.
We do not change anything in the Web.config (with our validators - see above)! Suppose, also, that we want to catch “insert-process” errors and to separate these errors from validation errors.
Our BL class will look like this:
using System;
using System.Collections.Generic;
using System.Text;
using System.Data;
using System.Data.Sql;
using FH.DAL;
using FH.DAL.PersonDalTableAdapters;
using FH.BO;
using System.ComponentModel;
using Microsoft.Practices.EnterpriseLibrary.Common.Configuration;
using Microsoft.Practices.EnterpriseLibrary.Validation;
using Microsoft.Practices.EnterpriseLibrary.Validation.Validators;
namespace FH.BL
{
[DataObject]
public static class PersonBL
{
[DataObjectMethod(DataObjectMethodType.Insert, true)]
public static string InsertPerson(Person person)
{
PersonTableAdapter personAdapter =
new PersonTableAdapter();
string result = GetValidationMessage(person);
if (result.Equals(string.Empty))
{
try
{
result = personAdapter.Insert(
person.PersonID, person.FirstName,
person.LastName, person.DateBirth,
person.Comments, DateTime.Today).ToString();
}
catch (Exception ex)
{
result = "TryError" + ex.Message;
}
}
return result;
}
private static string GetValidationMessage(Person person)
{
string resultMessage = string.Empty;
if (person != null)
{
Validator<BO.Person> validator =
ValidationFactory.CreateValidator<BO.Person>("rsPerson");
ValidationResults results = validator.Validate(person);
if (!results.IsValid)
{
resultMessage +=
"ThereAreValidationErrors<b>Errors:</b><br/>";
foreach (ValidationResult result in results)
{
resultMessage += "<b>* " +
result.Key.ToString() + ": " +
result.Message + "</b><br/>";
}
}
}
return resultMessage;
}
......................................................................................
In order to display errors we use the “Inserted” event of the ObjectDataSourcePersonDetails, which is the Data Source of our FormViewPerson, and LabelMessage:
protected void ObjectDataSourcePersonDetails_Inserted
(object sender, ObjectDataSourceStatusEventArgs e)
{
string returnMessage = e.ReturnValue.ToString();
string check = "ThereAreValidationErrors";
string check1 = "TryError";
int index = returnMessage.IndexOf(check, 0);
int index1 = returnMessage.IndexOf(check1, 0);
if (index >= 0)
{
LabelMessage.Visible = true;
LabelMessage.Text = returnMessage.Replace(check, "");
}
else
{
if (index1 >= 0)
{
LabelMessage.Visible = true;
LabelMessage.Text = "Adapter.Insert errors: " +
returnMessage.Replace(check1, "");
}
}
}
Of course, to improve performance in this case of validation you can use AJAX UpdatePanel. Now you can run your project and try to insert data without FirstName (this is: empty), you will get the following result:

Figure 10.
You can add your own “complex” validation logic to your BO with the help of SelfValidation. For example, you want, that if the DateBirth of the Person equals “12/12/2000”, then the FirstName must be only “Michael”. In this case you should add to the class Person the [HasSelfValidatin] attribute
………………………………………….
namespace FH.BO
{
[HasSelfValidation]
public class Person
{
…………………………………………
and some method (for example, named “DoValidate”) with the [SelfValidation] attribute, which, according to your logic, add some result to ValidationResult:
[SelfValidation(Ruleset = "rsPerson")]
private void DoValidate(ValidationResults results)
{
……………………………..
ValidationResult resultMic =
new ValidationResult(....);
results.AddResult(resultMic);
……………………………..
}
Of course, you should add two namespaces of the Enterprise Library. Full text of our additions you can see above ( all “comments” of the Person class).
No any addition of the code to the form (or user control), containing our FormViewPerson! Now, if you will try to insert the new Person with the DataBirth “12/12/2000” and the FirstName, for example, “Mike”, you will get the following message:

Figure 11.
Good luck in programming !