

Introduction
Today, we will create a simple demo application to display the images and the preview of those images.

Prerequisites
- Knowledge of Angular 2 or higher
- Basic knowledge of TypeScript
- Visual Studio Code
- Node and NPM installed
Technologies we will use to build this demo
- Angular 7
- Bootstrap
- HTML and CSS
Step 1
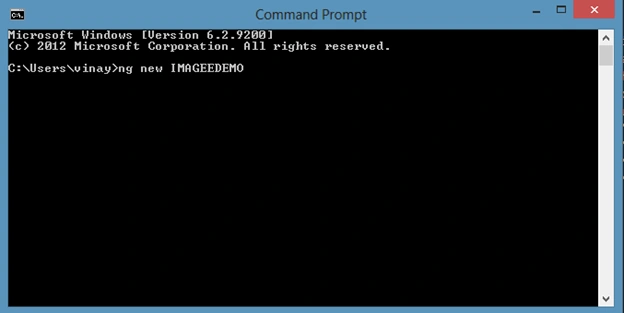
Create an Angular project by using the following command.
ng new Imageedemo
Step 2
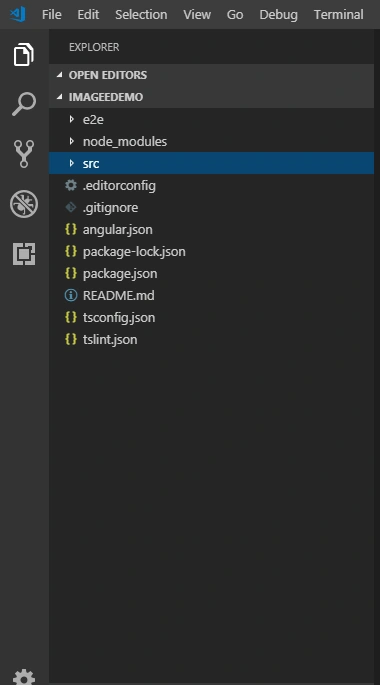
Open this project in Visual Studio Code.
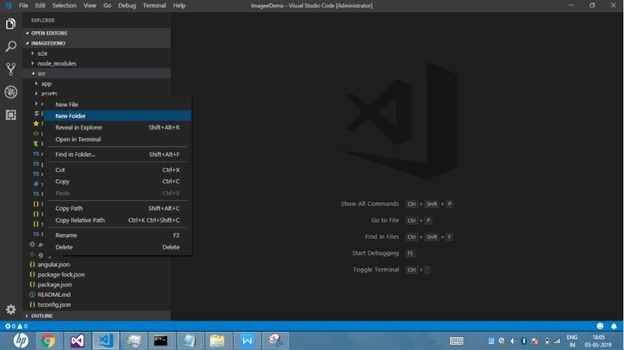
Expand the src folder and right-click on the Assets folder. Add a new folder under it and rename that to 'Images'.
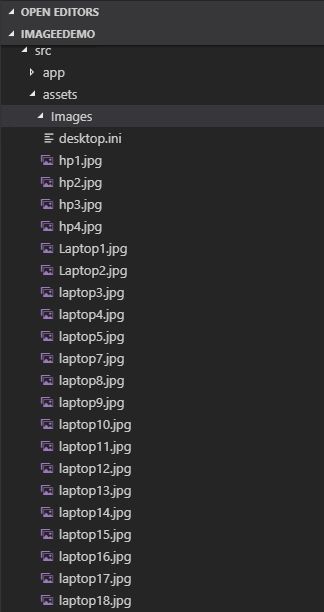
Now, open the Images folder and add some demo images to this folder.
Step 3
Now, open the integrated terminal by pressing Ctrl + ~.
Let's create a service to retrieve the images with the name 'image', by using the following command.
ng g service image
Now, open the image.service.ts file and add the following code.
- import { Injectable } from '@angular/core'
- @Injectable()
- export class ImageService {
- allImages = [];
- getImages() {
- return this.allImages = Imagesdelatils.slice(0);
- }
- getImage(id: number) {
- return Imagesdelatils.slice(0).find(Images => Images.id == id)
- }
- }
- const Imagesdelatils = [
- { "id": 1, "brand": "Apple", "url": "assets/Images/Macbook1.jpg" },
- { "id": 2, "brand": "Apple", "url": "assets/Images/MacBook.jpg" },
- { "id": 3, "brand": "Apple", "url": "assets/Images/laptop3.jpg" },
- { "id": 4, "brand": "Apple", "url": "assets/Images/laptop4.jpg" },
- { "id": 5, "brand": "hp", "url": "assets/Images/hp1.jpg" },
- { "id": 6, "brand": "hp", "url": "assets/Images/hp2.jpg" },
- { "id": 7, "brand": "hp", "url": "assets/Images/hp3.jpg" },
- { "id": 8, "brand": "hp", "url": "assets/Images/hp4.jpg" },
- { "id": 9, "brand": "Lenovo", "url": "assets/Images/laptop5.jpg" },
- { "id": 10, "brand": "Lenovo", "url": "assets/Images/laptop7.jpg" },
- { "id": 11, "brand": "Lenovo", "url": "assets/Images/laptop8.jpg" },
- { "id": 12, "brand": "Lenovo", "url": "assets/Images/laptop9.jpg" },
- { "id": 13, "brand": "Lenovo", "url": "assets/Images/laptop11.jpg" },
- { "id": 14, "brand": "asus", "url": "assets/Images/laptop13.jpg" },
- { "id": 15, "brand": "asus", "url": "assets/Images/laptop14.jpg" },
- { "id": 16, "brand": "asus", "url": "assets/Images/laptop15.jpg" },
- { "id": 17, "brand": "asus", "url": "assets/Images/laptop16.jpg" },
- { "id": 18, "brand": "asus", "url": "assets/Images/laptop17.jpg" },
- { "id": 19, "brand": "asus", "url": "assets/Images/laptop18.jpg" },
- { "id": 20, "brand": "asus", "url": "assets/Images/laptop20.jpg" },
- ]
Step 4
Now, create two components for displaying all imageslist and showing image preview, respectively. To create the components, open terminal and use the following commands.
ng g c ImageGallery
ng g c ImageDetails
Step 5
Now, open Image-Gallery.component.html and add the following HTML.
- <div>
- <div class="row">
- <div class="col-sm-12 btn btn-primary">
- Image Gallery
- </div>
- </div>
- <div class="row" style="margin-top:10px;margin-bottom: 10px;">
- <div class="col-sm-1">
- </div>
- <div class="col-sm-2">
- <button class="btn btn-success" (click)="filterBy='all'">All</button>
- </div>
- <div class="col-sm-2">
- <button class="btn btn-success" (click)="filterBy='Apple'">Apple</button>
- </div>
- <div class="col-sm-2">
- <button class="btn btn-success" (click)="filterBy='hp'">Hp</button>
- </div>
- <div class="col-sm-2">
- <button class="btn btn-success" (click)="filterBy='Lenovo'">Lenovo</button>
- </div>
- <div class="col-sm-2">
- <button class="btn btn-success" (click)="filterBy='asus'">Asus</button>
- </div>
- <div class="col-sm-1">
- </div>
- </div>
- <div class="row">
- <ul>
- <li *ngFor="let img of (allImages | filterimages:filterBy)">
- <a [routerLink]="['/image', img.id]">
- <img src="{{img.url}}" class="img" width="240" height="170">
- </a>
- </li>
- </ul>
- </div>
- </div>
Now, open ImageGallery.component.css and add the following lines.
- .img{
- margin:6px 6px;
- border: 4px solid #eee;
- box-shadow:rgb(224, 199, 199) 1px 1px 8px 1px;
- cursor: pointer
- }
- .modal-content {
- width: 1000px !important;
- }
- ul { padding:0; width:1200px; margin:20px auto;margin-left: 80px}
- li { display:inline;}
- import { Component, OnInit, Input, OnChanges } from '@angular/core';
- import { ImageService } from './image.service';
- @Component({
- selector: 'app-imagegallery',
- templateUrl: './image-gallery.component.html',
- styleUrls: ['./image-gallery.component.css']
- })
- export class GalleryComponent implements OnChanges {
- images:any[];
- filterBy?: string = 'all'
- allImages:any[] = [];
- constructor(private imageService: ImageService) {
- this.allImages = this.imageService.getImages();
- }
- ngOnChanges() {
- this.allImages = this.imageService.getImages();
- }
- }
Step 6
Now, open Image-Details.component.html and add the following HTML.
- <div class="row">
- <div class=col-md-12>
- <div [ngStyle]="{'background-image':'url('+ image.url +')'}" class="img-container">
- </div>
- </div>
- </div>
Now, open Image-Details.component.css and add the following lines.
- .img-container{
- margin:13px;
- box-shadow: rgb(211, 31, 31) 1px 2px 8px 1px;
- min-height: 600px;
- min-width: 800px;
- background-position: center;
- background-repeat: no-repeat;
- align-content: center;
- }
- import { Component } from '@angular/core';
- import { ImageService } from './image.service';
- import { ActivatedRoute } from '@angular/router'
- @Component({
- templateUrl: './image-detail.component.html',
- styleUrls: ['./image-detail.component.css']
- })
- export class ImageDetailComponent {
- image:any
- constructor(private imageService: ImageService,
- private route: ActivatedRoute) { }
- ngOnInit(){
- thisthis.image = this.imageService.getImage(
- this.route.snapshot.params['id']
- )
- }
- }
Step 7
Now, create a custom pipe using the following command to filter the data.
ng g pipe filterimages
Now, open the filterimages.pipe.ts file and add the following lines.
- import { Pipe, PipeTransform } from '@angular/core';
- @Pipe({
- name: 'filterimages'
- })
- export class FilterimagesPipe implements PipeTransform {
- transform(items: any[], laptop: string): any {
- if(laptop === 'all'){ return items } else
- return items.filter(item =>{
- return item.brand === laptop;
- });
- }
- }
Step 8
Open app.module.ts file and add the following code.
- import { BrowserModule } from '@angular/platform-browser';
- import { NgModule } from '@angular/core';
- import { FormsModule } from '@angular/forms';
- import { RouterModule } from '@angular/router';
- import { ImageService } from './image.service';
- import { AppComponent } from './app.component';
- import { GalleryComponent } from './image-gallery.component';
- import { ImageDetailComponent } from './image-detail.component';
- import { appRoutes } from '../routes';
- import { FilterimagesPipe } from "./filterimages.pipe"
- @NgModule({
- declarations: [
- AppComponent,
- ImageGalleryComponent,
- ImageDetailComponent,
- FilterimagesPipe
- ],
- imports: [
- BrowserModule,
- FormsModule,
- RouterModule.forRoot(appRoutes)
- ],
- providers: [ImageService, FilterimagesPipe],
- bootstrap: [AppComponent]
- })
- export class AppModule { }
Step 9
Open app.component.html file and add this line of code.
- <div>
- <router-outlet></router-outlet>
- </div>
Step 10
Now, run the project and check the result.
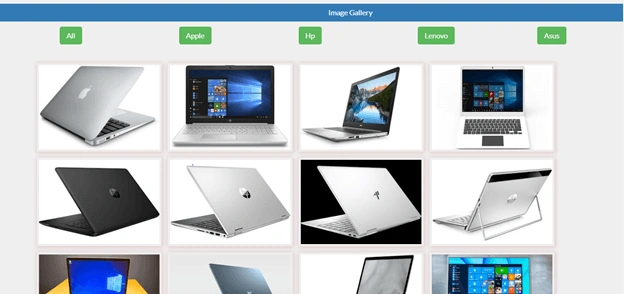
Now, click on any button and check.
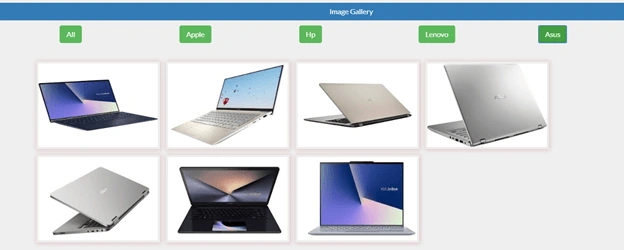
Click on any image and check.

Summary
In this article, we learned how we can create an image gallery using Angular and CSS.
kamlesh BanosekarPosted Mar 1, 2021, 9:07 AM
Import { appRoutes } from '../routes'; i am getting error for this line can not find module ../routes
Shoaib MullaPosted Apr 4, 2020, 11:33 AM
I'm getting this error Cannot find module './image.service'.
Aditi KumariPosted Jun 10, 2019, 1:52 AM
Import { appRoutes } from '../routes'; i am getting error for this line can not find module ../routes
Chu DuPosted May 13, 2019, 7:36 PM
Thank You So Much.