
Introduction: The Custom activities are the units of work that are composed to produce workflow based functionality. In WF4, activities explicitly declare their inputs and outputs via arguments.
Step 1: Open Visual Studio and select the File option.
- Select New->Project->Workflow Console Application.
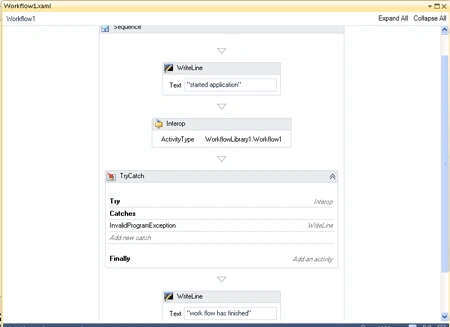
- Drag s Sequence activity and s WriteLine activity.
- Go to properties and write a Text "started application".
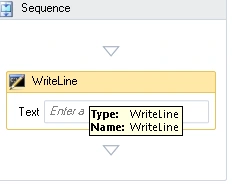
Let see how to create Sequential Workflow :
Step 2: Open Visual Studio 2010.
- Go to File->New->Project option.
- Select Visual C#->Workflow->.NET Framework 3.5.
- Select Sequential Workflow Console Application.
- Click OK .
After creating the Application, the designer window look like this:
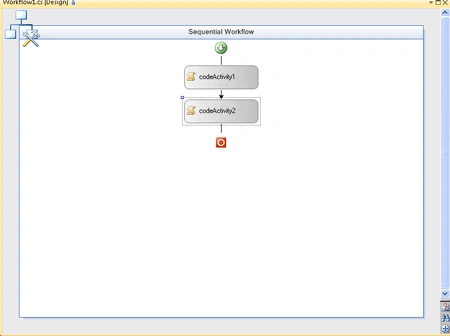
Step 3 : Add an activity from Toolbox for Workflow.
- Add a Code activity in Workflow.
- Double click in codeActivity1 and write the following code.
Code :
namespace
WorkflowLibrary1
{
public sealed
partial class
Workflow1 :
SequentialWorkflowActivity
{
public Workflow1()
{
InitializeComponent();
}
private void
codeActivity1_ExecuteCode(object sender,
EventArgs e)
{
Console.WriteLine("start
3.5 workflow");
}
private void
codeActivity2_ExecuteCode(object sender,
EventArgs e)
{
Console.WriteLine("finish
3.5 workflow");
}
}
}
Step 4 : Go to Workflow1.cs [Desaign]
drag another codeActivity and write the below code.
Code :
namespace
WorkflowLibrary1
{
public partial
class
customActivity1 : SequenceActivity
{
public customActivity1()
{
InitializeComponent();
}
public static
DependencyProperty MessageProperty =
DependencyProperty.Register("Message",
typeo
(string), typeof(customActivity1));
[DescriptionAttribute("Message")]
[BrowsableAttribute(true)]
[DesignerSerializationVisibilityAttribute
(DesignerSerializationVisibility.Visible)]
public string
Message
{
get
{
return ((string)(base.GetValue(MessageProperty)));
}
set
{
base.SetValue(MessageProperty,
value);
}
}
private void
codeActivity1_ExecuteCode(object sender,
EventArgs e)
{
Console.WriteLine(this.Message);
}
}
}
Step 5 : Go to Solution Explorer and right-click.
- Select Project->Add Reference.
- Select SequentialWorkflowLibrary1.
- Press F6 to rebuild the solution.
Step 6 : Go to workflow1.xaml file.
- Drag a Interop activity below the WriteLine activity.
- Click browse and select Workflow1.
- Drag WriteLine activity below the Interop activity.
- Enter the Text property "Workflow finished".
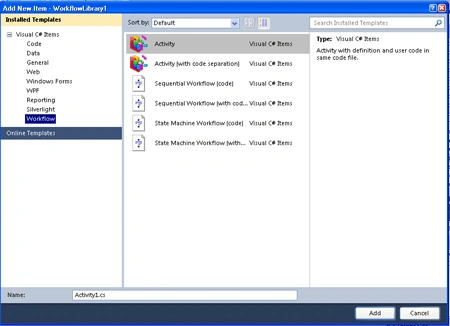
Creating a Custom Activity:
Step 7: Go to Solution Explorer and right-click.
- Select WorkflowLibrary->Add->New Item.
- Select Activity and click on the Add option.
- Activity.cs designer option show.
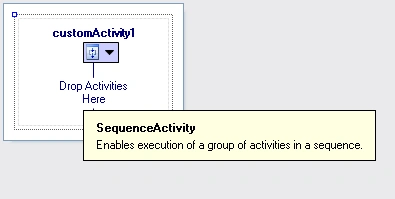
Throwing an Exception:
Step 8: Open Custom.cs [Design] option.
- Drag Throw activity.
- Go to property options and select FaultType.
- Select mscorlib assembly->System namespace.
- Select InvalidProgramException.
Step 9 : Drag a WriteLine activity onto the Catch section.
- Write the Text property "Custome 3.5 activity".
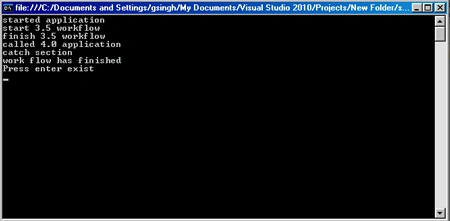
Step 10 : Press F5 to run the application.
Join the conversation! Your thoughts help the community grow.