

Here are the steps:
Step 1:
Firstly, we need to create an empty project by opening Visual Studio by pressing command devenv in the start menu search bar or using Windows Run-Command by pressing (Windows icon + R ) and enter devenv. It will open the installed version of Visual Studio.
If by pressing this opens the old one, you can change it by changing the registry value for updated version by following this link.

Firstly, we need to create an empty project by opening Visual Studio by pressing command devenv in the start menu search bar or using Windows Run-Command by pressing (Windows icon + R ) and enter devenv. It will open the installed version of Visual Studio.
If by pressing this opens the old one, you can change it by changing the registry value for updated version by following this link.
Step 2: Now after opening Visual Studio you can create a new website by going to File, New, then Website or by pressing Shift+Alt+N command in Visual Studio.

Step 3: Now give a name to the project and also select desired location of website.

Step 4: Now create a new web form by pressing combination of keys (Ctrl + Shift + A).

Step 5: Now we first add GridView control to the Web Form.
- <asp:GridView ID="gvitems" runat="server" AutoGenerateColumns="false">
- <Columns>
- <asp:BoundField DataField="ID" HeaderText="Item ID" ItemStyle-Width="60" />
- <asp:BoundField DataField="Name" HeaderText="Item Name" ItemStyle-Width="150" />
- <asp:BoundField DataField="Quantity" HeaderText="Item Quantity" ItemStyle-Width="150" />
- </Columns>
- </asp:GridView>
Note: (Possible Exceptions)
- Make sure that GridView control must be placed in <form> tag with runat='server' attribute.
- Another thing which you need to take care of is that you must use AutoGenerateColumns="false".
If you are using custom columns which are binding date then you must set this attribute to false otherwise see the image for reference.

As you can see the columns repeated by default, it is set to true when you set it to false and it come to its original position of number of assigned columns.
Step 6: Now we can add New LINQ to SQL class to the project.
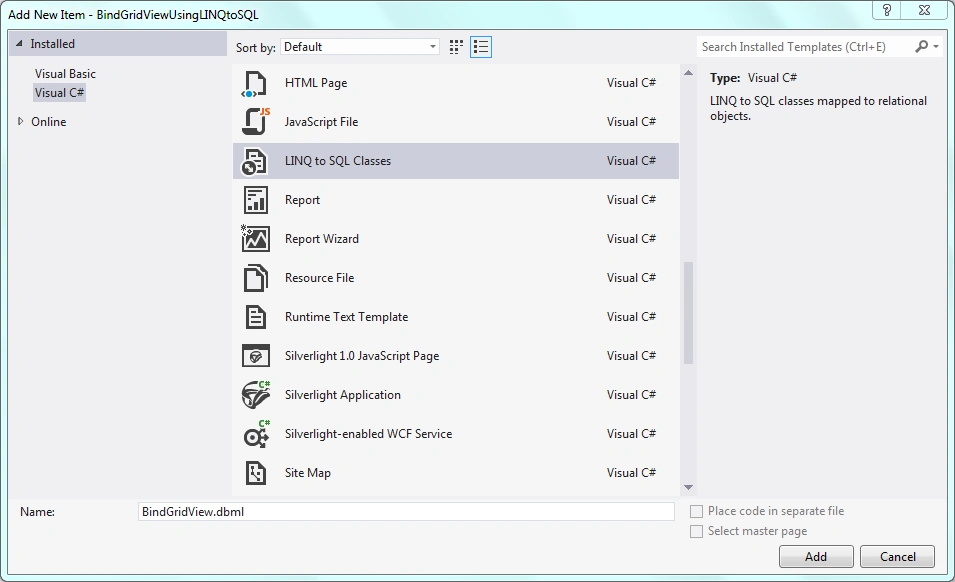
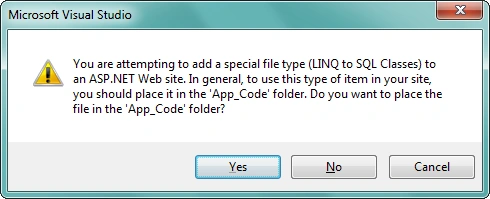
Note: If you are creating an empty project then after adding dbml to your website it gives you the following prompt:
---------------------------
Microsoft Visual Studio
---------------------------
You are attempting to add a special file type (LINQ to SQL Classes) to an ASP.NET Web site. In general, to use this type of item in your site, you should place it in the 'App_Code' folder. Do you want to place the file in the 'App_Code' folder?
---------------------------
Yes No Cancel
If you choose Yes option then new folder with the name of App_Code created automatically by the Visual Studio IDE and add dbml inside it.
If you choose No, then no special folder created in spite of dbml added at your root directory.
After adding DBML file your view look like the following.
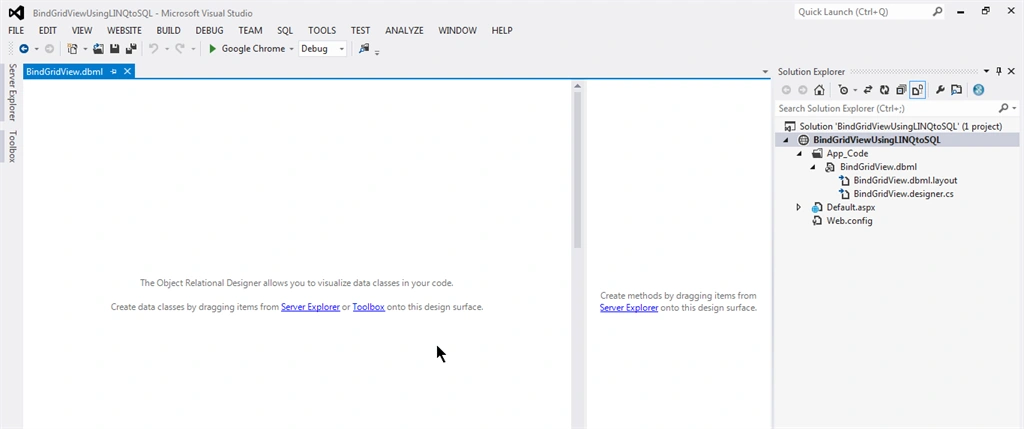
As you can see the new dbml class file you can create table and drag and drop from server explorer to the Left view of dbml class to create data classes and in the right view you can drag and drop stored procedures to create methods.
Step 7: Now lets create database table to get values by querying LINQ query.
- CREATE TABLE ITEMS
- (
- ID INT NOT NULL PRIMARY KEY,
- NAME VARCHAR(100) NOT NULL,
- QUANTITY VARCHAR(100) NOT NULL
- )
Step 8:
Connect to the server explorer, connect and drag drop table on the left hand side of the dbml class as elaborated above. Firstly, we open the Server Explorer from View => Server Explorer or by pressing keyboard shortcut combination (Ctrl + W, L).
Connect to the server explorer, connect and drag drop table on the left hand side of the dbml class as elaborated above. Firstly, we open the Server Explorer from View => Server Explorer or by pressing keyboard shortcut combination (Ctrl + W, L).
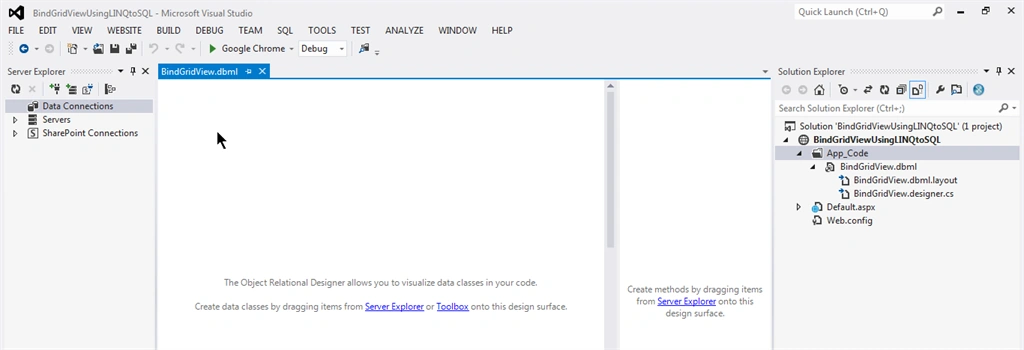
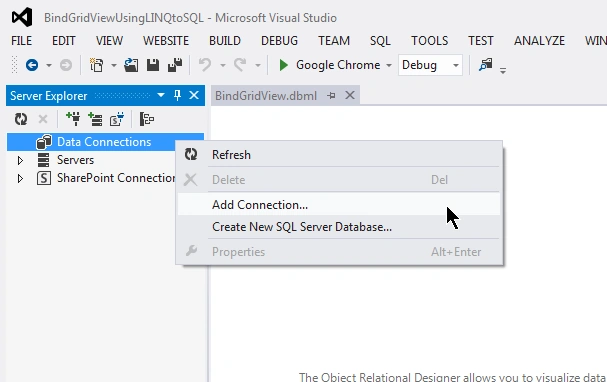
Right click on Data Connections, New Context Menu opens which shows Add Connection option.
After clicking new connection window opens.
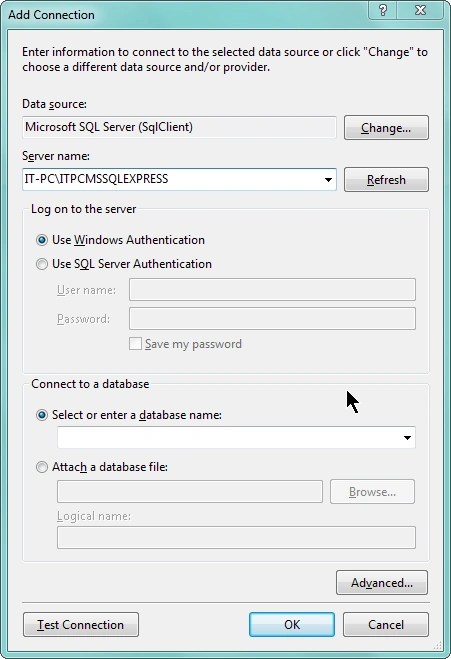
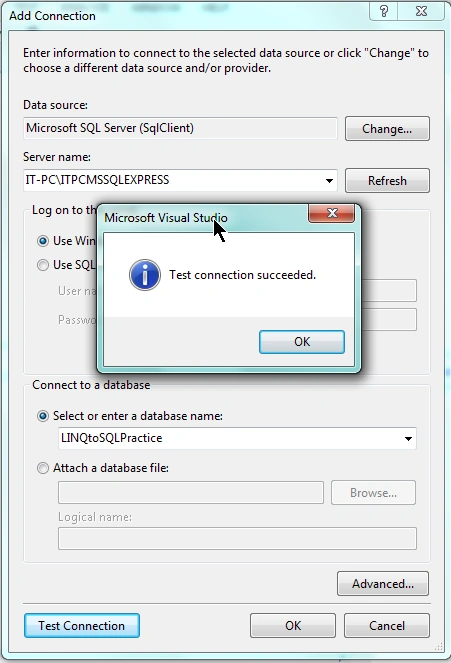
Enter the server name and use your required Authentication to log on the server, after that connect to the database by selecting from drop down menu and select your database and click on Test Connection before clicking on OK button as you are best aware of that the connection is connected mode or not.
Step 9: In this step we can drag and drop table from server explorer to dbml class designer view. After this process designer look like this.
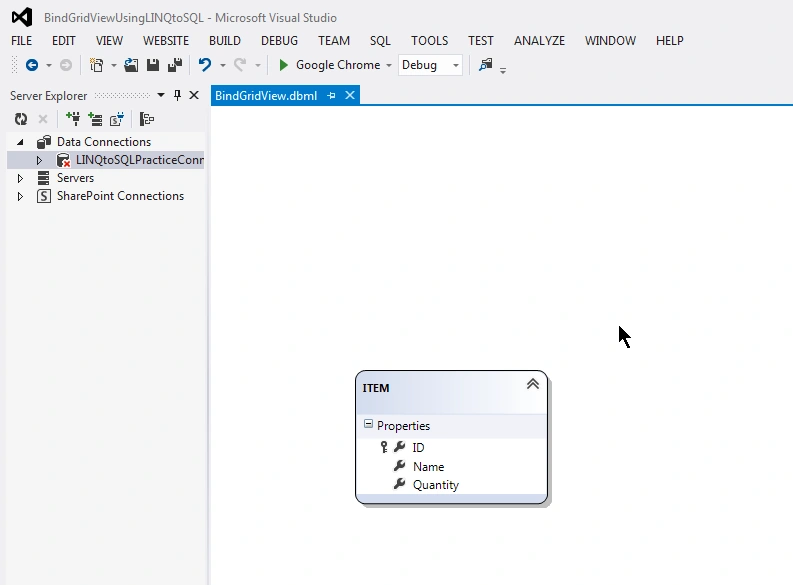
Note: As we drag and drop the table the designer will create the connection string in configuration file.
Step 10: Import the following name space.
- using System.Linq;
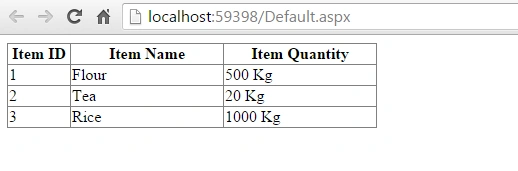
Step 11: The final step is to query to get items using LINQ to SQL.
- using System;
- using System.Collections.Generic;
- using System.Linq;
- using System.Web;
- using System.Web.UI;
- using System.Web.UI.WebControls;
- using System.Data;
- public partial class _Default : System.Web.UI.Page
- {
- protected void Page_Load(object sender, EventArgs e)
- {
- if (!Page.IsPostBack)
- {
- gvitems.DataSource = GetItemsRecord();
- gvitems.DataBind();
- }
- }
- public List<ITEM> GetItemsRecord()
- {
- BindGridViewDataContext db = new BindGridViewDataContext();
- var listitemsrecord = (from x in db.ITEMs select x).ToList<ITEM>();
- return listitemsrecord;
- }
- }
Kishan sahooPosted Nov 28, 2017, 6:50 AM
How to do the same in webgrid using mvc?
Iqrar AliPosted Dec 9, 2016, 9:48 AM
Very knowledgeable piece of data.
Sonu ChaudharyPosted May 26, 2016, 10:33 AM
good one
Bhuvanesh MohankumarPosted May 6, 2016, 3:53 PM
Good one...
G CPosted Apr 14, 2016, 1:17 PM
how to using nested gridview with this code?
Asfend YarPosted Mar 3, 2016, 3:35 PM
nice
Muhammad Aqib ShehzadPosted Jan 26, 2016, 5:17 AM
Thanks to all
Humayun Kabir MamunPosted Jan 25, 2016, 10:49 PM
Nice...
Shashangka ShekharPosted Jan 25, 2016, 5:59 AM
Thanks for sharing with us...
Upendra Pratap ShahiPosted Jan 25, 2016, 5:32 AM
nice share...thanks for sharing...