

Introduction
In this article, we will see the following things.
- Prerequisites
- Implementation – Create an Ubuntu Virtual Machine in Azure.
- Implementation – Connect an Ubuntu Virtual Machine through Putty.
Prerequisites
- Some basic knowledge of Azure, like how to create services.
Implementation – Creating Ubuntu Virtual Machine in Azure
- Open Azure portal https://portal.azure.com
- Click on "Create a Resource".
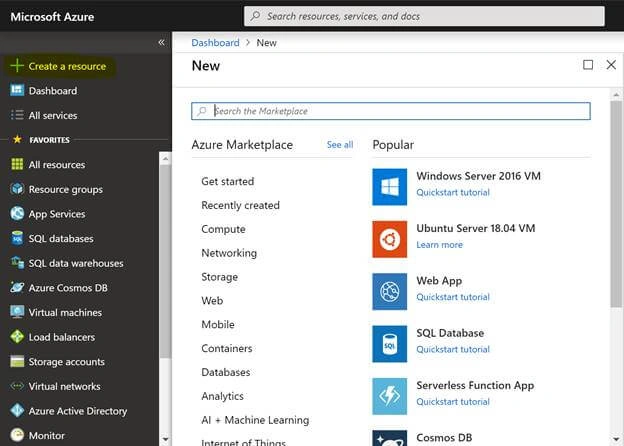
- Then, type Ubuntu and select Ubuntu Server 16.04 LTS.
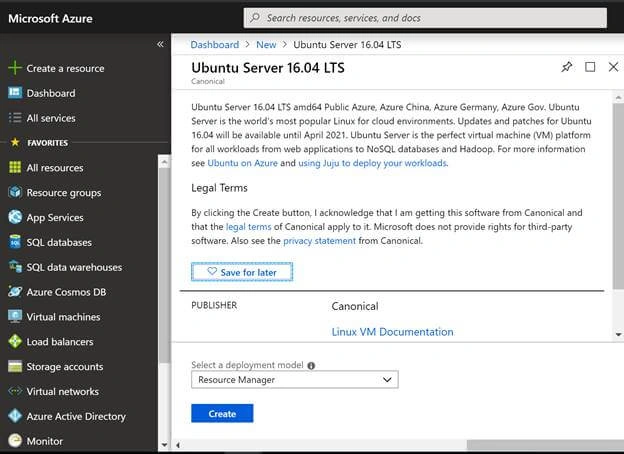
- Click on the "Create" button.
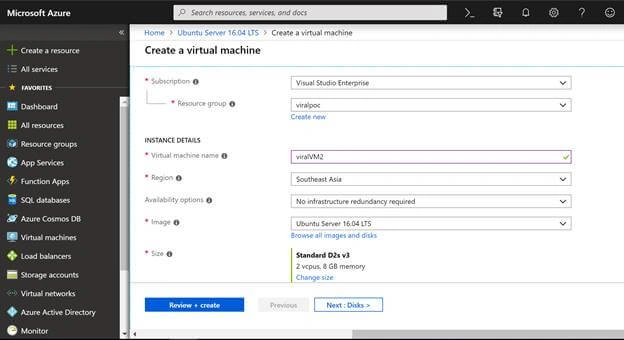
- Then, in the next step, select Subscription, Resource Group, Virtual Machine name, select Region, and Image etc.
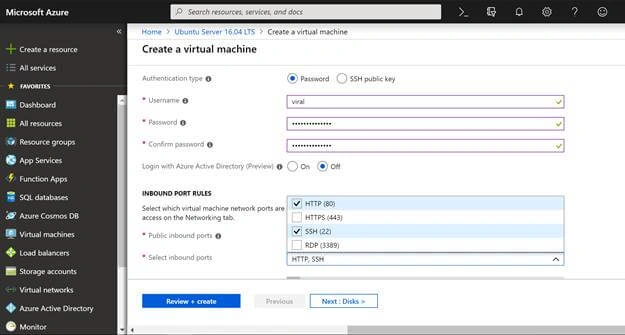
- Set username and password to log into the VM and make a note of that.
- Set the administrator account and then set the inbound port rules.
- Don’t forget to set the Inbound Port Rules.
- Set HTTP and SSH.
- Then, click "Next" if you want to change your disk type.
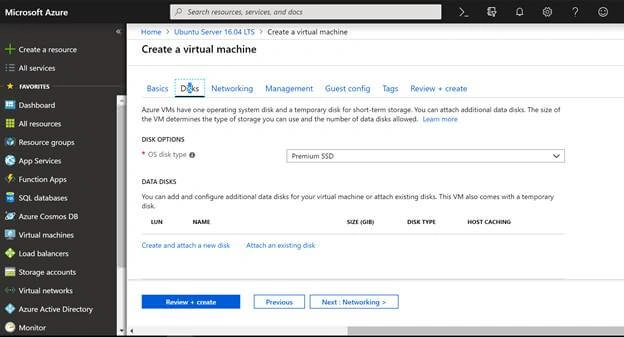
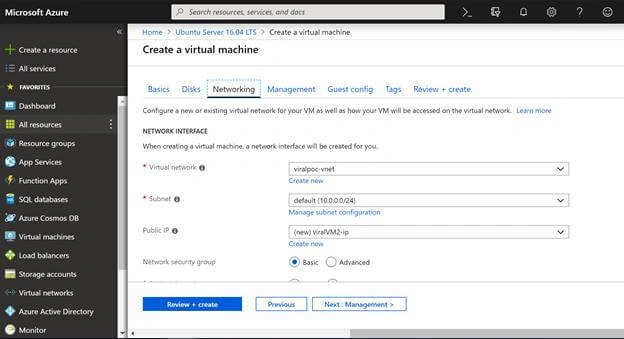
- By default, the network settings are there. Just click on Next.
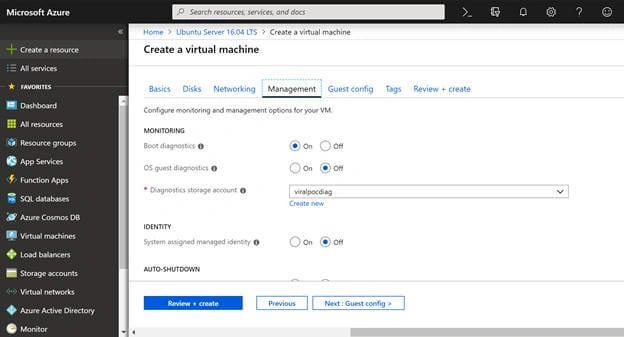
- Set several properties in management if you need.
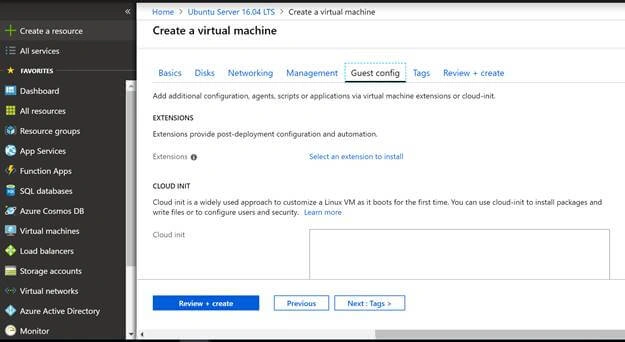
- Then, set the guest config accordingly.
- Set the Tags.
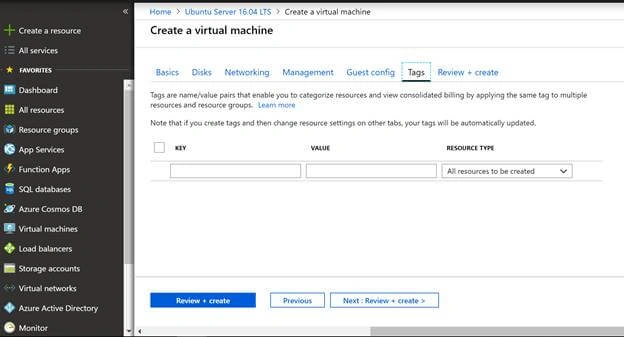
- Then, at last, click on "Review + Create".
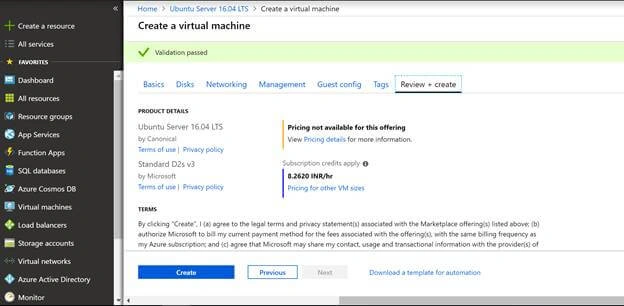
- Click on "Create".
- Once it is up and running, we will connect our VM using SSH tool called Putty.
- Now, open the virtual machine in Azure portal and look for the Public IP address which helps you to connect with VM and also required in the putty tool.
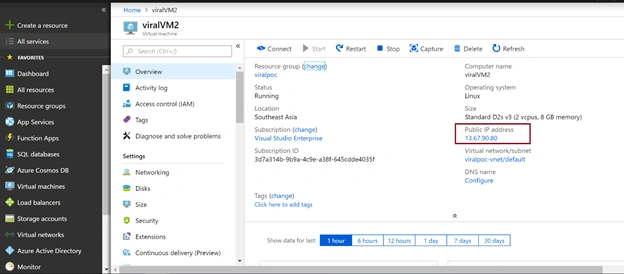
- Download Putty.exe from the internet and pass that public IP address in it.
Implementation – Connect Ubuntu Virtual Machine through Putty
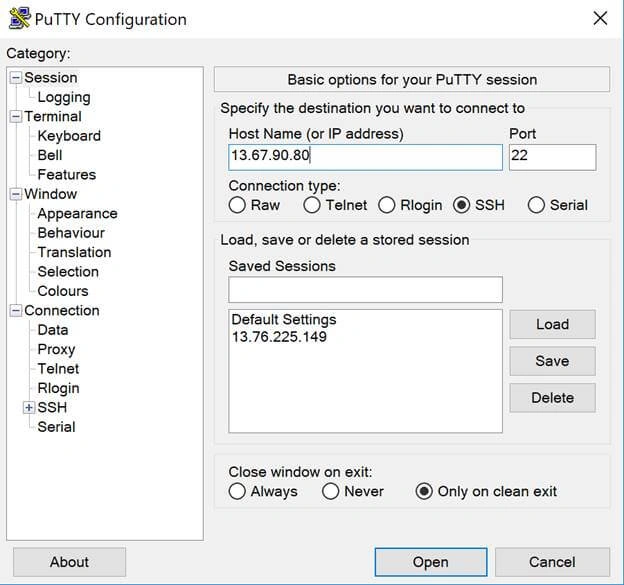
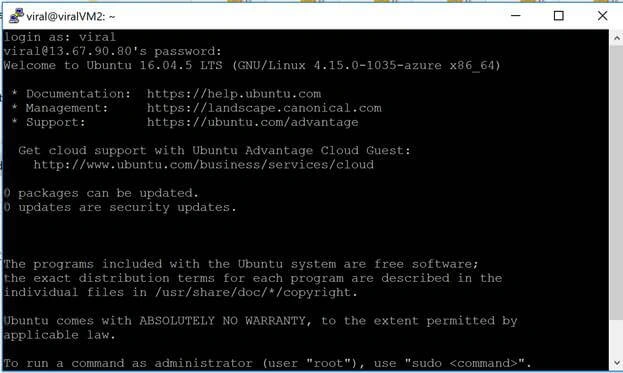
- Give the username and password which you have set in the portal at the time of creation of Virtual Machine.
Join the conversation! Your thoughts help the community grow.