I previously wrote this article in my blog, Think Big!.
Introduction
It is common to change the screen resolution when working with some applications. In addition, games automatically change the screen resolution (bounds) and color system (bit count) to accommodate performance issues.
Overview
This lesson focuses on how to change the screen resolution and color system programmatically via DirectX. It starts by an overview about how the Windows satisfies user's need through the Display Settings window. Then, it digs into discussing how to retrieve these settings and to change these programmatically in the .NET environment.
Background
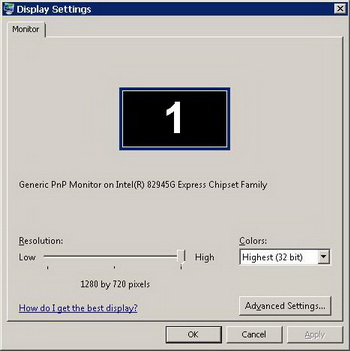
In Windows, you can change display settings from Display Settings window where you can change screen resolution and color system. Figure 1 shows the Display Settings window.

However, your screen might support more than these settings. For instance, it could support 8 bit color system which you cannot see in the colors list.
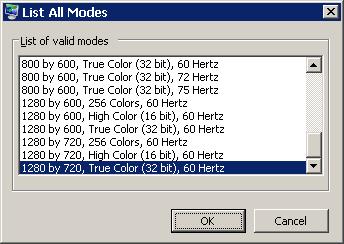
To list all modes that are supported by your screen, you can click Advanced Settings then List All Modes button to display all modes supported and change to the desired mode. Figure 2 shows the List All Modes dialog.

What is a mode? A mode is a combination of four settings, resolution (width and height,) orientation (rotation,) bit count (color system,) and frequency (refresh rate.)
Accessing the DirectX Library
DirectX is the technology of choice when working with multimedia of any type. Here in this lesson, we will focus on how to use DirectX to retrieve screen settings and to change them in the .NET environment.
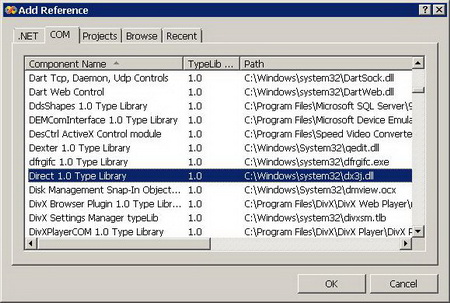
DirectX consists of many libraries of which every library is specialized in some processing. The library we are interested in is dx3j.dll (Direct 1.0 Type Library) which resides in the System32 folder. You can reference this library in your project by adding it from the Add Reference dialog from the COM tab. Because it is a COM component, you end up creating an interop assembly (DIRECTLIB.dll) for accessing the library. Figure 3 shows the Add Reference dialog.

Because there is no such compatibility between .NET and unmanaged code, you cannot call COM components directly. Instead, you may create a RCW (Runtime Callable Wrapper) assembly that acts as a proxy to the COM component. RCWs also called Interop Assemblies are created automatically when you try to reference a COM component in Visual Studio .NET. However, if you want to have more control over the creation process, you can create your RCW via the tool tlbimp.exe. This tool allows you to control the RCW at a granular level. For instance it allows you to sign the RCW, change its name and version, and to control the marshalling process of the unmanaged types. It is worth mentioning that ActiveX COM components are created with the tool aximp.exe not tlbimp.exe.
Retrieving Current Display Settings
After referencing the required DirectX library, you can now dig into the details of programmatically retrieving and changing display settings.
You can access display settings from the _dxj_DirectDrawClass that resides in our RCW assembly.
The getDisplayMode() function is used to retrieve current display mode information; it accepts a single output parameter that is of type DDSurfaceDesc which encapsulates the retrieved data.
Like other DirectX structures, DDSurfaceDesc is fairly big. However, here, we are interested in four members:
- width and height:
Represent the screen bounds (resolution.)
- rgbBitCount:
Represents the bit count (color system) of the screen.
- refreshRate:
Represents the screen refresh rate (monitor flicker.)
Now, it is the time for the code retrieves current display mode information:
    // The DirectDraw object which used heavily for controlling display settings
    DIRECTLib._dxj_DirectDrawClass ddraw = new DIRECTLib._dxj_DirectDrawClass();

    // The DDSurfaceDesc structure which encapsulates the display mode information
    DIRECTLib.DDSurfaceDesc desc = new DIRECTLib.DDSurfaceDesc();

    // Retrieving the display mode information
    ddraw.getDisplayMode(out desc);

    // Writing the output
    Console.WriteLine("{0} by {1}, {2} bit, {3} Hertz",
        desc.width, desc.height,
        desc.rgbBitCount, desc.refreshRate);
|
Changing Current Display Settings
Changing the current display settings is very easy. All you need is to provide the new settings to the setDisplayMode() function.
The setDisplayMode() function takes five parameters. However, we are interested in the first three parameters:
- w:
The screen width.
- h:
The screen height:
- bpp:
The bit count (color system.)
The following code sets the display bounds to 640 by 480, and sets the bit count to only 8. I think that feeling reminds you of the ancients Windows ME and its ascendants specially before installing the video driver.
    DIRECTLib._dxj_DirectDrawClass ddraw = new DIRECTLib._dxj_DirectDrawClass();

    // Changing the display bounds to 640 by 480 and the bit count to 8 bits
    ddraw.setDisplayMode(640, 480, 8, 0, 0);

    // Allowing the user to see the new settings
    Console.ReadLine();
|
Notice that closing your application rolls everything back to its original state. It is worth mentioning that, trying to change the display settings to a mode that is not supported by the display throws NotImplementedException. Despite this, you can enumerate all display modes by the enumDisplayModes() function.
The Last Word
You can use this technique to change the display settings at the beginning of the application and let the runtime returns it back for you when closing the application. For instance, you could add the code to the Main() function and everything will be returned back after the last line of Main() completes.