Windows Azure Portal is now all new. It is made in Silverlight. Almost all information is on one page and nearly all operations can be performed from one page. Properties Windows for Deployment, Role Instances, and Hosting Service provide extensive operations. Configuring OS to SWAP VIP can be performed from the top ribbon controls. The left panel contains an online How To guide and options to perform other operations.
I will cover in detail in a later article about the look of the new portal. The purpose of this article is to walk through how we can host ASP.Net Applications in the new Azure Portal.
To Start with:
1. Open Visual Studio.
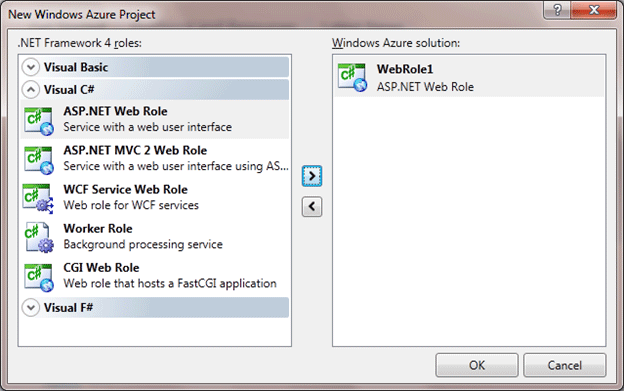
2. Create a new project and select Windows Azure Project Template from Cloud tab.
3. Select ASP.Net Web Role and click the right arrow key.
4. Just modify something to test in Default.aspx.
5. Right click on Cloud Project and select Publish. From the two options given select Create Service package only.
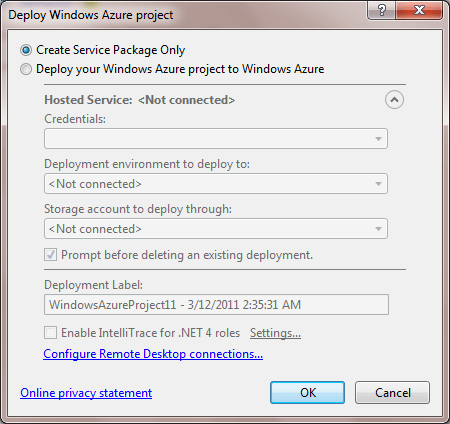
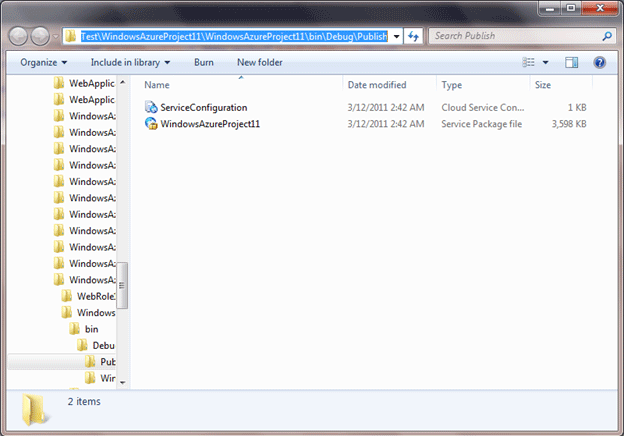
On click of Ok you will get a published success message and two files created.
1. Package file (.cspkg)
2. Configuration file (.csdef)
We need to provide full location of these files to host application in Azure. So make a note of this path.
The Application is up and running on the local application fabric. Login to the Azure Development portal. After successful login you will get an option to move to new Azure portal. Choose that option. There is no need to fear while moving to the new portal because you can switch back to the old portal at any time.
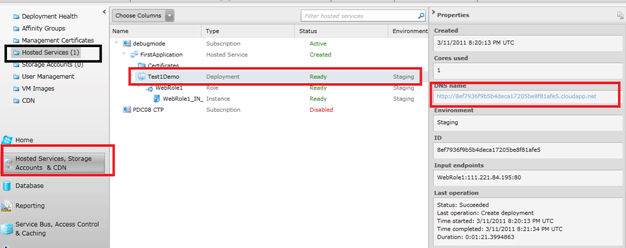
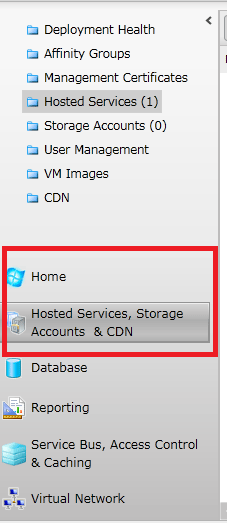
In the left panel you will get a Hosted Service listed. I have one Hosted Service created and that is listed as count next to Hosted service option. To create new service click on Hosted Service, Storage Account and CDN option.
You can create a new hosted service

I already have a Hosted Service created called FirstApplication. Here we are going to deploy an ASP.Net Web Application in this hosted service.
Click on FirstApplication then click on New Staging Deployment at top.
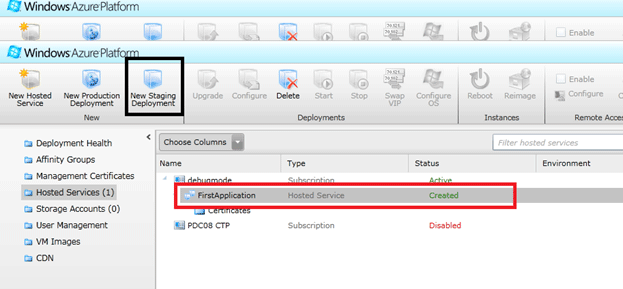
Note here is debugmode is name of my subscription.
After clicking on New staging Deployment in the top ribbon, the following window will popup.
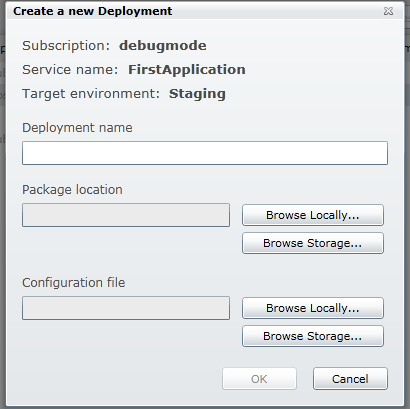
We need to provide Deployment name and need to browse to package file and configuration file. We created and packaged ASP.Net Application on local system. So we will select Browse Locally option. If we have configuration fie and package file in some of storage like BLOB then we will choose Browse Storage option.
On Browsing Locally, give path to exact location where you have packaged and configuration file saved.
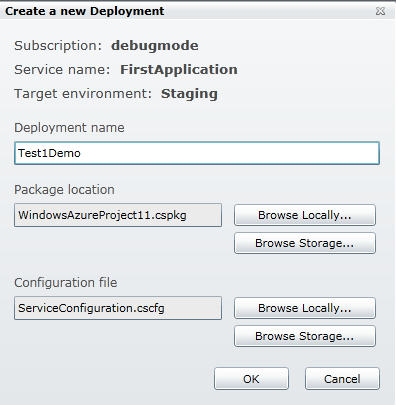
We have provided a Deployment name as Test1Demo. Once browsing to a package and a configuration file click Ok.
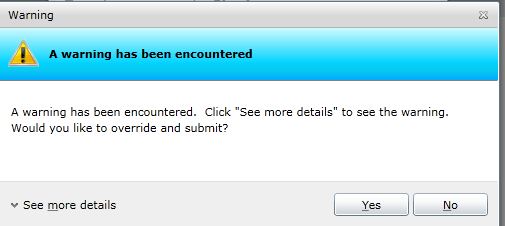
When I clicked on the Ok button, I got the following warning.
When I clicked See More Details, I saw that this warning is about having only one instance of the Web Role.
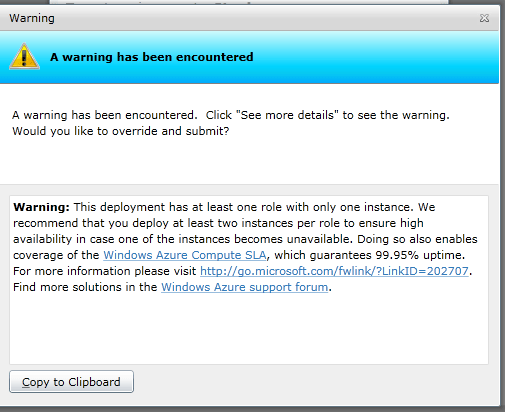
Ignore the warning and click on Yes. If you want you can increase the count of Web Role instances.
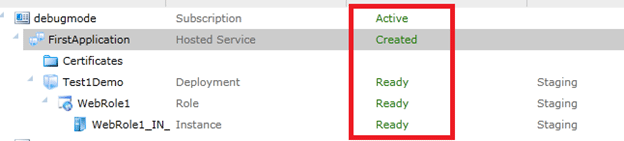
Once clicking ok you can see changing messages about various Deployment stages.

After some time you will get message Ready as below.
Now your application is hosted in Azure Staging server. Click on Deployment name [Here it is Test1Demo] . After clicking on that click on DN Server URL in Properties tab to open the Azure hosted ASP.Net Web Application in a browser.