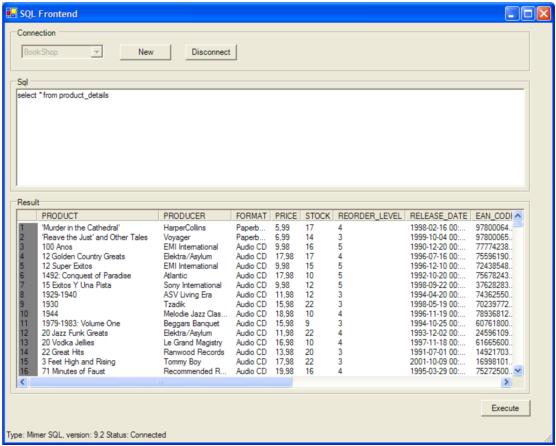
To show you how to work with Mpm we will develop a small SQL front end in C# where the user can enter SQL statements and view the result in a grid. The user can select among all available data sources in a combo box and there will be a button that activates Mimer Provider Manager Administrator to create or edit data sources.
The architecture of ADO.NET allows you to work either connected to the database or in a disconnected manner. You can of course work in the same way with Mpm. In the connected model a Data Provider is used for connecting to a database, executing commands, and retrieving results. The disconnected model uses a DataAdapter where the connecting/disconnecting is handled automatically by the DataAdapter. In this simple example we will work directly connected to the Database.
Connecting to the database
The first thing you have to do is to set up the Mpm framework on your machine.
Download the latest binary release from http://developer.mimer.com/mpm or http://www.sourceforge.net/projects/mimerpm
Start the Windows installer. This will install Mpm in the folder you specify, install the required Mpm assemblies in the Global Assembly Cache, and integrate Mpm with Visual Studio .NET if available.
Start the Mimer Provider Manager Administrator and create Data Sources for your databases. Its also possible to create data sources programmatically from your applications if you want to.
As we said above this application will work connected to the database and this means we have to start by opening a connection. When you are working with Mpm you can use the MpmProviderInfo class to get runtime information about the system, for example registered data sources, plugins and SQL filters. With this information you can, for example, create a ComboBox where the user can select data source to work with, as we do below:
conCombo.Items.AddRange(MpmProviderInfo.DataSourceNames);
When you know the name of the data source you want to work with you can use the MpmDataSourceDescriptor class to get more information about the specific data source. In this example we use this functionality to show database type and version in the statusbar when the user selects a data source:
MpmDataSourceDescriptor desc = MpmProviderInfo.GetDataSource(conCombo.SelectedItem.ToString());
statusBar.Text = "Type: " + desc.DbmsTypeName;
if(desc.DbmsVersion.Length > 0)
statusBar.Text += ", version: " + desc.DbmsVersion;
We will not show the error handling with each example, but of course everyting is contained in try-catch clauses. We will show how to catch and display errors and warnings later on.
If you know the data source name or you dont want any extra information you dont have to use this information at all, just connect as you would using any other Data Provider.
To create a connection to the database with Mpm you use the class MpmConnection. The connection string used by MpmConnection can be very simple by just giving the data source name. In our example application we can create and open a connection with the following code:
MpmConnection mpmConnection =
new MpmConnection();
mpmConnection.ConnectionString = "Data Source Name=" + conCombo.SelectedItem.ToString();
mpmConnection.Open();
Executing a query and showing the result
Okay, now we are connected to some kind of database, lets execute some queries. Just as you would use OdbcCommand with the ODBC Provider you use MpmCommand with Mpm. In our example we use the MpmConnection to create the command, but we can of course just create a new MpmCommand and set the MpmConnection in a later stage. The following code creates the command from the connection:
MpmCommand mpmCommand;
mpmCommand = mpmConnection.CreateCommand();
When we have the connection we get the SQL to execute from our RichTextBox called sqlText:
//If a text selection exists, only use that part of the sqlText
if(sqlText.SelectedText.Length > 0)
{
mpmCommand.CommandText = sqlText.SelectedText;
}
else
{
mpmCommand.CommandText = sqlText.Text;
}
In this example we will use a MpmDataReader to fetch the result and show it in a ListView. To continue or execution we clear the ListView (resultView) and executes the query. This will give us our MpmDataReader:
resultView.Items.Clear();
resultView.Columns.Clear();
//Execute the query and get a MpmDataReader
reader = mpmCommand.ExecuteReader();
Next we use the RecordsAffected property in the MpmReader to see if the query executed returns a result or if it modifies anything. If RecordsAffected is 1 we have a result to work with. The first thing we want to do if we have a result is to get the column names and create the corresponding columns in our ListView. Since the user can enter any arbitrary SQL we dont know the column names or how many columns there are. We can use the FieldCount property of the MpmDataReader to find out how many columns there are and then iterate and fetch each column name:
int
numCols = reader.FieldCount;
for (int cnt = 0; cnt < numCols; cnt++)
{
resultView.Columns.Add(reader.GetName(cnt), -2, HorizontalAlignment.Left);
}
Now when we have our table header, lets iterate over the MpmDataReader and insert each row into the ListView. For each row in the result we iterate over the columns to get each value and insert it in correct column. Since we dont know the datatype we treat all columns as strings:
ListViewItem listItem;
int numRows = 0;
//Avoid redrawing of the ListView while adding rows
resultView.BeginUpdate();
while(reader.Read())
{
//Create a new ListViewItem for each row
listItem = new ListViewItem);
//Get all column values
for (int cnt = 0; cnt < numCols; cnt++)
{
listItem.SubItems.Add(reader.GetValue(cnt).ToString());
}
//Add the row to the ListView
resultView.Items.Add(listItem);
}
//Redraw the ListView
resultView.EndUpdate();
If reader.RecordsAffected is not 1 there were no result and we assume that a insert, delete or update statement, or alternatively a Data Definition Language (DDL) statement like create table, was issued. In this case we dont have to iterate over any MpmDataReader. Instead we crate one column header and insert the number of affected rows as the one and only row:
ColumnHeader header = new ColumnHeader();
header.Text="Affected Rows";
header.Width = header.Text.Length * (int)resultView.Font.Size;
resultView.Columns.Add(header);
ListViewItem item = new ListViewItem(reader.RecordsAffected.ToString());
resultView.Items.Add(item);
When we are done with the execution we have to close the MpmDataReader. We do this in a finally block so we are sure it occurs.
Errors and warnings
We have removed all error handling in the examples above to save space, but of course we enclose all database operations in a try catch block. When working with a database with Mpm you can catch MpmException and use the MpmError class to get more information.
catch(MpmException me)
{
StringBuilder msg = new StringBuilde();
foreach(MpmError mErr in me.Errors)
{
ExtractErrors(mErr, msg);
}
MessageBox.Show(msg.ToString(),
"Caught a MpmException",
MessageBoxButtons.OK);
ExtractErrors(mErr, msg) is a helper method we can use for both errors and warnings:
private void ExtractErrors(MpmError mErr, StringBuilder msg)
{
if(mErr.Message.Length > 0)
{
msg.Append("\r\nError message: ");
msg.Append(mErr.Message);
}
if(mErr.SQLState.Length > 0)
{
msg.Append("\r\nSQLState: ");
msg.Append(mErr.SQLState);
}
if(mErr.NativeError != 0)
{
msg.Append("\r\nNative error: ");
msg.Append(mErr.NativeError);
}
if(mErr.Source.Length > 0)
{
msg.Append("\r\nSource: ");
msg.Append(mErr.Source);
}
}
In our example application we have extracted the above functionality and put it in a helper class called ErrorHandler instead.
To receive warnings in ADO.NET and consequently in Mpm you have to write an event handler and register it on the object to receive events for. We can write the following method for this:
public void HandleWarnings(object sender, MpmInfoMessageEventArgs e)
{
StringBuilder msg = new StringBuilder();
foreach(MpmError mErr in e.Errors)
{
ExtractErrors(mErr, msg);
}
MessageBox.Show(msg.ToString(), "Received a MpmInfoMessageEvent",MessageBoxButtons.OK);
}
To register the event handler for a connectin you simply add it to the InfoMessage property on the MpmConnection:
mpmConnection.InfoMessage += new MpmInfoMessageEventHandler(HandleWarnings)
In these examples we only handle MpmExceptions. Depending on what you do you have to handle more exception types.