In this article, we are going to deep dive into ASP.NET Core Web API to learn how to perform CRUD operations (Create, Read, Update, and Delete) using Entity Framework Core.
If you already know ASP.NET Web API, then you know about 70 percent. Now, you need to understand how to configure and use it with ASP.NET Core.
Along with this, you are also going to learn how to configure Entity Framework Core and the POSTMAN app.
If you are new to .NET Core, read these articles to kick-start your .NET Core knowledge.
Steps
- Database part
- Creating application
- Installing Package for Entity Framework Core from NuGet
- Adding Connection string and Setting up DbContext
- Adding CustomerTB Model in Models Folder
- Adding DbSet for CustomerTB Model in DatabaseContext class
- Adding packages to access the scaffolding Template in ASP.Net Core MVC
- Adding Controller [CustomerController]
- Installing the POSTMAN app in Chrome for sending HTTP requests and testing API
- Adding New Customer Detail
- Updating Customer Details by Customer ID
- Get Customer Detail by Customer ID
- Get All Customer Details
- Deleting Customer Detail by Customer ID
- Completed
Step 1: Database part
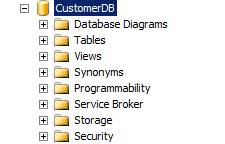
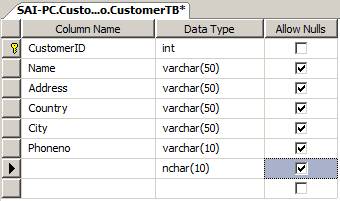
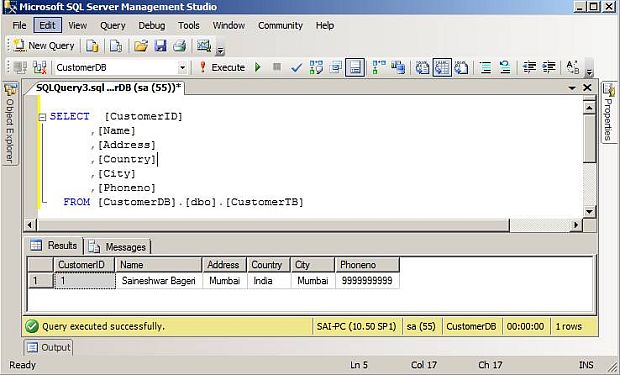
Create a sample database with the name “CustomerDB” for showing the demo.
Inside this database, I have added the CustomerTB table. You can see the structure of the table, below.
Step 2: Creating an application
Now, let’s create a Core Web application. Open Visual Studio IDE from the Start page and click on the "New Project" link.
It will open a new dialog with the name “New Project”. Inside that, from the left pane, choose Templates >> Visual C# >> .NET Core Template. Then, in the middle pane, you will see the .NET Core project template. Select "ASP.NET Core Web Application (.NET Core)”.
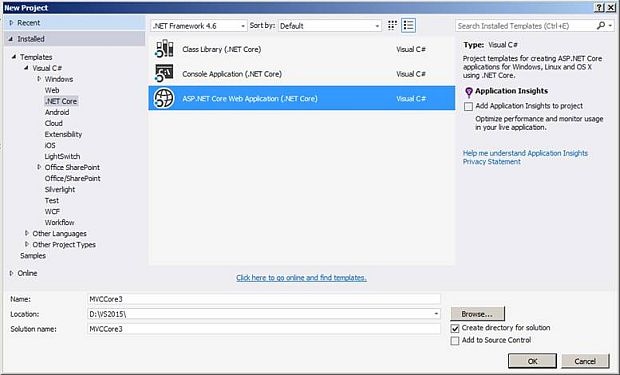
Next, we are going to name the project “MVCCore3” and finally click on the "OK" button to create a project. But, it will pop up another dialog with the name “New ASP.NET Core Web Application (.Net Core)”.
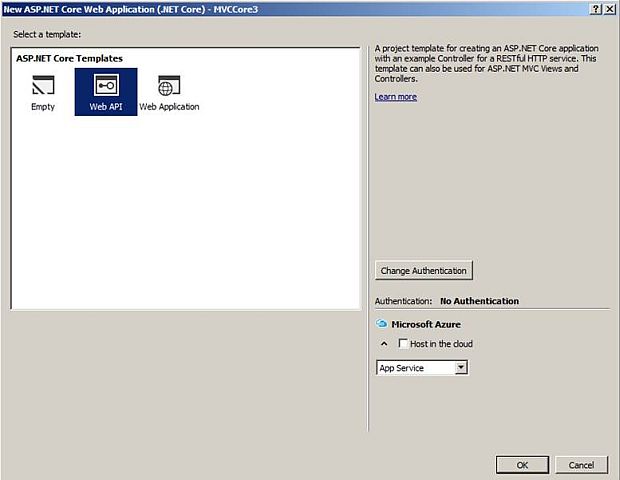
Inside this dialog, choose the “Web API” project template for creating a “Web API application” and click on the "OK" button.
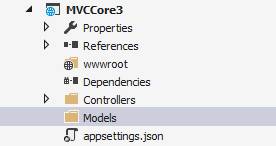
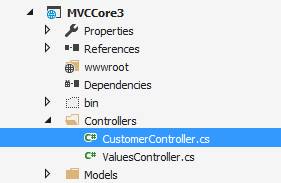
Below is the complete project view of the newly created project.
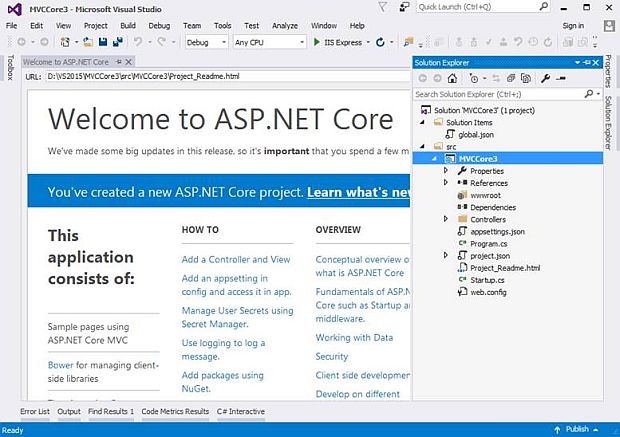
After creating the application, add references needed for Entity Framework Core.
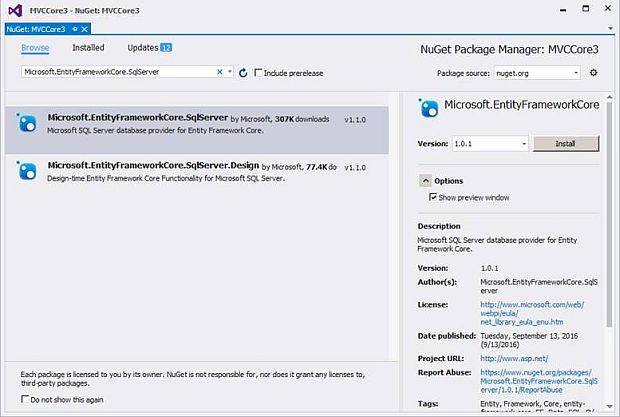
Step 3: Installing Package for Entity Framework Core from NuGet
To install the package, just right-click on the project (MVCCore3) and then, select "Manage NuGet package". The below dialog of Nuget Package Manager will pop up. In the browse tab, there is a search box. Type “Microsoft.EntityFrameworkCore.SqlServer” and just click on the "Install" button to install.
- Microsoft.EntityFrameworkCore.SqlServer
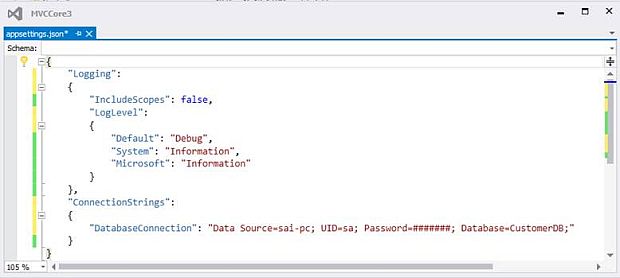
Step 4: Adding connection string and setting up DbContext
After adding the reference, the next step is to add a connection string in the appsetting.json file.
After adding a connection string, add a Class that will inherit the DbContext class. But before doing this, let's start with creating a folder for Models, and inside that, we are going to add this class.
To add a folder, just right-click on the project (MVCCore3) and choose "Add" from the menu that pops up, and inside that, choose "New Folder".
Add - New Folder.
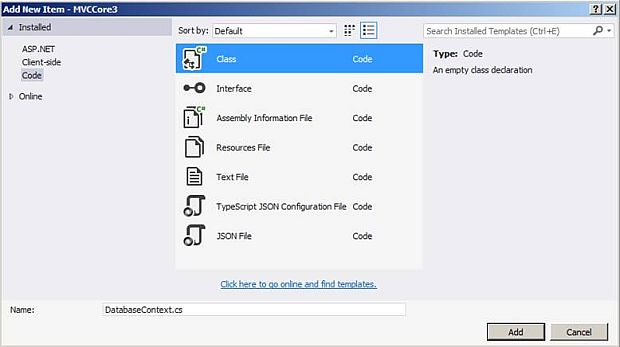
Now, let’s add a class with the name DatabaseContext in the Models folder.
To add a model, just right-click on the Models folder and select Add >> Class. The "Add New Item" dialog will pop up with the default class selected. Name the class as DatabaseContext and click on the "Add" button.
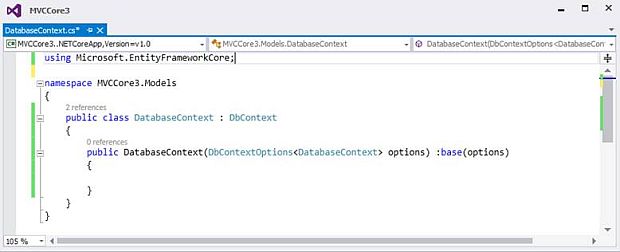
After adding a DatabaseContext class, we are going to inherit the DbContext class.
After inheriting with DbContext, next, we have created a constructor that takes DbContextOptions as an input parameter and inherits a base class constructor ( base(options)) [DbContext].
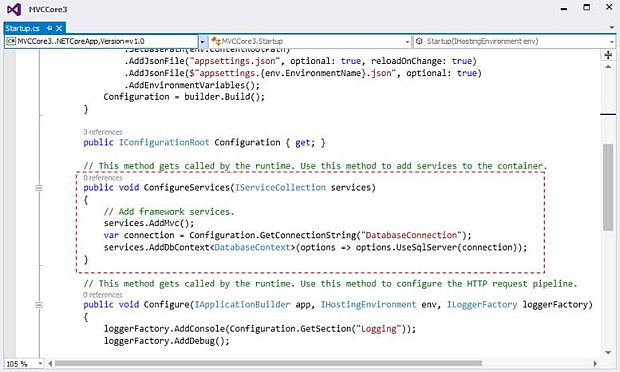
Next, add a new Service in Startup.cs class for injecting dependency.
Now, whenever you use the DatabaseContext class, the DbContext instance will be injected.
After completing with add service, next we are going to add Model.
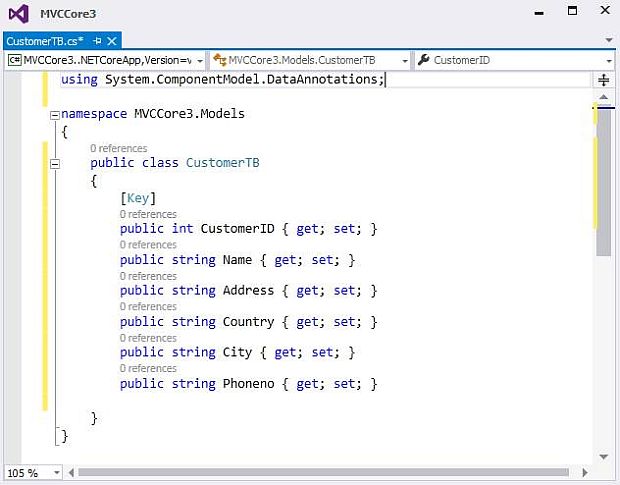
Step 5: Adding CustomerTB Model in the Models Folder
To add a model, just right-click on the Models folder and select Add >> Class. In the "Add New Item" dialog, name the class as CustomerTB and click on the "Add" button.
Adding Model CustomerTB
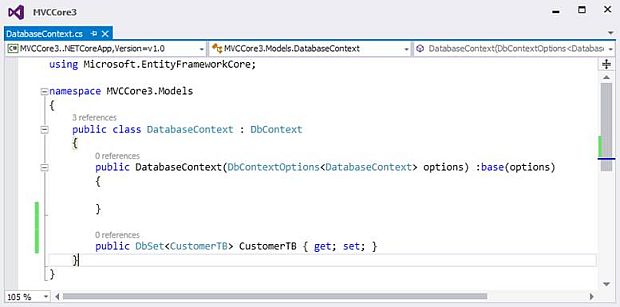
Step 6: Adding DbSet for CustomerTB Model in DatabaseContext class
Now, let's add DbSet for the CustomerTB Model in the DatabaseContext class, as shown below.
NoteBy default, ASP.Net Core MVC does not provide a scaffolding template.
Step 7: Adding packages to access the scaffolding template in ASP.NET Core MVC.
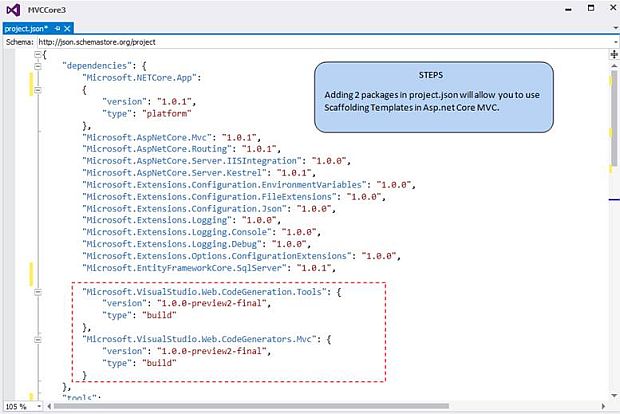
Code snippet to add in the dependencies section
Add these 2 packages under the dependencies section.
{
  "Microsoft.VisualStudio.Web.CodeGeneration.Tools": {
    "version": "1.0.0-preview2-final",
    "type": "build"
  },
  "Microsoft.VisualStudio.Web.CodeGenerators.Mvc": {
    "version": "1.0.0-preview2-final",
    "type": "build"
  }
}
Now, after adding 2 packages in the dependencies section, next, we are going to add the "Microsoft.VisualStudio.Web.CodeGeneration.Tools” package in the “tools” section, as shown below.
Code snippet to add in the Tools section
{
    "Microsoft.VisualStudio.Web.CodeGeneration.Tools": {
        "version": "1.0.0-preview2-final",
        "imports": ["portable-net45+win8"]
    }
}
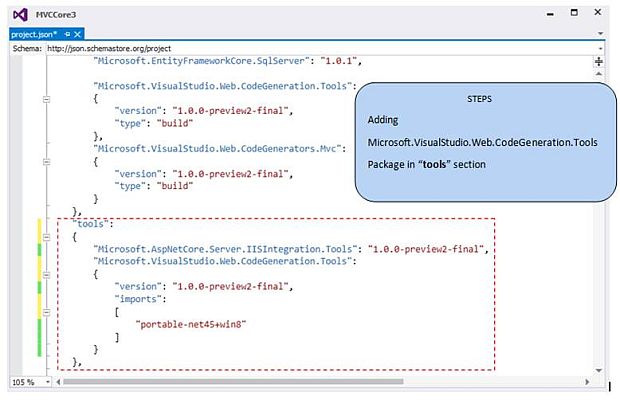
Now, after adding packages, just save it and build the project.
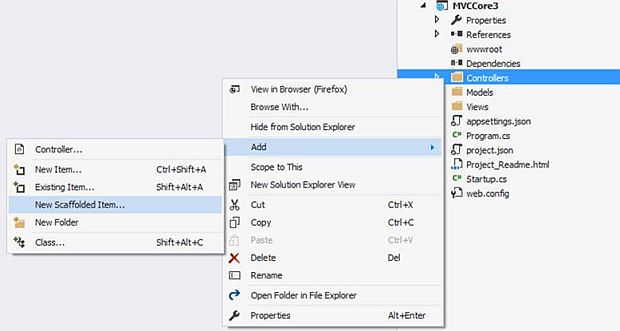
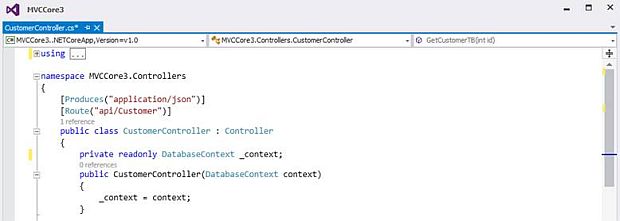
Step 8: Adding Controller [CustomerController]
To add a Controller, just right-click on the Controller folder and select Add >> Controller.
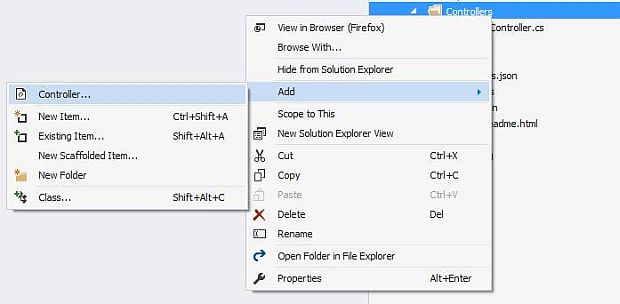
After selecting Controller, a new dialog will pop up with the name "Add Scaffold".

In this dialog, choose “API Controller with actions, using Entity Framework Template” and click on the "Add" button.&A new dialog will pop up with the name "Add Controller", as shown in the below snapshot.
Next, add the Controller from the scaffolding mechanism. We need to provide specific inputs to it.
- The model that we are going to use [Model class CustomerTB]
- Data context class which we have created [DatabaseContext]
- Controller name which we want.
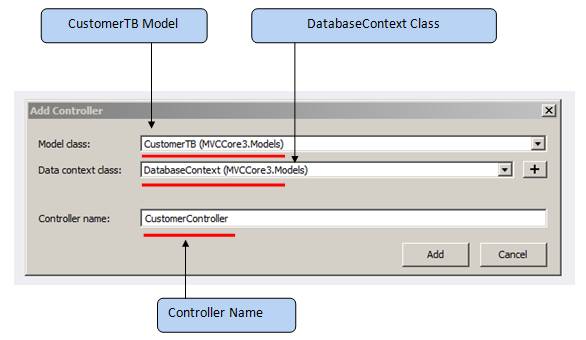
After providing all inputs to the "Add Controller" dialog, just click on the "Add" button. It will generate the complete code with basic CRUD operation for API.
After adding CustomerController, let’s look at the complete code of Action Methods one by one.
Constructor which takes DatabaseContext as an input parameter
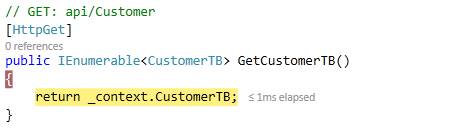
GetCustomerTB Action Method will get all customer's details from the database
No parameter is needed to be passed

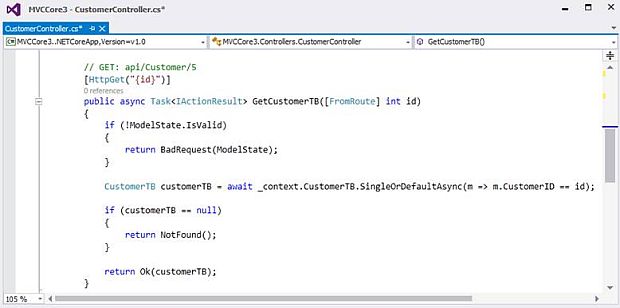
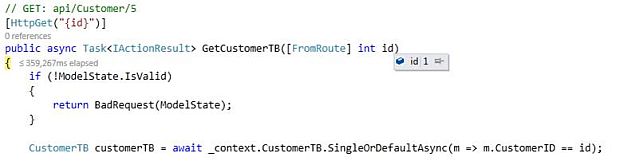
GetCustomerTB by CustomerID Action Method will get customer details from the database according to the CustomerID we provide
Parameter to pass
- Need to pass CustomerID
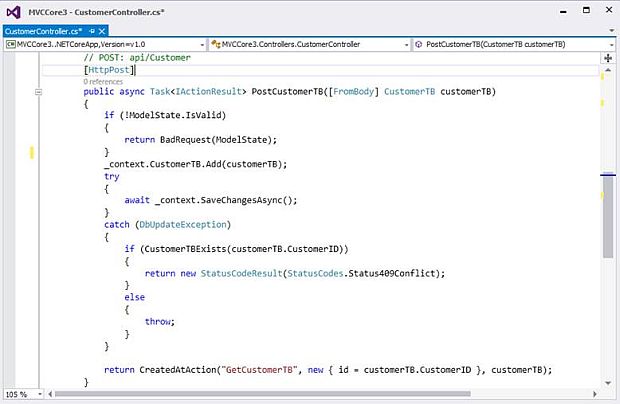
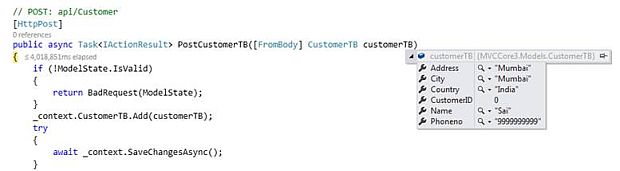
PostCustomerTB Action Method will create new customer
Parameter to pass
- Need to pass CustomerTB object [Json format]
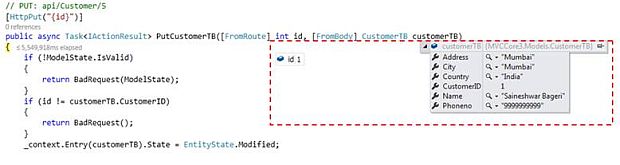
PUTCustomerTB Action Method will update customer details in a database
Parameter to pass
- Need to pass CustomerTB object [Json format] along with CustomerID
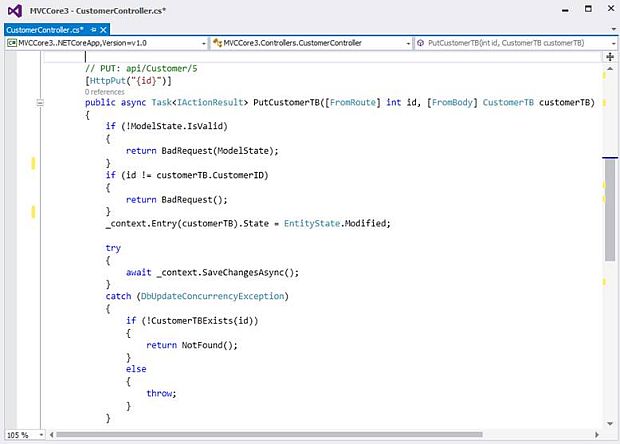
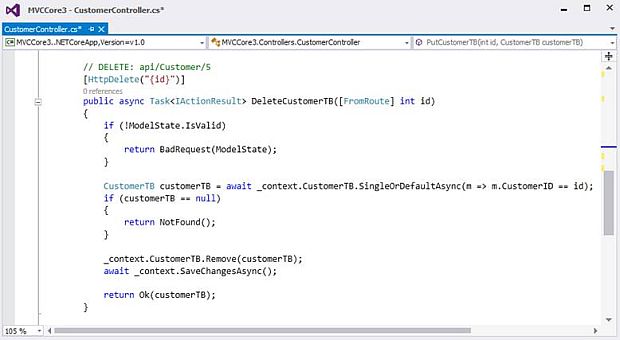
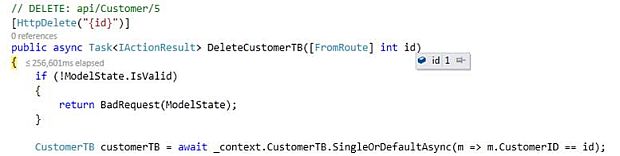
DeleteCustomerTB Action Method will delete customer details from the database according to the CustomerID we provide
Parameter to pass
- Need to pass CustomerID
After having looked at each action method in detail, next, we are going to save this application and run it to send the HTTP request. But, before that, we need some tools to send HTTP requests, and to do that, we are going to install the Postman REST client in the Chrome browser.
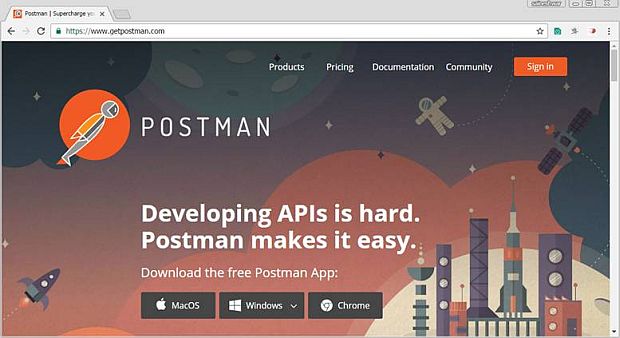
Step 9: Installing the POSTMAN app in Chrome for sending HTTP requests and testing API
To download the POSTMAN APP, just copy and paste the URL into the browser https//www.getpostman.com/
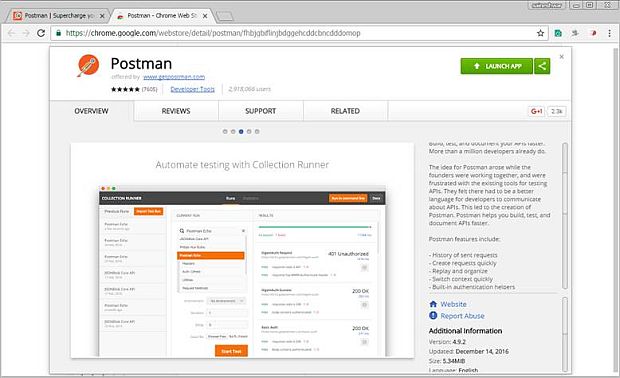
You will find 3 buttons to download. You can download any one version according to your Operating System. For this demo, I am going to use the Chrome app. After clicking on the Chrome button, it will open another page, as shown below, with an add extension button.
Note: You see the "Launch App" button because I have already installed it.
Now, after installing the POSTMAN APP in the Chrome browser, just type “chrome//apps/” to see the installed apps, as shown below.
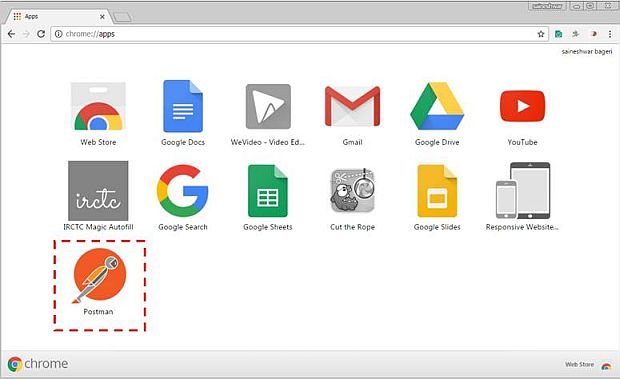
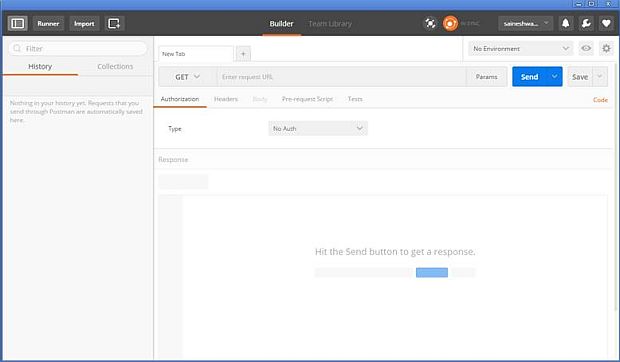
Now, just click on “Postman”. It will take a while to load. Given below is the completed UI of the Postman app.
After installing the Postman app, just save and run the application.
Step 10: Adding new Customer Detail
In this part, we are going to add new Customers by sending HTTP POST requests using the “Postman” app.
Before sending a request, we need a URI for sending a request. To get that to run in the application, we are going to get the Port number.

URI for Post request - http//localhost6899/api/Customer
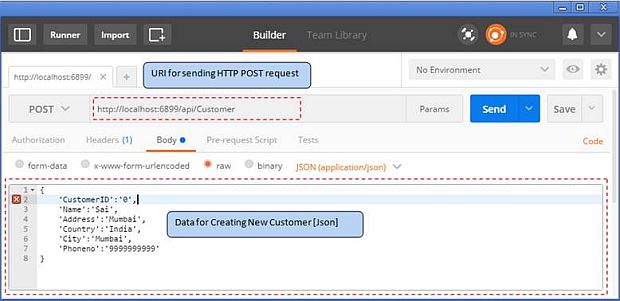
Steps to send request
- Add URI
- We are going to send data from the body so choose the body tab in the Postman app
- The data we are sending is in JSON format why we have chosen [Json(application/json) header]
- Then finally click on the Send button to send the request.
Below is the debug view after sending a POST request
After sending the request, we are also getting a response in return, as shown below.
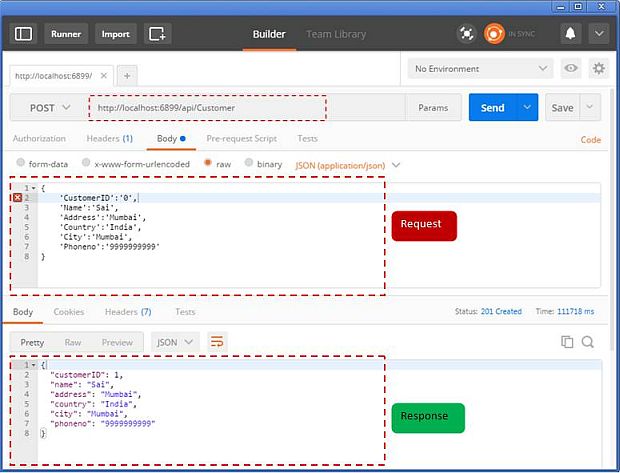
Response
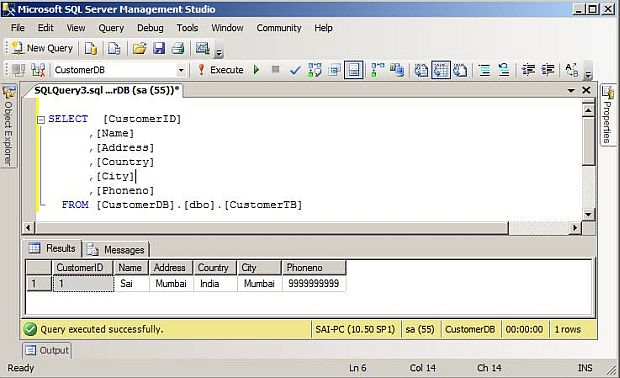
In response, you will get customer details along with Status Code - 201(Created). After getting a response, now, let's have a look if the database has been inserted in the customers table.
CustomerTB table view after sending post request
After completing adding new customer details, let’s try to update customer details.
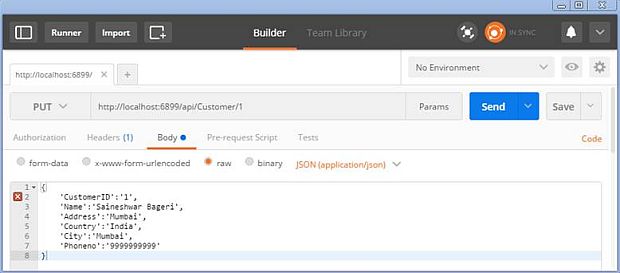
Step 11: Updating Customer Detail by Customer ID
In this part, we are going to update the Customer by sending an HTTP PUT request using “Postman” app
We are just going to update the name from ‘Sai’ to ‘Saineshwar Bageri’.
URI for PUT request - http//localhost6899/API/Customer/1
Note
Now, we are updating that data, that's why we need to send CustomerID which we have already inserted.
Response
In response, you will only get Status Code - 204 (the Server successfully processed the request but it is not returning any content).
Steps to send request
- Add URI. Along with that, we need to pass CustomerID in URI [http//localhost6899/API/Customer/1]
- We are going to send data from the body that is why we choose the body tab in the Postman app
- The data we are sending is in JSON format which is why we have chosen [Json(application/json) header]
- Then finally, click on the "Send" button to send the request.
Below is the debug View after sending PUT request.
CustomerTB table View after sending PUT request.
After completing updating customer details, now, let’s get customer data by CustomerID
Step 12: Get Customer Detail by Customer ID
In this part, we are going to get customer details by sending an HTTP GET request using the “Postman” app.
Here, we need to send CustomerID to get Customer Details; as you can see, we have appended CustomerID at last in URI.
URI for GET request - http//localhost6899/API/Customer/1
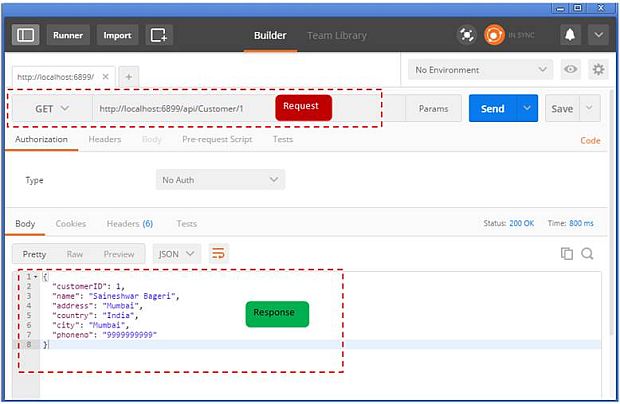
Response
In response, you will get customer details for the CustomerID you have passed, along with the Status Code - 200 (OK)
Below is the debug View after sending the GET request
After completing getting customer details by CustomerID, now let’s get all customer details.
Step 13: Get All Customer Details
In this part, we are going to All Get Customer Details by sending an HTTP GET request using the “Postman” APP.
URI for GET request - http//localhost6899/API/Customer
Here we are going to get all Customer Details hence we do not need to pass any parameter or header.
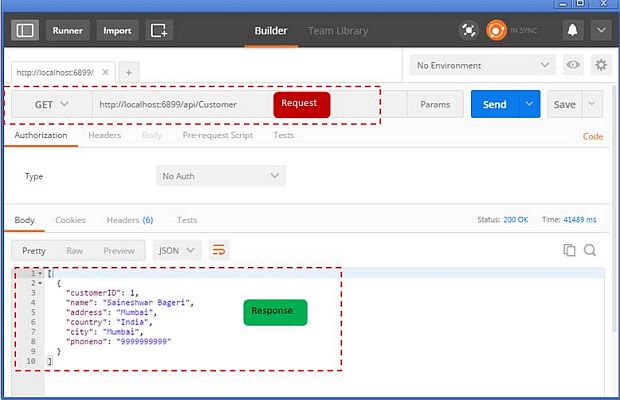
Response
In response, you will get all customer details along with Status Code - 200 (OK)
Below is the debug view after sending the GET request
After completing getting All Customer Details now let’s try to delete Customer Detail by CustomerID.
Step 14: Deleting Customer Details by Customer ID
In this part, we are going to Delete the Customer by sending an HTTP DELETE request using “Postman” APP.
URI for Delete request - http//localhost6899/API/Customer/1
Here, we need to send CustomerID for Deleting Customer Details; as you can see, we have appended CustomerID at last in URI.
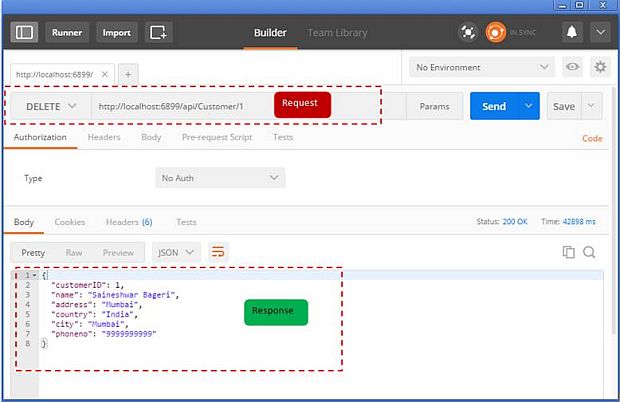
Response
In response, you will get deleted customer details for the CustomerID you have passed, along with the Status Code - 200 (OK).
Below is the debug view after sending the Delete request
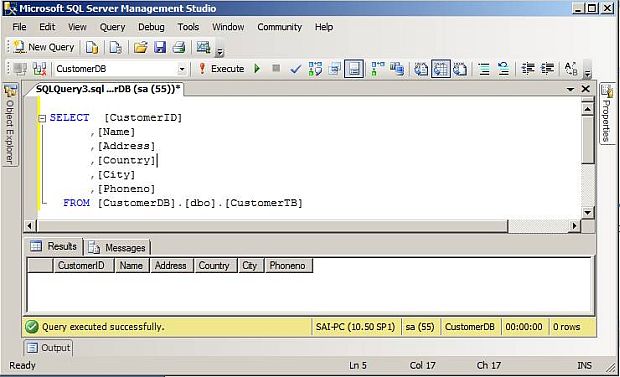
CustomerTB table view after sending Delete request
Finally, we have learned how to create Web API in ASP.Net Core MVC using Entity Framework Core.
I hope you liked my article. Please share it.