Introduction:
This article describes a very easy approach to building an image conversion utility that will permit the user to open a supported image type and convert it to another supported image type. The supported file types addressed in the application are:
- Bitmap
- Enhanced Windows Metafile
- Exchangeable Image File
- GIF Files
- JPEG Files
- PNG Files
- TIFF Files
- Window Metafiles
All file conversions are accomplished through the use of the Microsoft .NET 2.0 Imaging class library's conversion methods. In addition to demonstrating the approach used to achieve the file conversions, the application also demonstrates an approach used to open an image file into a picture box control.
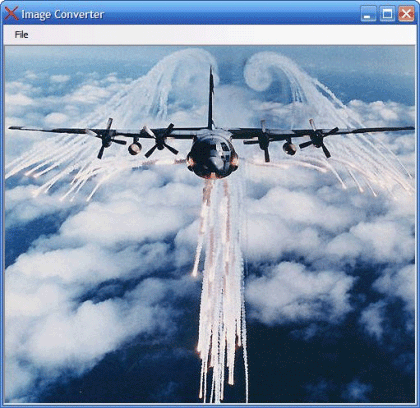
Figure 1: The Image Conversion Utility In Use
Getting Started:
In order to get started, unzip the attachment and load the solution into Visual Studio 2005. Examine the solution explorer and note the files contained in the project:
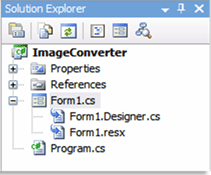
Figure 2: The Solution Explorer Showing the Project Files
The contents of the solution show that it contains a single project entitled, "ImageConverter". This project contains a single form called "Form1". The Form1.vb class contains all of the code necessary to drive the utility.
A quick check of the references will reveal that only the default class libraries are contained in the project and the Program.cs file is a unedited version of the default version of that file.
The Code: The Main Application Form.
The main application's form class (Form1.vb) contains all of the application code needed to make the file conversions and to open a file into the application's image viewer (which is nothing more than a standard picture box control).
The class begins with the using statements; the imports include the standard and default inclusions as well as an added reference to System.Drawing.Imaging. The class declaration is equally simple:
using System;
using System.Collections.Generic;
using System.ComponentModel;
using System.Data;
using System.Drawing;
using System.Drawing.Imaging;
using System.Text;
using System.Windows.Forms;
namespace ImageConverter
{
public partial class Form1 : Form
{...
Following the class declaration and library imports, a few local variables are declared to support file management within the application across each of the class methods:
// local variable declarations
string CurrentFile;
Image img;
The string variable "CurrentFile" is used to store the name of the current, working image file (as loaded into the form's picture box). The image variable "img" is used to provide form level exposure to the current image; this was done here to make the image available to any of the form method calls that require access to the image.
Following the variable declarations, there is a section of default code added to the project through the Visual Studio IDE. You may examine that code from the IDE if you so desire but it won't be discussed in this article.
The next piece of code worthy of mention is the code used to open an image file and load it into the form. It is not really necessary to load the file in order to perform the conversion, however, this utility does load the file so the user may examine it prior to making the conversion. The code for the file open method looks like this:
// Show open file dialog to allow user to open an image file
// for display in the application
private void openToolStripMenuItem_Click(object sender, EventArgs e)
{
openFileDialog1.Title = "Open Image File";
openFileDialog1.Filter = "Bitmap Files|*.bmp" +
"|Enhanced Windows MetaFile|*.emf" +
"|Exchangeable Image File|*.exif" +
"|Gif Files|*.gif|Icons|*.ico|JPEG Files|*.jpg" +
"|PNG Files|*.png|TIFF Files|*.tif|Windows MetaFile|*.wmf";
openFileDialog1.DefaultExt = "bmp";
openFileDialog1.FilterIndex = 1;
openFileDialog1.FileName = "";
openFileDialog1.ShowDialog();
if (openFileDialog1.FileName == "")
return;
CurrentFile = openFileDialog1.FileName.ToString();
img = Image.FromFile(openFileDialog1.FileName);
pictureBox1.Image = img;
}
This method first configures and displays a File Open dialog; from the dialog, the user may navigate to the file they intend to convert. The method checks to see if a valid file name has been entered and, if no valid file name exists, the application will abort the attempt and close the dialog box.
If a valid file has been selected, the method will set the current file name variable to the file name in the file open dialog box and will set the "img" variable to contain the image using the Image.FromFile method included in the imaging library. With a file loaded, you should see the selected image loaded into an picture box control on the form.
Once the image has been loaded, the user may open the file menu, select "Convert To" and then select one of the alternative image file formats:
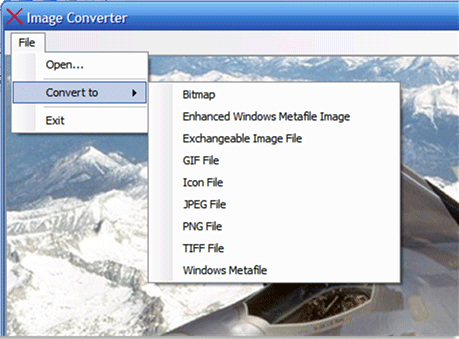
Figure 3: Convert to Alternative Image File Format Options
When the user selects one of the available image options, the application will launch a method used to complete the conversion; the application will not overwrite an existing file nor will it allow the user to specify a new file name or location. The converted file will be dropped into the same folder as the original but will carry the new file extension:
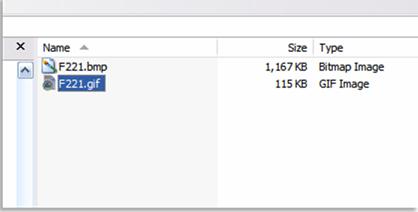
Figure 3: Windows Explorer showing original and converted files in the same directory (note the Size and Type values to verify the conversion has occurred).
Whilst the code used to make the conversion is, in the application, specific to the target image type, very little in each block of code changes. Since all of the conversion code is essentially the same, I will only show one of the methods here, you can refer to source code to see each specific conversion:
// Convert to GIF
private void gIFFileToolStripMenuItem_Click(object sender, EventArgs e)
{
string newName =
System.IO.Path.GetFileNameWithoutExtension(CurrentFile);
newName = newName + ".gif";
try
{
img.Save(newName, ImageFormat.Gif);
}
catch
{
MessageBox.Show("Failed to save image to GIF format.", "Error",
MessageBoxButtons.OK, MessageBoxIcon.Error);
return;
}
MessageBox.Show("Image file saved to " + newName.ToString(), "Image
Saved", MessageBoxButtons.OK, MessageBoxIcon.Information);
}
The code shown here is the call made to convert the current image to GIF format. At the start of the method, a new string variable is declared and used to capture the name of the current file without the current file's extension. The new name variable then has the file extension of the new, converted file type added to it.
Once the new file name has been configured, the existing image, made available through the "img" variable, has its' Save method evoked, the new file name and the desired image format are passed to this Save method. The Imaging library function then does the work of converting the image to the target format and saving it into the directory along with the original version of the image.
If the conversion does not take place (for example if the user tries to overwrite the original file), a message box will be displayed to tell the user that the requested conversion did not occur. If the Save occurs without error, the user is told that the image file was saved to the new file name. That is all there is to it. If you check your image file directory, you will see the original and the converted file, each with the correct extension.
Summary.
This application has attempted to describe how simple it is to accomplish an image file format conversion through the use of the .NET 2.0 framework's Imaging class. Whilst this document addresses the topic in the context of a C# 2005 application; there is no reason that you could not apply the same code to a 1.0 or 1.1 framework based solution if you are working in .NET or .NET 2003.