

Today we are going to learn how to create a XML file in a Windows Store App programmatically. XML is a platform-independent language, so the information formatted in XML can be used in any other platforms. XML was designed to transport and store data. Once we create an XML file in one platform it can also be used in other platforms.
In this article we create a user interface to get the value from the user; then create a node from these values and add that node to the XML document. We also put a button on the user interface to save the XML document to the application folder.
Here are the steps to be followed to create a XML document programmatically in a Windows Store App using C#.
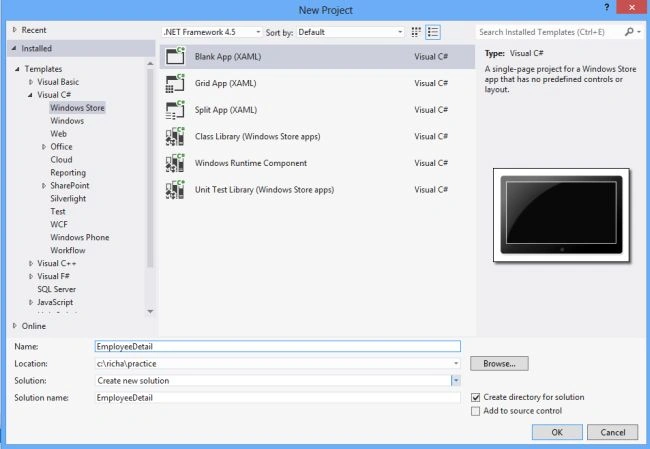
Step 1 First, we will create a new blank Windows Store Application:
- Open Visual Studio 2012.
- File -> New -> Project
- Choose Template -> Visual C# -> Windows Store
- Select Blank Application
- Rename the application.
Step 2 Then, design the user interface in the MainPage.xaml file through which we get the input values from the user. In this we design three textboxes and two buttons.
Code of the MainPage.xaml file.
<Page
x:Class="App9.MainPage"
IsTabStop="false"
xmlns="http://schemas.microsoft.com/winfx/2006/xaml/presentation"
xmlns:x="http://schemas.microsoft.com/winfx/2006/xaml"
xmlns:local="using:App9"
xmlns:d="http://schemas.microsoft.com/expression/blend/2008"
xmlns:mc="http://schemas.openxmlformats.org/markup-compatibility/2006"
mc:Ignorable="d">
<Grid Margin="40,40">
<Grid.Background>
<LinearGradientBrush EndPoint="0.5,1" StartPoint="0.5,0">
<GradientStop Color="Black"/>
<GradientStop Color="#FF0EFDC7" Offset="1"/>
</LinearGradientBrush>
</Grid.Background>
<Grid.ColumnDefinitions>
<ColumnDefinition Width="250"></ColumnDefinition>
<ColumnDefinition Width="250"></ColumnDefinition>
</Grid.ColumnDefinitions>
<Grid.RowDefinitions>
<RowDefinition Height="100"></RowDefinition>
<RowDefinition Height="100"></RowDefinition>
<RowDefinition Height="100"></RowDefinition>
<RowDefinition Height="100"></RowDefinition>
</Grid.RowDefinitions>
<Button x:Name="xml" Content="Submit" Grid.Row="3" Grid.Column="0" Click="xml_Click_1" Margin="121,31,0,31"></Button>
<Button x:Name="savexml" Content="Save XML" Grid.Row="3" Grid.Column="1" Click="savexml_Click_1" Margin="56,31,0,31"></Button>
<TextBlock Text="Id" FontSize="30" Grid.Column="0" Margin="30" Grid.Row="0"/>
<TextBlock Text="Name" FontSize="30" Grid.Column="0" Grid.Row="1" Margin="30"></TextBlock>
<TextBlock Text="Designation" FontSize="30" Grid.Column="0" Margin="30" Grid.Row="2"></TextBlock>
<TextBox x:Name="id" Grid.Column="1" Height="60" Grid.Row="0"></TextBox>
<TextBox x:Name="name" Grid.Column="1" Height="60" Grid.Row="1"></TextBox>
<TextBox x:Name="desig" Grid.Column="1" Height="60" Grid.Row="2"></TextBox>
</Grid>
</Page>
Step 3 Include the following namespaces in the MainPage.xaml.cs file:
using Windows.Data.Xml;
using Windows.Data.Xml.Dom;
using System.Xml.Linq;
using Windows.Storage;
using System.Xml;
Step 4 In the MainPage.xaml.cs we create an object of the XmlDocument class at the global level:
XmlDocument dom = new XmlDocument();
XmlElement x;Step 5 In the constructor of the MainPage we create a comment and also create a root node for the XML document and append it to the object of the XmlDocument class:
Code of MainPage.xaml file.
public MainPage()
{
this.InitializeComponent();
XmlComment dec = dom.CreateComment("This is data of all Employees");
dom.AppendChild(dec);
x = dom.CreateElement("students");
dom.AppendChild(x);
}
Step 6 Now, we create nodes on the click event of the submit button and add these nodes to the root node of the XML document:
Code of the MainPage.xaml file.
private void xml_Click_1(object sender, RoutedEventArgs e)
{
XmlElement x1 = dom.CreateElement("Student");
XmlElement x11 = dom.CreateElement("id");
x11.InnerText = id.Text;
x1.AppendChild(x11);
XmlElement x12 = dom.CreateElement("name");
x12.InnerText = name.Text;
x1.AppendChild(x12);
XmlElement x13 = dom.CreateElement("desig");
x13.InnerText = desig.Text;
x1.AppendChild(x13);
x.AppendChild(x1);
}
Step 7 In the above steps we create a XML document with its nodes. Now, its time to save this XML document in the application at the specified location. So, we create a folder and save the XML document in that folder; see:
private async void savexml_Click_1(object sender, RoutedEventArgs e
{
Windows.Storage.StorageFolder sf = await Windows.ApplicationModel.Package.Current.InstalledLocation.CreateFolderAsync("EMP");
StorageFile st = await sf.CreateFileAsync("Employee.xml");
await dom.SaveToFileAsync(st);
}
In the above code we retrieve a Storage Folder from the app's install directory and create a folder in it using the CreateFolderAsync method. Then, we create a file in this storage folder using the CreateFileAsync method of the Storage folder. At last we save the XML document to the storage file. We use the await and async keywords as Windows Store App supports Asynchronous Programming.
The full code of MainPage.xaml.cs file is as follows:
using System;
using System.Collections.Generic;
using System.IO;
using System.Linq;
using Windows.Foundation;
using Windows.Foundation.Collections;
using Windows.UI.Xaml;
using Windows.UI.Xaml.Controls;
using Windows.UI.Xaml.Controls.Primitives;
using Windows.UI.Xaml.Data;
using Windows.UI.Xaml.Input;
using Windows.UI.Xaml.Media;
using Windows.UI.Xaml.Navigation;
using Windows.Data.Xml;
using Windows.Data.Xml.Dom;
using System.Xml.Linq;
using Windows.Storage;
using System.Xml;
// The Blank Page item template is documented at http://go.microsoft.com/fwlink/?LinkId=234238
namespace App9
{
public sealed partial class MainPage : Page
{
public MainPage()
{
this.InitializeComponent();
XmlComment dec = dom.CreateComment("This is data of all Employees");
dom.AppendChild(dec);
x = dom.CreateElement("students");
dom.AppendChild(x);
}
protected override void OnNavigatedTo(NavigationEventArgs e)
{
}
XmlDocument dom = new XmlDocument();
XmlElement x;
private void xml_Click_1(object sender, RoutedEventArgs e)
{
XmlElement x1 = dom.CreateElement("Student");
XmlElement x11 = dom.CreateElement("id");
x11.InnerText = id.Text;
x1.AppendChild(x11);
XmlElement x12 = dom.CreateElement("name");
x12.InnerText = name.Text;
x1.AppendChild(x12);
XmlElement x13 = dom.CreateElement("desig");
x13.InnerText = desig.Text;
x1.AppendChild(x13);
x.AppendChild(x1);
}
private async void savexml_Click_1(object sender, RoutedEventArgs e)
{
Windows.Storage.StorageFolder sf = await Windows.ApplicationModel.Package.Current.InstalledLocation.CreateFolderAsync("EMP");
StorageFile st = await sf.CreateFileAsync("Employee.xml");
await dom.SaveToFileAsync(st);
}
}
}
Step 8 Press F5 to run the Program. Enter the values in the given textboxes and click the submit button: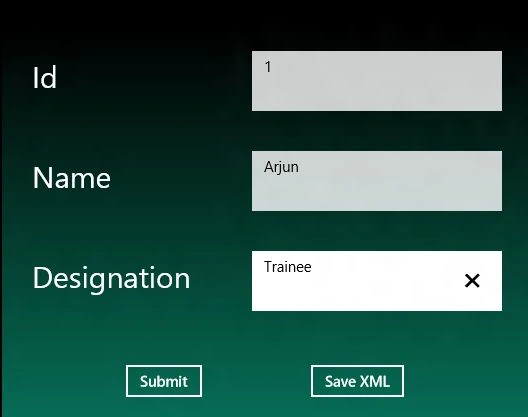
Step 9 Repeat Step 7 as many times you want to create nodes in the XML document.
Step 10 When you finish entering the values, click on the Save XML button to save the XML file: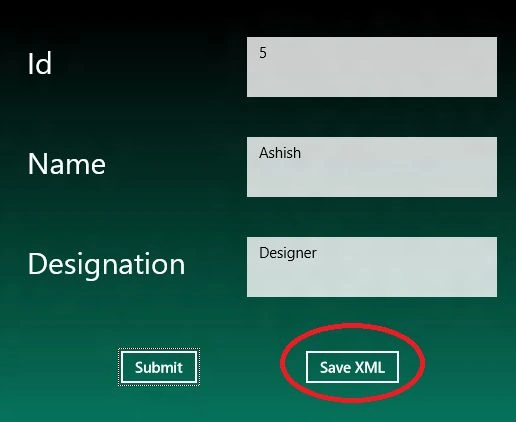
Step 11 To see the output XML file go to the Solution Explorer and expand the bin folder: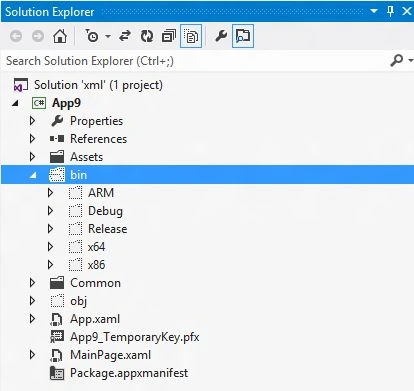
Step 12 Then, expand the debug folder. Then expand the Appx folder. You will see the XML file within the specified folder that we have created in the above steps.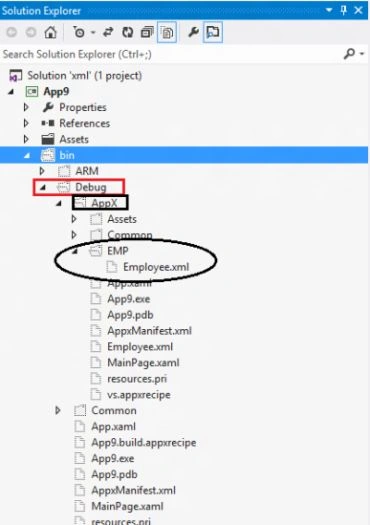
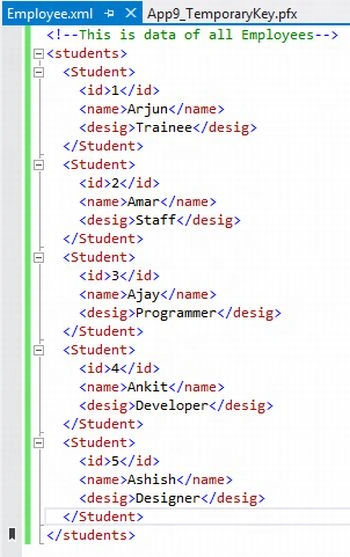
Step 13 Open the XML file to see the output.
Mike WangPosted Apr 23, 2013, 5:20 PM
Well Done! One question: how to append more records once the xml file created? I can not figure it out. Please help. Thanks.
saikiran kodumuruPosted Feb 4, 2013, 5:42 AM
Nice article gaurav, I am new to windows store apps, can you provide me source code / reference links for create, read and write an excel in windows store apps using C#.
Gaurav GuptaPosted Nov 26, 2012, 10:03 PM
Great Effort Nate, Thanks...
Nate HeditedPosted Nov 26, 2012, 5:32 PMEdited Nov 26, 2012, 5:33 PM
This is what I did to make this work for me, I am trying to create a Windows Store App - Windows.Storage.StorageFolder sf = await ApplicationData.Current.LocalFolder.CreateFolderAsync("EMP", CreationCollisionOption.OpenIfExists); StorageFile st = await sf.CreateFileAsync("Employee.xml", CreationCollisionOption.OpenIfExists);await dom.SaveToFileAsync(st);
ashok kallaguntaPosted Sep 11, 2012, 2:20 AM
hi i am alos getting same error "UnauthorizedAccesException - HRESULT: 0x80070005 (E_ACCESSDENIED)" i gave full access to that folder even though i am getting issue can u pls help me out
Gaurav GuptaPosted Sep 4, 2012, 4:39 AM
probably your folder properties is set to be readonly or you have not rights to read/write this folder. change the settings of the folder. Hope this will help you... To see the bin file you have to ensure that show all files are enabled... thanks.
JohanneseditedPosted Aug 1, 2012, 9:16 AMEdited Aug 1, 2012, 9:39 AM
Thanks for this great Tutorial. But I have a question: When I come to the point where the programm saves the XML-File, I get this Error: "UnauthorizedAccesException - HRESULT: 0x80070005 (E_ACCESSDENIED)" Why don't I have the rights to save this XML-File? And also I don't have a folder "Bin" in my solution explorer..I hope you can help me.Sorry for my bad englich ;-)Greeting, Creeps EDIT: I get the error when the programm wants to create the folder "EMP"!
Varesh TuliPosted Jul 12, 2012, 4:49 AM
This article is very useful for freshers. Thanks for the post.