This article deals with the management of User Login and Password information for Forms Authentication in ASP.Net. The article shows how to update existing users password and add new users when the ASP.Net application is configured to allow for passwords hashed using SHA1 format. The article can be easily modified to use the MD5 format or clear format for passwords.
As a .Net programmer, you must have definitely come across the Forms Authentication for securing ASP.Net applications as an alternative to Windows Authentication. In this sample we create a sample web site which is secured using Forms Authentication. We store our user names and passwords in the web.config file. We will create a web page for administering the user security information. We will allow access to only the Admin user to modify the user security information.
Step 1 : Create the Web Application
In this article, I will describe the steps assuming use of Visual Studio.Net. Code Listings are included at the end of the article for users who prefer other code editors.
Step 2 : Modify the Web.Config File
Modify the Web.Config file to specify the authentication mode of "Forms". Replace the authentication section to include the following xml snippet:
<
authentication mode="Forms">
<forms loginUrl="login.aspx" name=".ASPXCOOKIEAUTH" path="/">
<credentials passwordFormat="SHA1">
<user name="User1" password="4A60935FE851C99148EFD66122CDD0F43D5A3059" />
<user name="User2" password="114B3C899D75F5A3FE3FDF83531C42E33214555B" />
<user name="Admin" password="1F95EC61B6EF02B5D2B138654DA138BFDBBC7F3C" />
</credentials>
</forms>
</authentication>
<authorization>
<deny users="?" />
</authorization>
XML Snippet: Configure our application for Forms Authentication
Step 3: Design the Login Form
Now we move on to design the Login.aspx form. This form is specified in our web.config file as the form which will be presented to the user, if there is no authentication in the requested form. It is a good practice to setup this form to use SSL.
The login form consists of 2 text boxes for accepting the user name and password input from the user and a Login button.
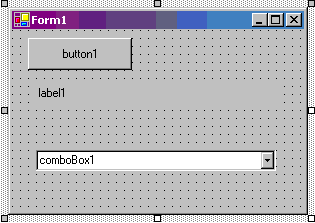
Figure 1: Layout of the Login.aspx form
| Control |
Property Name |
Property Value |
| Label |
Text |
Login |
| TextBox |
ID |
txtLogin |
| Label |
Text |
Password |
| TextBox |
ID |
txtPassword |
|
TextMode |
Password |
| Button |
ID |
btnSubmit |
|
Text |
Submit |
Table : Control Properties for Login.aspx Layout
Add the following statement to the top of this web form.
using System.Web.Security;
Add the code for the Submit button's Click event handler. This will handle the login action.
private void Button1_Click(object sender, System.EventArgs e)
{
if (FormsAuthentication.Authenticate(TextBox1.Text, TextBox2.Text))
{
FormsAuthentication.SetAuthCookie(TextBox1.Text, true);
FormsAuthentication.RedirectFromLoginPage(TextBox1.Text, true);
}
}
Code Snippet : Do the Login.
Step 4: Create the application.
Now we can proceed to creating the various pages and other elements of the Web Forms application. Note that the security settings permeate to the sub-folders, unless you specify a separate web.config file for the sub-folder.
We will keep our web application very simple - it will consist of only a default page which will display a greeting to the user and offer an option for the Admin functionality.
(I renamed the page WebForm1.aspx which is created as the default web page in the web application to default.aspx)
Add the following statement to the top of this web form.
using System.Web.Security;
| Control |
Property Name |
Property Value |
| Label |
|
|
| LinkButton |
Text |
Go to Security Admin Web Page |
|
NavigateURL |
Admin/Admin.aspx |
| Button |
Text |
Logout |
|
ID |
btnLogout |
Table : Properties for controls on default.aspx
Code for Displaying a Greeting to the user :
Add the following code snippet to the Page_Load event of the Web Form.
private void Page_Load(object sender, System.EventArgs e)
{
Label1.Text = "Hello " + Context.User.Identity.Name;
}
Code Snippet : Greet the user
Code for the Logout Button :
Add the following code to signout from the web application in the Click event of the Logout button
private void tmpLogout_Click(object sender, System.EventArgs e)
{
FormsAuthentication.SignOut();
Response.Redirect("login.aspx");
}
Code Snippet : Logout from the application
Step 5 : Test the Application
Let's take a break and see how the application works so far.
To test the logins, here are the values specified in the config file
| User Name |
Password |
| User1 |
1resU |
| User2 |
2resU |
| Admin |
AdminAdmin |
Table : Valid login information specified in the config file.
TIP: To get the hashed values of the passwords for saving in your web.config file, you can make use of the FormsAuthentication.HashPasswordForStoringInConfigFile function in a test web form and copy-paste the result to your config file section.
Start the application in debug mode. Since the application does not have any authentication at this time, you will be displayed the login page. Enter valid credentials and click on the Submit button
If you login correctly , you will be displayed the greeting page.You can add validation code to display an appropriate error message to the user if the login fails. The link for the Security Administration web page is not yet setup - We will do that in just a moment. You can try to logout from the application and login as a different user.
Step 6: Security Administration Web Page : Security
The Security Authentication web page will allow for adding new users for the application and modifying passwords for existing users. It goes without saying that is very important to setup the security for this page.
We will create this page in a sub-folder called Admin below our application root. By doing so we can enforce stricter constraints on accessing the contents of this folder. We will specify the authorization settings for this folder in a separate web.config file. We could have also specified the settings in a <location> section in the web.config in the application root.
Create a new XML file named web.config in the Admin folder.
<?xml version="1.0" encoding="utf-8" ?>
<configuration>
<system.web>
<authorization>
<allow users="Admin"/>
<deny users="*" />
</authorization>
</system.web>
</configuration>
XML listing : web.config in the Admin sub-folder.
This web.config specifies that only the user Admin will be allowed to access the contents of this folder and all other users will be denied access. We could have fine-tuned this by setting up roles and granting rights to the Admin role.
Step 7: Security Administration Web Page : Details
We will add a new web form named Admin.aspx in the Admin sub-folder. The purpose of this web page is to allow the administration of the user accounts and their password. The Admin user will be able to add new user/passwords and modify the passwords of existing users.
We display a list of the available users and passwords in the application root's web.config file by binding a data grid to the xml file using a dataset. Declare a Dataset variable for the Form object.
private DataSet ds;
Add code in the Page_Load event to fill the dataset with the contents of the web.config file in the application root folder and display the contents of the User section of the config file in the data grid.
private void Page_Load(object sender, System.EventArgs e)
{
ds = new DataSet();
ds.ReadXml(@"c:\inetpub\wwwroot\formsauth\web.config");
DataGrid1.DataSource = ds.Tables["user"];
if (!IsPostBack)
DataGrid1.DataBind();
}
Code Snippet: Display the available users in the datagrid
Now add an Edit, Update, Cancel Button Column to the DataGrid - you can right click the Data Grid and click on Property Builder menu item - click on the Columns tab in the Property Builder and select an Edit, Update, Cancel column.
Start Editing
Add the following code to the EditCommand event of the DataGrid
private void DataGrid1_EditCommand(object source, System.Web.UI.WebControls.DataGridCommandEventArgs e)
{
DataGrid1.EditItemIndex = e.Item.ItemIndex;
DataGrid1.DataBind();
}
Cancel Editing
Add the following code to the CancelCommand event of the data grid.
private void DataGrid1_CancelCommand(object source, System.Web.UI.WebControls.DataGridCommandEventArgs e)
{
DataGrid1.EditItemIndex = -1;
DataGrid1.DataBind();
}
Save the Update
Add the following code to the UpdateCommand event of the DataGrid. The UpdateCommand event handler gets the data row from the dataset table based on the index of the edited item. It then converts the password entered in the modification operation to it's hashed representation and saves the updates to the dataset. The next step saves the dataset to the xml file - effectively overwriting the web.config file in the application root. This saves the changes to the xml file and the new passwords are effective. The users already logged in can continue till the authentication expires.
Note that the actual passwords are not displayed to the Admin also, but the Admin user is only allowed to modify the password. The Admin user must clear off the contents of the existing password before resetting the password. The new password entered by the Admin is then converted to it's corresponding hashed value before being saved to the web.config file.
We do not modify the user names in this operation. To enhance the usability you can hide the third column in the datagrid.
private void DataGrid1_UpdateCommand(object source, System.Web.UI.WebControls.DataGridCommandEventArgs e)
{
int i = e.Item.ItemIndex;
DataRow oRow = ds.Tables["user"].Rows[i];
oRow["password"] = FormsAuthentication.HashPasswordForStoringInConfigFile(((TextBox)e.Item.Cells[2].Controls[0]).Text, "sha1");
ds.AcceptChanges();
ds.WriteXml(@"c:\inetpub\wwwroot\formsauth\web.config");
DataGrid1.EditItemIndex = -1;
DataGrid1.DataBind();
}
Code Listing : Update password.
Add New User Operation
Modify the Layout of the Admin.aspx page to include the input boxes for the user name and password for new user as shown in the figure below.
Code to Add the New User
Add the following code to the Click event handler of the Add button. The code adds a new user row to the table in the dataset with the value of the user name and the password (in hashed format) as entered by the user. The dataset with the new row is now saved to web.config and the new user will be able to access the application.
private void Button1_Click(object sender, System.EventArgs e)
{
DataRow oRow = ds.Tables["user"].NewRow();
oRow["name"] = TextBox1.Text;
oRow["password"] = FormsAuthentication.HashPasswordForStoringInConfigFile(TextBox2.Text, "sha1");
oRow["credentials_Id"]=0;
ds.Tables["user"].Rows.Add(oRow);
ds.Tables["user"].AcceptChanges();
ds.WriteXml(@"c:\inetpub\wwwroot\formsauth\web.config");
DataGrid1.DataBind();
}
<?xml version="1.0" standalone="yes"?>
<configuration>
<system.web>
<compilation defaultLanguage="c#" debug="true" />
<customErrors mode="RemoteOnly" />
<authentication mode="Forms">
<forms loginUrl="login.aspx" name=".ASPXCOOKIEAUTH" path="/">
<credentials passwordFormat="SHA1">
<user name="User1" password="B3DAA77B4C04A9551B8781D03191FE098F325E67" />
<user name="User2" password="114B3C899D75F5A3FE3FDF83531C42E33214555B" />
<user name="Admin" password="1F95EC61B6EF02B5D2B138654DA138BFDBBC7F3C" />
<user name="NewUser" password="51B7E40C9E2CF75F211321025E93A4CEC33F1141" />
<user name="new" password="C2A6B03F190DFB2B4AA91F8AF8D477A9BC3401DC" />
</credentials>
</forms>
</authentication>
<authorization>
<deny users="?" />
</authorization>
<trace enabled="false" requestLimit="10" pageOutput="false" traceMode="SortByTime" localOnly="true" />
<sessionState mode="InProc" stateConnectionString="tcpip=127.0.0.1:42424" sqlConnectionString="data
source=127.0.0.1;user id=sa;password=" cookieless="false" timeout="20" />
<globalization requestEncoding="utf-8" responseEncoding="utf-8" />
</system.web>
</configuration>
Code Snippet: Add the new user
<authentication mode="Forms">
<forms loginUrl="login.aspx" name=".ASPXCOOKIEAUTH" path="/">
<credentials passwordFormat="SHA1">
<user name="User1" password="4A60935FE851C99148EFD66122CDD0F43D5A3059" />
<user name="User2" password="114B3C899D75F5A3FE3FDF83531C42E33214555B" />
<user name="Admin" password="1F95EC61B6EF02B5D2B138654DA138BFDBBC7F3C" />
<user name="NewUser" password="51B7E40C9E2CF75F211321025E93A4CEC33F1141" />
</credentials>
</forms>
</authentication>
XML Snippet: Modified web.config with the new password as entered by the Admin user, in hash format.
Suggested enhancements
- When modifying the password for existing user and accepting passwords for new users, hide the password by setting the mode of the textbox to password.
- Hide the credentials_Id column of the security administration datagrid and provide user-friendly columns headings.
- Use SSL for the login.aspx and the admin.aspx pages.
- Instead of saving the entire web.config file, save only the changes to the existing web.config file.
- Provide a Change password web page for users to be able to change their own passwords.
Complete Code Listing
Application Root Web.Config
<?xml version="1.0" standalone="yes"?>
<configuration>
<system.web>
<compilation defaultLanguage="c#" debug="true" />
<customErrors mode="RemoteOnly" />
<authentication mode="Forms">
<forms loginUrl="login.aspx" name=".ASPXCOOKIEAUTH" path="/">
<credentials passwordFormat="SHA1">
<user name="User1" password="B3DAA77B4C04A9551B8781D03191FE098F325E67" />
<user name="User2" password="114B3C899D75F5A3FE3FDF83531C42E33214555B" />
<user name="Admin" password="1F95EC61B6EF02B5D2B138654DA138BFDBBC7F3C" />
<user name="NewUser" password="51B7E40C9E2CF75F211321025E93A4CEC33F1141" />
<user name="new" password="C2A6B03F190DFB2B4AA91F8AF8D477A9BC3401DC" />
</credentials>
</forms>
</authentication>
<authorization>
<deny users="?" />
</authorization>
<trace enabled="false" requestLimit="10" pageOutput="false" traceMode="SortByTime" localOnly="true" />
<sessionState mode="InProc" stateConnectionString="tcpip=127.0.0.1:42424" sqlConnectionString="data source=127.0.0.1;user id=sa;password=" cookieless="false" timeout="20" />
<globalization requestEncoding="utf-8" responseEncoding="utf-8" />
</system.web>
</configuration>
Login.aspx
<%@ Import Namespace="System.Web.Security" %>
<script Language="C#" runat="server">
private void btnSubmit_Click(object sender, System.EventArgs e)
{
if (FormsAuthentication.Authenticate(txtLogin.Text, txtPassword.Text))
{
FormsAuthentication.SetAuthCookie(txtLogin.Text, true);
FormsAuthentication.RedirectFromLoginPage(txtLogin.Text, true);
}
}
</script>
<html>
<body leftmargin="0" topmargin="0" marginwidth="0" marginheight="0">
<form id="login" method="post" runat="server">
<asp:Label id="Label1" style="Z-INDEX: 101; LEFT: 33px; POSITION: absolute; TOP: 31px" runat="server">Login</asp:Label>
<asp:TextBox id="txtLogin" style="Z-INDEX: 102; LEFT: 112px; POSITION: absolute; TOP: 24px" runat="server" Width="234px"></asp:TextBox>
<asp:Label id="Label2" style="Z-INDEX: 103; LEFT: 35px; POSITION: absolute; TOP: 63px" runat="server">Password</asp:Label>
<asp:TextBox id="txtPassword" style="Z-INDEX: 104; LEFT: 112px; POSITION: absolute; TOP: 57px" runat="server" TextMode="Password" Width="234px"></asp:TextBox>
<asp:Button id="btnSubmit" style="Z-INDEX: 105; LEFT: 70px; POSITION: absolute; TOP: 99px" runat="server" Text="Submit" Width="105px" OnClick="btnSubmit_Click"></asp:Button>
</form>
</body>
</html>
Default.aspx
<%@ Import Namespace="System.Web.Security" %>
<script Language="C#" runat="server">
private void Page_Load(object sender, System.EventArgs e)
{
Label1.Text = "Hello " + Context.User.Identity.Name;
}
private void txtLogout_Click(object sender, System.EventArgs e)
{
FormsAuthentication.SignOut();
Response.Redirect("login.aspx");
}
</script>
<html>
<body leftmargin="0" topmargin="0" marginwidth="0" marginheight="0">
<form id="Form1" method="post" runat="server">
<asp:Label id="Label1" style="Z-INDEX: 101; LEFT: 42px; POSITION: absolute; TOP: 33px" runat="server" Width="418px" Height="13px">Label</asp:Label>
<asp:Button id="txtLogout" style="Z-INDEX: 102; LEFT: 42px; POSITION: absolute; TOP: 110px" runat="server" Text="Logout" OnClick="txtLogout_Click"></asp:Button>
<asp:HyperLink id="HyperLink1" style="Z-INDEX: 103; LEFT: 44px; POSITION: absolute; TOP: 75px" runat="server" NavigateUrl="Admin/Admin.aspx">Go to Security Administration Web Page</asp:HyperLink>
</form>
</body>
</html>
Admin/web.config
<?xml version="1.0" encoding="utf-8" ?>
<configuration>
<system.web>
<authorization>
<allow users="Admin"/>
<deny users="*" />
</authorization>
</system.web>
</configuration>
Admin/Admin.aspx
<%@ Import Namespace="System.Web.Security" %>
<%@ Import Namespace="System.Data" %>
<script Language="C#" runat="server">
DataSet ds;
private void Page_Load(object sender, System.EventArgs e)
{
ds = new DataSet();
ds.ReadXml(@"c:\inetpub\wwwroot\formsauth\web.config");
DataGrid1.DataSource = ds.Tables["user"];
if (!IsPostBack)
DataGrid1.DataBind();
}
private void DataGrid1_EditCommand(object source, System.Web.UI.WebControls.DataGridCommandEventArgs e)
{
DataGrid1.EditItemIndex = e.Item.ItemIndex;
DataGrid1.DataBind();
}
private void DataGrid1_CancelCommand(object source, System.Web.UI.WebControls.DataGridCommandEventArgs e)
{
DataGrid1.EditItemIndex = -1;
DataGrid1.DataBind();
}
private void DataGrid1_UpdateCommand(object source, System.Web.UI.WebControls.DataGridCommandEventArgs e)
{
int i = e.Item.ItemIndex;
DataRow oRow = ds.Tables["user"].Rows[i];
oRow["password"] = FormsAuthentication.HashPasswordForStoringInConfigFile(((TextBox)e.Item.Cells[2].Controls[0]).Text, "sha1");
ds.AcceptChanges();
ds.WriteXml(@"c:\inetpub\wwwroot\formsauth\web.config");
DataGrid1.EditItemIndex = -1;
DataGrid1.DataBind();
}
private void Button1_Click(object sender, System.EventArgs e)
{
DataRow oRow = ds.Tables["user"].NewRow();
oRow["name"] = TextBox1.Text;
oRow["password"] = FormsAuthentication.HashPasswordForStoringInConfigFile(TextBox2.Text, "sha1");
oRow["credentials_Id"]=0;
ds.Tables["user"].Rows.Add(oRow);
ds.Tables["user"].AcceptChanges();
ds.WriteXml(@"c:\inetpub\wwwroot\formsauth\web.config");
DataGrid1.DataBind();
}
</script>
<html>
<body leftmargin="0" topmargin="0" marginwidth="0" marginheight="0">
<form id="admin" method="post" runat="server">
<asp:DataGrid id="DataGrid1" style="Z-INDEX: 101; LEFT: 43px; POSITION: absolute; TOP: 137px" runat="server" Width="530px" Height="250px" OnEditCommand="DataGrid1_EditCommand" OnCancelCommand="DataGrid1_CancelCommand" OnUpdateCommand="DataGrid1_UpdateCommand">
<Columns>
<asp:EditCommandColumn ButtonType="LinkButton" UpdateText="Update" CancelText="Cancel" EditText="Edit"></asp:EditCommandColumn>
</Columns>
</asp:DataGrid>
<asp:Label id="Label1" style="Z-INDEX: 102; LEFT: 39px; POSITION: absolute; TOP: 14px" runat="server">Security Administration</asp:Label>:<br>
<TABLE id="Table1" style="Z-INDEX: 103; LEFT: 45px; POSITION: absolute; TOP: 51px" cellSpacing="1" cellPadding="1" width="300" border="0" bgColor="papayawhip">
<TR>
<TD colSpan="5">Add New User:</TD>
</TR>
<TR>
<TD>Login:</TD>
<TD>
<asp:TextBox id="TextBox1" runat="server"></asp:TextBox></TD>
<TD>Password:</TD>
<TD>
<asp:TextBox id="TextBox2" runat="server"></asp:TextBox></TD>
<TD>
<asp:Button id="Button1" runat="server" Text="Add" OnClick="Button1_Click"></asp:Button></TD>
</TR>
</TABLE>
</form>
</body>
</html>
Conclusion
We saw a simple approach to allow administration of user information for maintaining security for Web Forms Authentication. This example serves to demonstrate the configurability of web applications using XML config files.