What is web.config file? It is the main settings and configuration file for an ASP.NET web application. The file is an XML document that defines configuration information regarding the web application. The web.config file contains information that controls module loading, security configuration, session configuration, and application language and compilation settings.
What make up web.config file?
- Configuration file is nested in a root <configuration> element
- Configuration element contains a <system.web> element, which is used for ASP.NET settings
- Inside the <system.web> element are separate elements for each aspect of configuration.
- <appSettings> element can store custom settings
A typical web.config file looks like this;
<?xml version="1.0"?>
<configuration>
<appSettings />
<connectionStrings />
<system.web>
<!-- ASP.NET configuration sections go here. -->
</system.web>
</configuration>
How ASP.NET 3.5 web.config file different from ASP.NET 2.0
- ASP.NET 3.5 includes the core ASP.NET 2.0 model i.e. version of 2.0 of the CLR, and set of new extensions that add support for new features of ASP.NET 3.5
- Due to this new model, ASP.NET 2.0 applications can run comfortably on a server that has 3.5 or 2.0 installed.
Typically, whatever was in the ASP.NET 2.0 web.config file is in the 3.5 file, with some new additions.
Let us see what they are and what they do.
|
Element |
What they do |
|
configSections |
Registers the optional <system.web.extensions> element, so that, ASP.NET recognizes it and knows how to process its data. |
|
|
|
|
system.codedom |
Configures your page to use the latest version of the C# compiler. |
|
|
|
|
system.web.extensions |
Allows you to enable some ASP.NET AJAX features. Visual Studio doesn't add this element to your web.config file, because it's optional. |
|
|
|
|
system.webServer |
Configures the ASP.NET AJAX features to work under IIS 7. If your website is hosted in any other version of IIS, these settings have no effect. |
Can we have multiple web.config files in a web application?
Answer: YES
Where can we keep these files?
Answer: In different sub-directories of your web application.
Scenario: For example, consider the web request http://localhost/A/B/C/MyPage.aspx, where A is the root directory for the web application. In this case, multiple levels of settings are relevant:
How this work: ASP.NET uses configuration inheritance to handle multiple web.config files
- The default machine.config settings are applied first.
- The web.config settings from the computer root are applied next. This web.config file is in
The same Config directory as the machine.config file.
- If there is a web.config file in the application root A, these settings are applied next.
- If there is a web.config file in the subdirectory B, these settings are applied next.
- If there is a web.config file in the subdirectory C, these settings are applied last.
So lets us take each tag one by one, and understand their purpose.
1. Name: <location>
Description: The <location> element is an extension that allows you to specify more than one group of settings in the same configuration file.
<configuration>
<system.web>
<!-- Basic configuration settings go here. -->
</system.web>
<location path="/Secure">
<system.web>
<!-- Configuration settings for the Secure subdirectory go here. -->
</system.web>
</location>
</configuration>
2. Name: <customErrors>
Description: This element allows you to configure the behavior of your application in response to various HTTP errors. The known 404 error to a page that prints a user-friendly error message to the users of your web application by creating a section like this:
<customErrors defaultRedirect="standarderror.aspx" mode="RemoteOnly">
<error statusCode="404" redirect="filenotfound.htm"/>
</customErrors>
Meaning of mode here;
a. On: Indicates that custom errors are enabled. If no defaultRedirect attribute is supplied, users
Will see a generic error.
b. Off: Custom errors are disabled. This allows full error details to be displayed.
c. RemoteOnly: Custom errors are shown only to remote clients while full detailed errors are displayed to local clients.
3. Name: <connectionStrings>
Description: This section allows you to define database connection strings that will be used elsewhere in your application. Since connection strings need to be reused exactly to support connection pooling and may need to be modified without recompiling the web application, it makes perfect sense to store them in the web.config file. We can add as many connection strings as needed.
<configuration>
<connectionStrings>
<add name="myConnectionString"
connectionString=
"Data Source=localhost;Integrated Security=SSPI;Initial Catalog=AIrtel;"
providerName="System.Data.SqlClient" />
</connectionStrings>
</configuration>
4. Name: <appSettings>
Description: You add custom settings to a web.config file in a special element called <appSettings>. Here's where the <appSettings> section fits into the web.config file:
<appSettings>
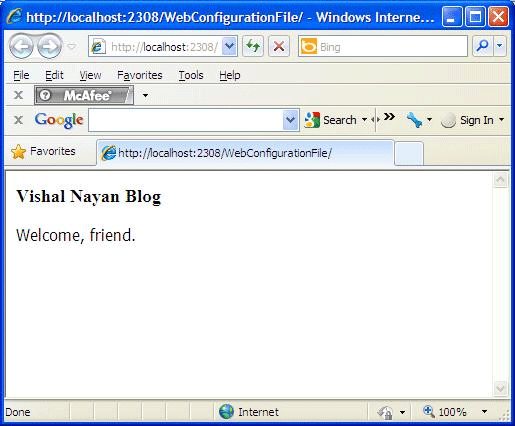
<add key="websiteName" value="Vishal Nayan Blog" />
<add key="welcomeMessage" value="Welcome, friend." />
</appSettings>
Retrieving these values from code behind is fairly simple and you can update the config file as well from code behind;
protected void Page_Load(object sender, EventArgs e)
{
Configuration config = WebConfigurationManager.OpenWebConfiguration(Request.ApplicationPath);
lblSiteName.Text =
config.AppSettings.Settings["websiteName"].Value;
lblWelcome.Text =
config.AppSettings.Settings["welcomeMessage"].Value;
if (config.AppSettings.Settings["welcomeMessage"].Value.Length > 15)
{
config.AppSettings.Settings["welcomeMessage"].Value = "Welcome, again.";
}
else
{
config.AppSettings.Settings["welcomeMessage"].Value = "Welcome, friend.";
}
config.Save();
}
So when we run this, it looks like this:

5. Name: <system.web>
Description: The <system.web> element contains all the configuration settings specific to ASP.NET. These settings configure various aspects of your web application and enable services such as security, state management, and tracing.
It has a few important elements; let us take them one by one;
- authentication : This element determines how you will verify a client's identity when the client requests a page.
- authorization: This element controls which clients have access to the resources within the
web application or current directory.
- Compilation: Contains the <assemblies> element, which lists the assemblies your web
application uses. These assemblies are then made available to your code (as
long as they can be found in the Bin directory or the GAC).
- customErrors: Allows you to set specific redirect URLs that should be used when specific (or
default) errors occur.
- identity: Controls the security identity of the ASP.NET application. You can use this
setting to cause the web application to temporarily assume the identity of
another Windows account and its permissions and restrictions. This setting is
set at the application level.
- httpHandlers: Defines the classes that process the HTTP requests your application receives.
For example, requests for files with the extension .aspx are automatically handled
by the System.Web.UI.PageHandlerFactory class, which runs the page life
cycle.
- httpModules: Defines classes that are given a chance to react to every request your web application receives. For example, ASP.NET's session state and authentication
features work through dedicated modules. Later, in the section "Extending the HTTP Pipeline
- pages: Defines default page settings (most of which you can override with the Page directive)
- SessionState: Configures the various options for maintaining session state for the application, such as whether to maintain it at all and where to maintain it (SQL, a
separate Windows service, and so on). This is set at the application level.
- Trace: Configures tracing, an ASP.NET feature that lets you display diagnostic information
in the page (or collect it for viewing separately).
Before we wrap up everything about web.config, we will look into code by which we can encrypt web.config file.
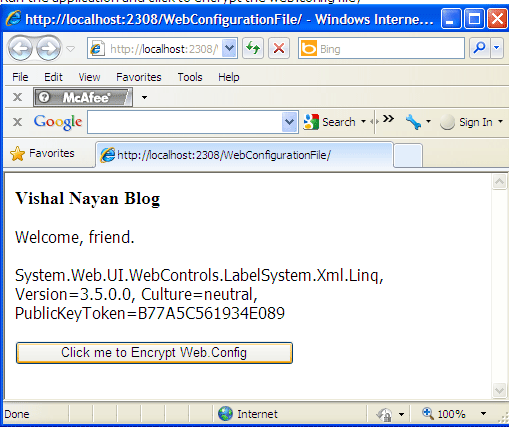
Make a button and on onClick, write the following code;
protected void btn_Click(object sender, EventArgs e)
{
Configuration config = WebConfigurationManager.OpenWebConfiguration(Request.ApplicationPath);
ConfigurationSection appSettings = config.GetSection("appSettings");
if (appSettings.SectionInformation.IsProtected)
{
appSettings.SectionInformation.UnprotectSection();
}
else
{
appSettings.SectionInformation.ProtectSection(
"DataProtectionConfigurationProvider");
}
config.Save();
lblInfo.Text = "web.config file saved with encrypted appSettings section.";
}
This will encrypt our application setting values, which are now:
<appSettings>
<add key="websiteName" value="Vishal Nayan Blog" />
<add key="welcomeMessage" value="Welcome, friend." />
</appSettings>
Run the application and click to encrypt the web.config file:

After clicking, our application setting value in web.config file will become like:
<appSettings configProtectionProvider="DataProtectionConfigurationProvider">
<EncryptedData>
<CipherData>
<CipherValue>AQAAANCMnd8BFdERjHoAwE/Cl+sBAAAAA2dU9YrCl0KQ9yq+HxDwzgQAAAACAAAAAAADZgAAqAAAABAAAA
Cikb0f8CR1B6m2cgbtGQM7AAAAAASAAACgAAAAEAAAAO02mpJDxfDU4UDHKa0syKkoAQAADKftolRs3rpque88bIBjpZEB6
wnz3Lyu6VFd/t/mICOq68KSSXToO2i2S+321wxiFN3Dv60RWnozQp2m4pLMlaVdFK/lWTjtAr+xsOp0QtLAfsJyjl+/AMocDh
kLc7dcfmCOy8WJ3wNCPmapOLZRQf3KdwMo9R8iaW/4bTWfmW2l+RRi5o5IEjd6lZlFbyb9ox8yk+M7bE3vOs6noYCjJZ4OXF
sUta2vwkNE5KC4gm2tKyOkMDB4Z+2/aqUaO5PULTp97mLCHjultSWcyWYaoRRESOS6LheNCcVr7Q5mO6UtvGghOBNA2zFbNSr
gfBi+mMdMX4uCcDyOYUCR5PkkeleWCP8didy83qU/FVxQNd7msiSjqY596aRXHeA7y5rfK74You3lT2sUAAAAYLxUegHFaakY
B8cJ57aezYcgSSk=</CipherValue>
</CipherData>
</EncryptedData>
</appSettings>
Cool, isn't it? I hope you enjoyed; Cheers....