Prologue:
In my previous article, we have seen how to create reference tables in LightSwitch Beta 2. Today we shall discuss how to save records to the database at the time of adding it.
Let us create a demo LightSwitch application to demonstrate the situation said above. In this demo application we will simply be seeing another way to save records at the time of adding the records so it avoids clicking the save screen command.
Preparing the Solution:
Open VS 2010; create a LightSwitch Desktop application with the name "CreatingReferenceTablesInLSBeta2" as shown in the figure.
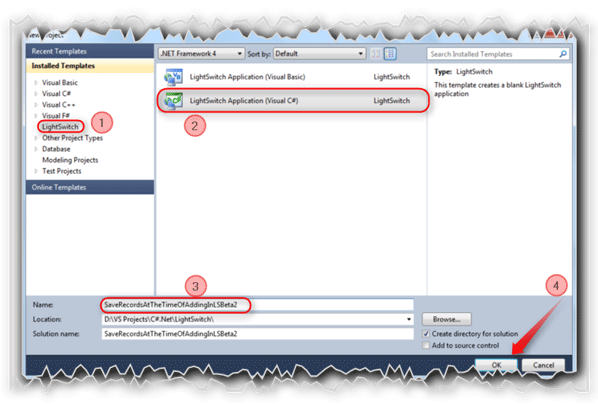
Follow the No: # to create the LightSwitch desktop application.
The Entity Designer:
Let us create a table.

This is a new screen of Beta 2 which is not available in Beta 1. Select the option shown with a rounded box in read around it to create a new table.
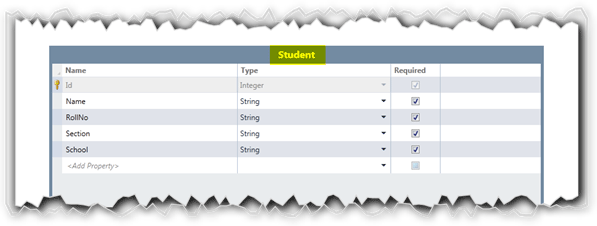
After clicking on the "Create new table" option, the Entity Designer will displayed to create the Entity required.
As per our demo application we need to create a table called "Student".
Designing the Screen:
Let us create a List and Details screen for the Student entity. There are two ways to create a screen. One of the options is by selecting the Screen... button on the Entity Designer screen.

Another way is right-clicking on Screens section in Solution Explorer. In our demo application we have created using the first way.
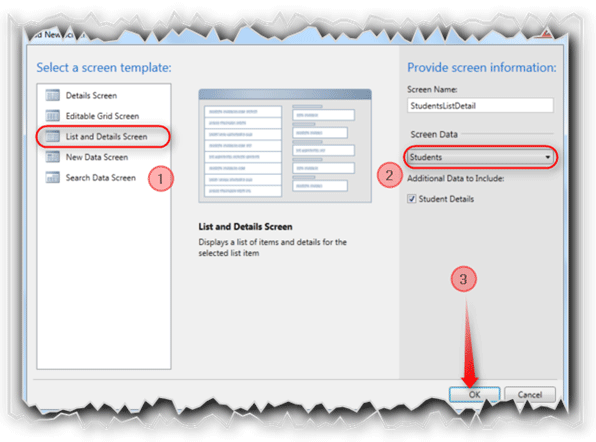
As shown in the above figure, select the List and Details screen template to create the screen for the student entity.
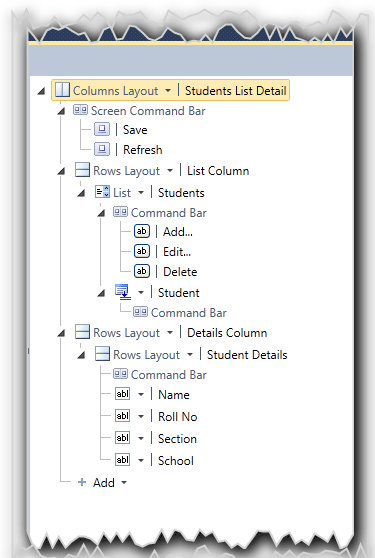
The above figure shows the complete screen structure for our demo application before adding the saving functionality.
As we are going to save the records at the time of adding, we need to disable the Save screen command.
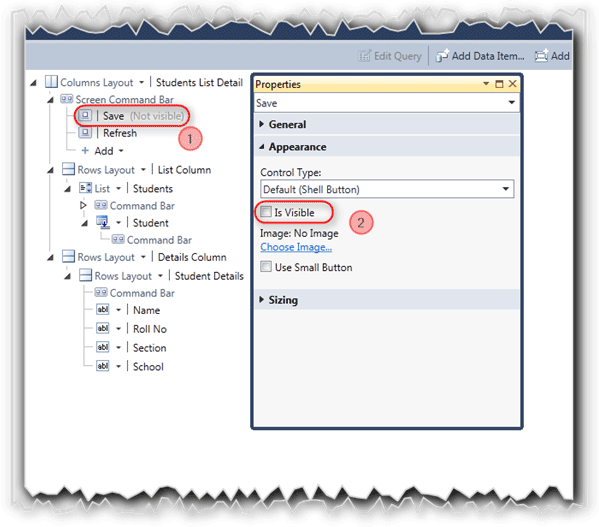
Here,
- Expand the Screen Command Bar and go to the Properties.
- In Appearance section, uncheck the "Is Visible" check box to hide the Save button.
Add new Model Window:
We may have the question that why should we create a model window. Yes, we need to create a model window to replace the default screen which will be popped up while clicking the Add button in the List and Details Screen.
Why do we need to replace the Default Screen? Because we need a screen to save the records at the time that they are added.
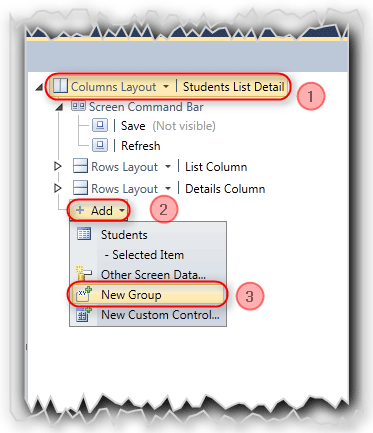
Here,
- Select the "Students List Details" root screen node.
- While selecting the root screen node, we will be getting the dropdown list Add. Click on that.
- Select the "New Group" to add the group.
Add a Student type Property using the "Add Data Item". This property will be bound to the Model Windows.
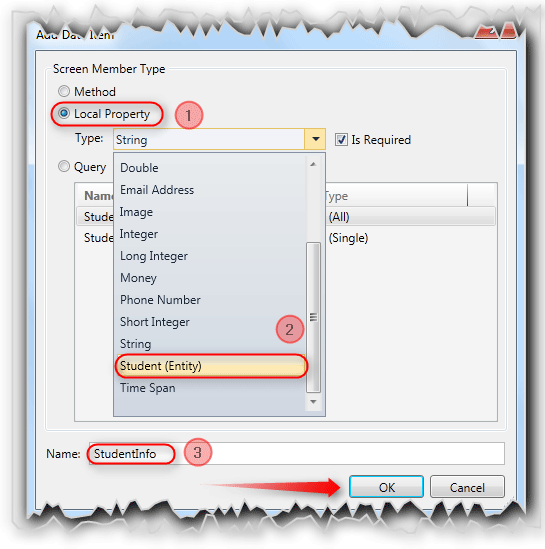
As shown in the above figure, create a property "StudentInfo" of type Student.
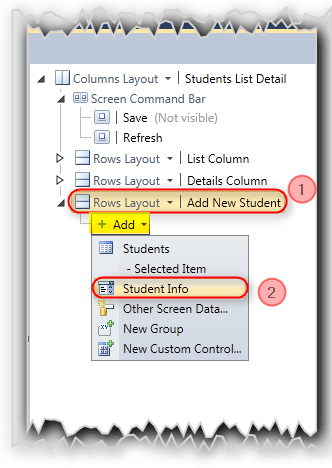
We need to bind the property that we have created. So select the "Add New Student" screen element and bind the "Student Info" property as shown in the figure.
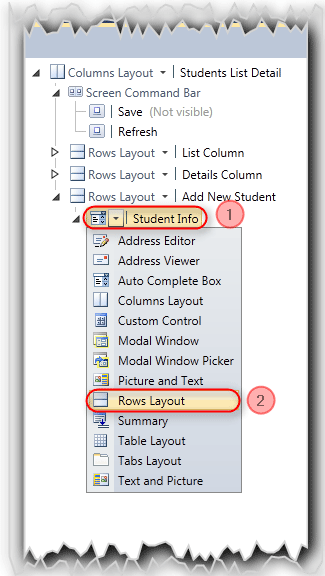
Here,
- By default the "AutoComplete" layout will be used for the Student Info. We need to change to Rows layout.
- Select the "Rows Layout" to change the layout of Student Info.
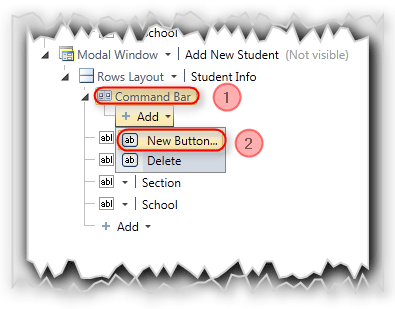
We need to add two buttons. One is for Save and another is for Cancel. Add two buttons as like shown in the above figure.
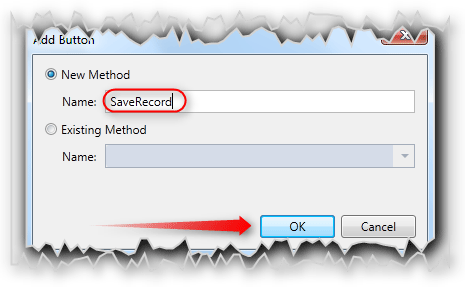
For creating the Save button, give the name as Save Record and add one more button with the name Cancel.
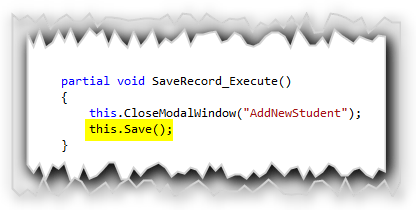
The above figure shows the method for the Save Record button. The highlighted part is the Save method which we are calling to Save the record.
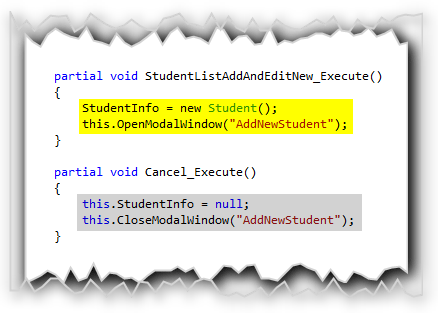
In the above figure, the highlighted part with yellow color will be executed while clicking the Add [+] button in the List and Details screen.
The highlighted part with gray color will be executed while clicking the Cancel button on the Model window.
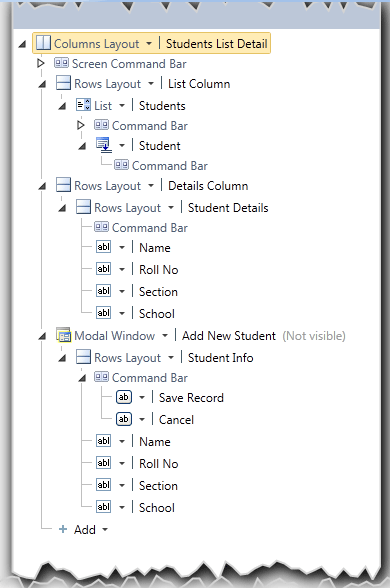
The above figure is the complete screen tree for our application.
That's it. Hit F5 to see our Application in Action.
Application in Action:
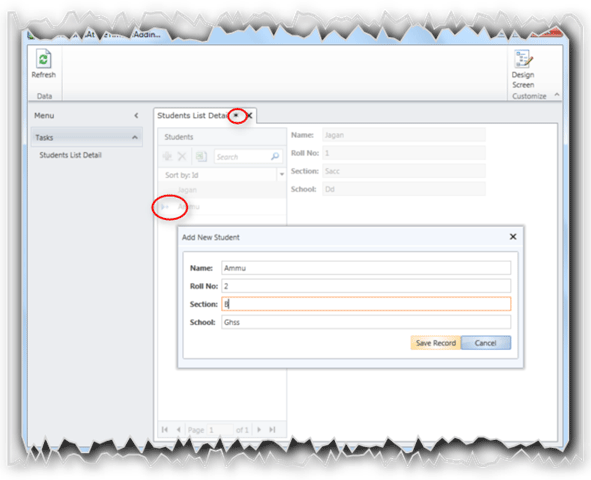
Press the Add [+] button to add a new Student record. Here the * like symbol means that the record is not yet saved. And also you can see there is no Save button at the Screen Command section.
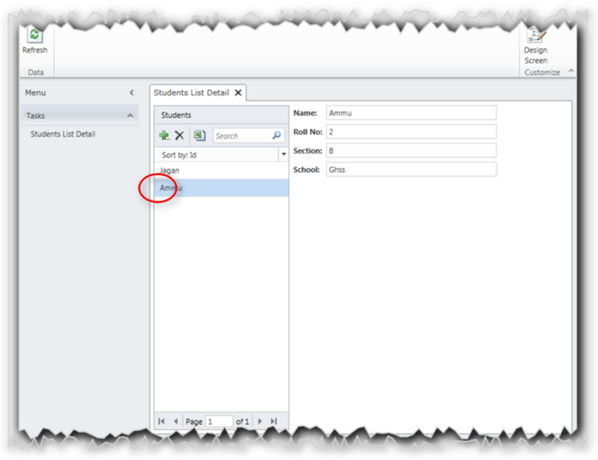
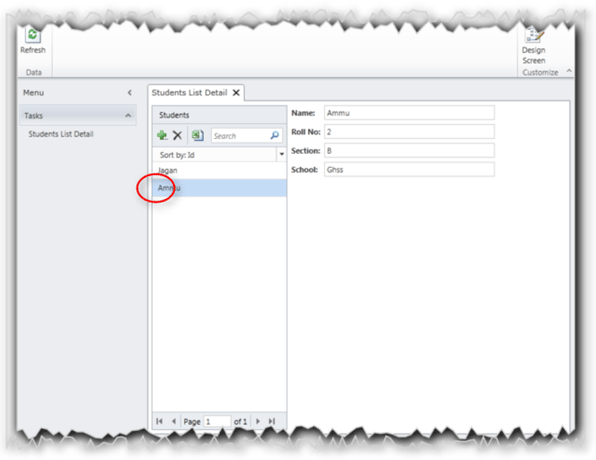
After clicking the Save Record button in our model window, the student record has been saved directly to the database.
Summary:
We have seen how to Save the records at the time of adding it so that we no need to press the Save button once again after adding it.
Thanks for spending your precious time here. Please provide your valuable feedbacks and comments, which enable me to give a better article the next time.
Thanks.