In this article, we will discuss how to consume data from a cloud [SQL Azure] in a Windows 7.1 [Mango] phone. SQL Azure and Windows 7.1 [Mango] phones are two common terms that you will hear about from many tech-savvy people. So I thought it is the right time to integrate these technologies. In this article, I have tried my best not to focus on the theoretical aspects. Instead, I will present a step-by-step approach on how to consume Data from a cloud in a Windows 7 phone application.
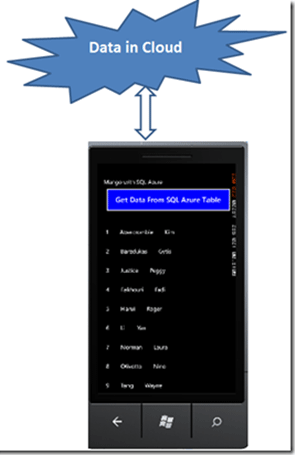
What we intend to achieve is given below:
In this article, we will cover:
- Migrating a local Database to SQL Azure
- Creating a Data Model on a database in the Cloud
- Expose the Data Model as a WCF Data Service
- Consumption of Data from a Cloud in a Windows 7.1 or Mango phone using a WCF Data Service.
The block diagram for that is given below. We have a School Database on our local (in-premise) SQL Server. We will be moving the local school database along with the schema and data to SQL Azure. Then, we will create a Data Model on the school database in the cloud and expose that data model as a WCF Data Service. Once the data from the cloud is exposed as a WCF Data Service, we will fetch that in the Windows 7.1 phone.

So, actually, there are two major steps involved:
- Exposing Data from the cloud as a WCF Data Service
- Consuming the WCF Data Service in Windows 7 Phone
Creating local Database and migrating to SQL Azure
Creating the Database
The first step is to create the database. We are going to use a School database.
Script of sample School Database copy from here
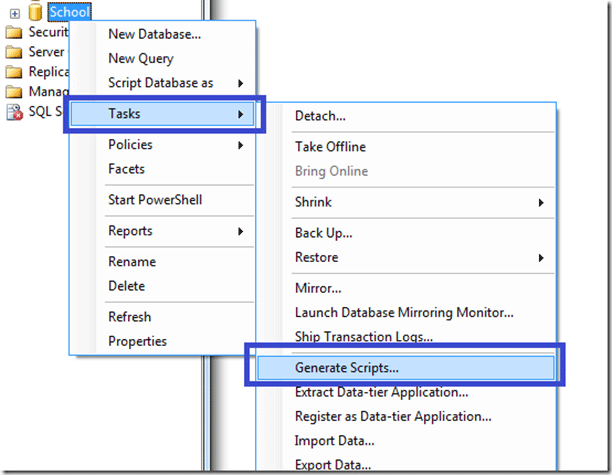
Generate Database Script for SQL Azure
Right-click on the School Database and select Tasks. From Tasks, select Generate Scripts.
From the Pop up, select Set Scripting Options.
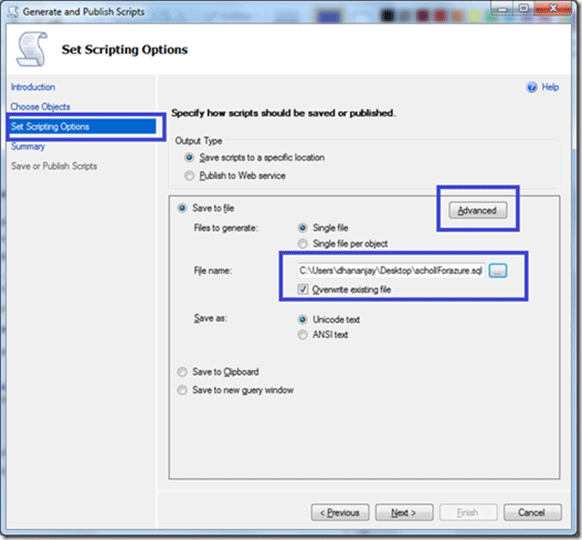
Give the file a name by selecting Save to file option.
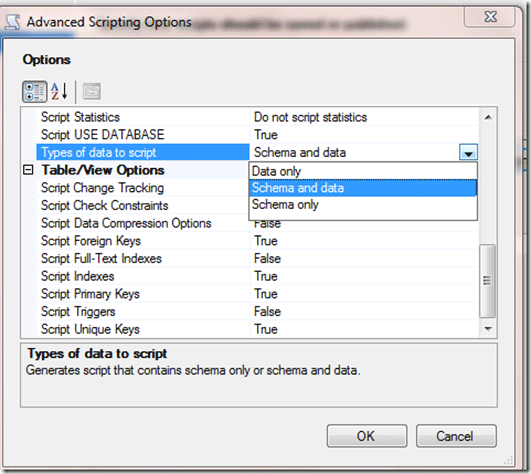
Now the main thing to be noticed here is that we need to so some changes in the advanced setting. For that, click on the Advanced button.
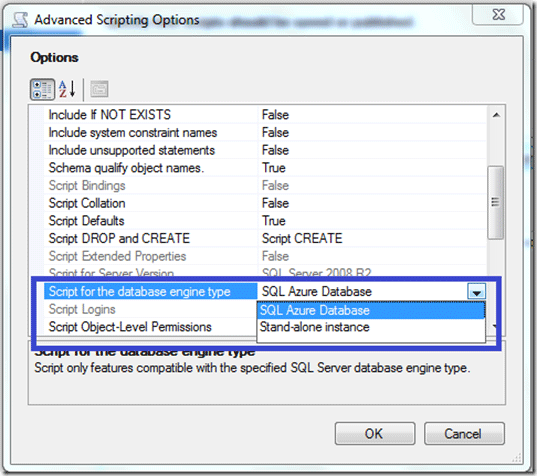
And in "Types of data to script", select "Schema and data" (both options).
After that, click next and Finish. You can see that a SQL file is created, and we will be using this script to migrate our in-house school database to SQL Azure.
Create School Database in SQL Azure
Login to the SQL Azure portal with your live credential.
https://sql.azure.com/
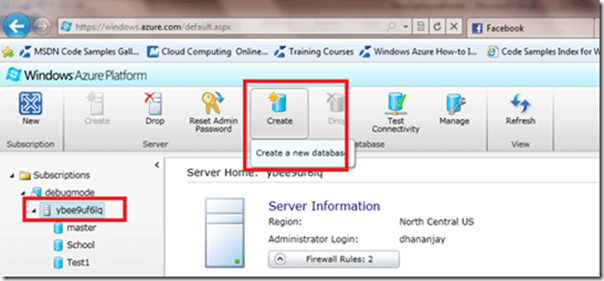
SQL Azure can be explored by selecting the Database option from the left panel.
To create a School Database, select Database server and from the Database section, select the Create option.
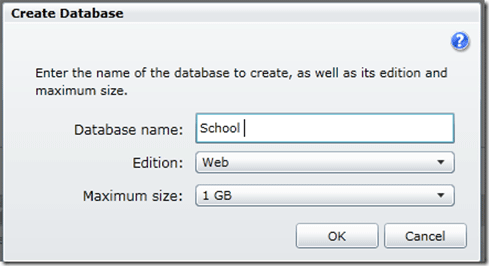
Provide Database name, Edition and Maximum Size.
Run the Script in SQL Azure
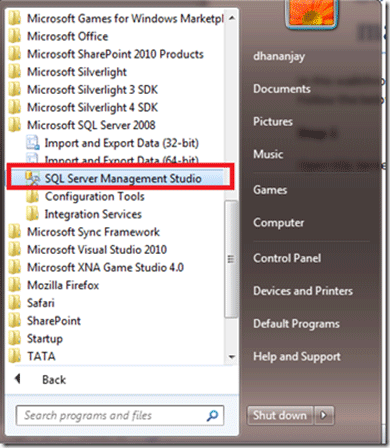
Open the SQL Server Management Studio.
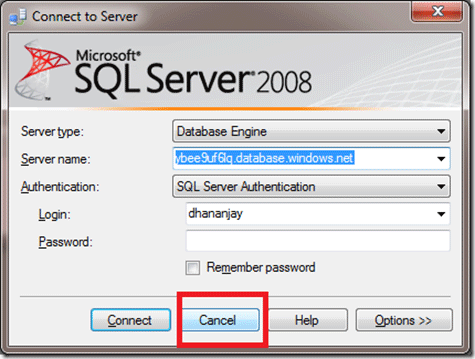
You will get a "Connect to Server" dialog box. Click on cancel.
After cancelling the dialog box, click on New Query (top left corner).
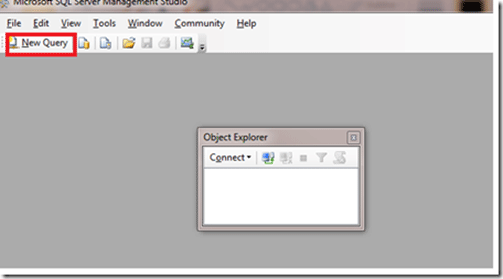
After clicking New Query, the Connect to Server dialog box appears again.
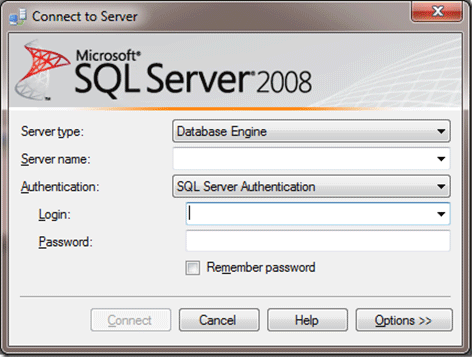
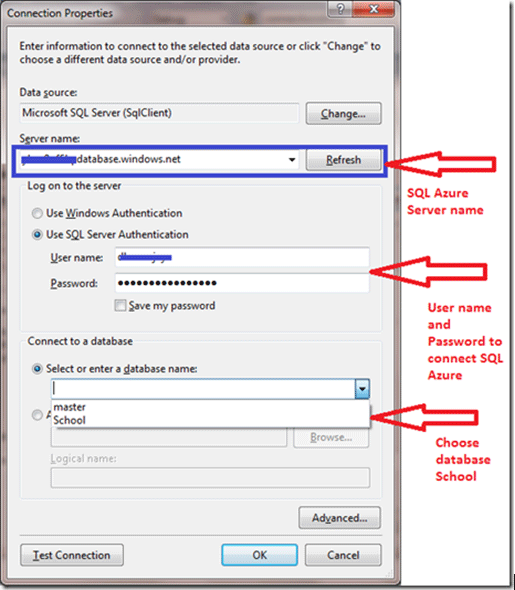
Now, here you need to provide the Server name of SQL Azure and Login credential of SQL Azure.
You can get a fully qualified server name in the Properties tab of the SQL Azure portal.
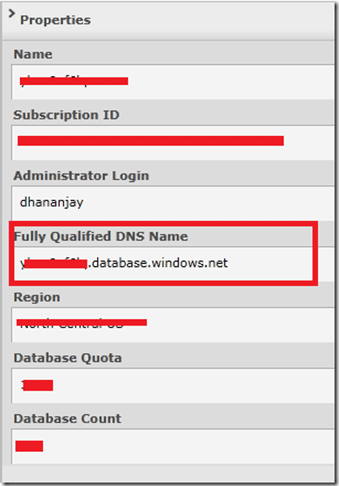
You will get the server name in the form of:
abc.database.windows.net
where abc is the name of your SQL Azure server. We need to provide this server name at the local SQL Server Management Studio.
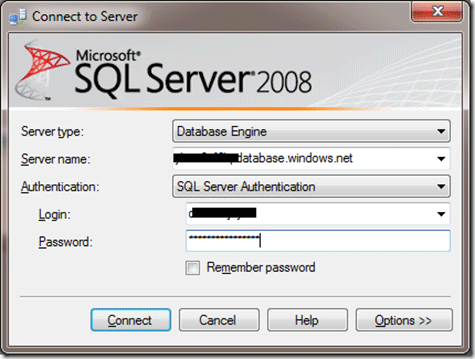
Make sure to select SQL Server Authentication and provide the login user name and password of your SQL Azure database portal.
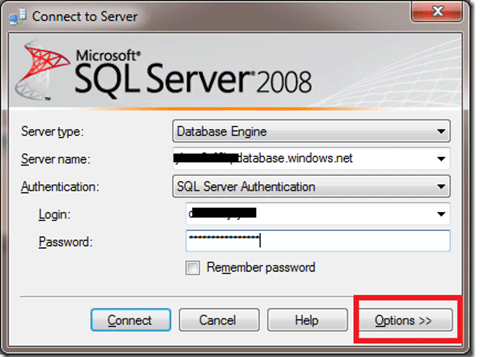
After that, before clicking Connect, click on "Options".
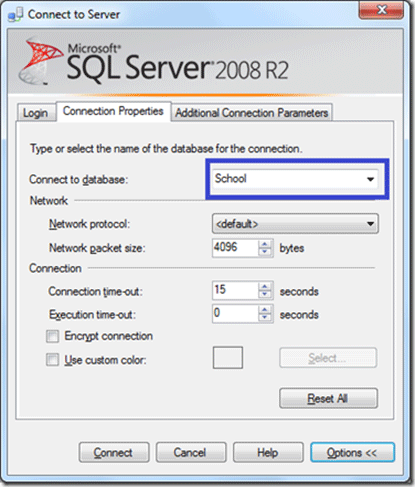
From Options, select the School database.
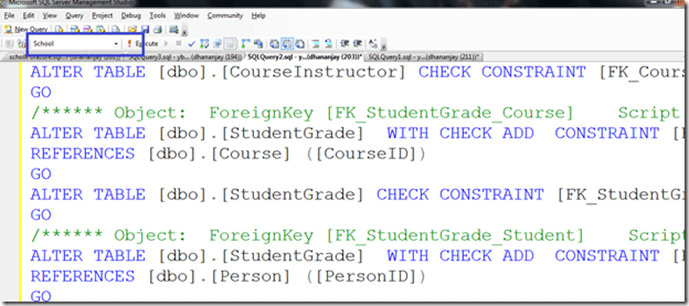
Run the Script
Now once you have successfully connected to the School Database in SQL Azure, copy the script and Run as given below.
After successfully run script, run the below command and all the tables name will get listed.

In this way, you have successfully migrated your database to SQL AZURE.
Exposing SQL Azure Database as WCF DATA Service
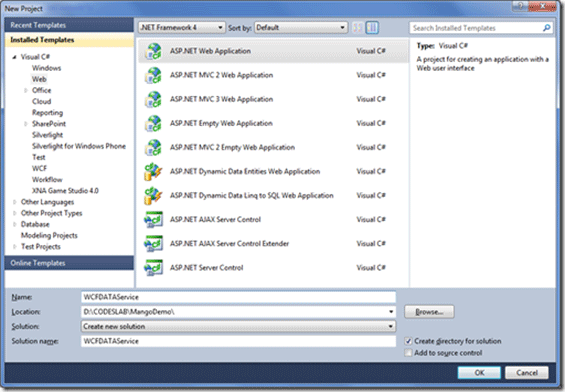
Create a Web Application
Create a new project and select the ASP.Net Web Application project template from the Web tab. Give a meaningful name to the web application.
Create a Data Model
We can create a Data Model, which can be exposed as a WCF Data Service, in one of three ways:
- Using ADO.Net Entity model.
- Using LINQ to SQL class.
- Custom Data Model.
Here, I am going to use ADO.Net Entity model to create the data model. So to create an entity model, do the following:
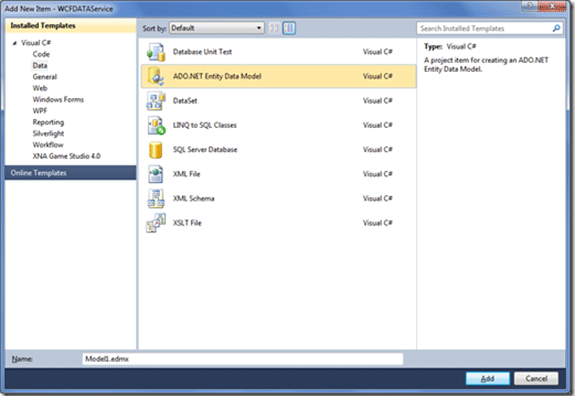
- Right-click on web application and add a new item.
- Select ADO.Net Entity model from the Data tab.
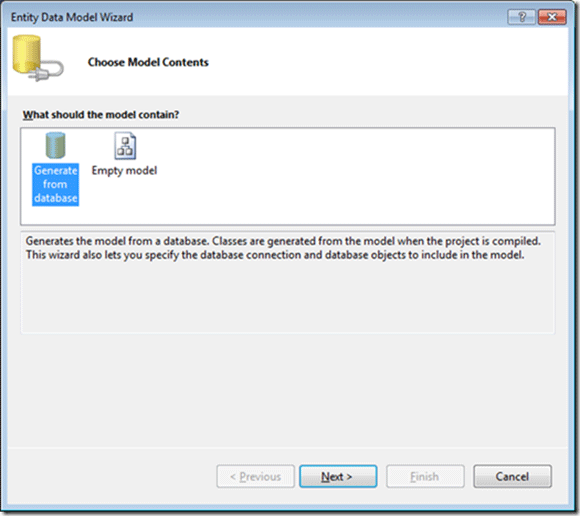
- Since we already have a table in the SQL Azure Database, we are going to choose the option "Generate from database".
- Choose a new connection.
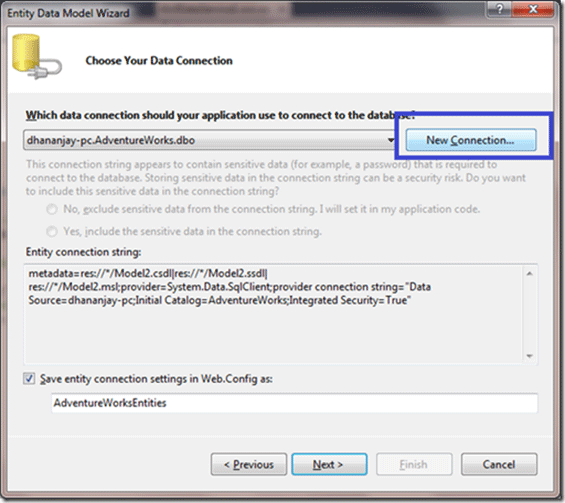
After clicking on New Connection, this is the important step. We need to give extra care here.
So provide the information as below:
Click on "Test Connection" to test if the connection has been established successfully. After this, you will be prompted if the Connection string contains sensitive data and if you want to keep that in a configuration file or manage it in the program. You can select any one of these options according to what you need.
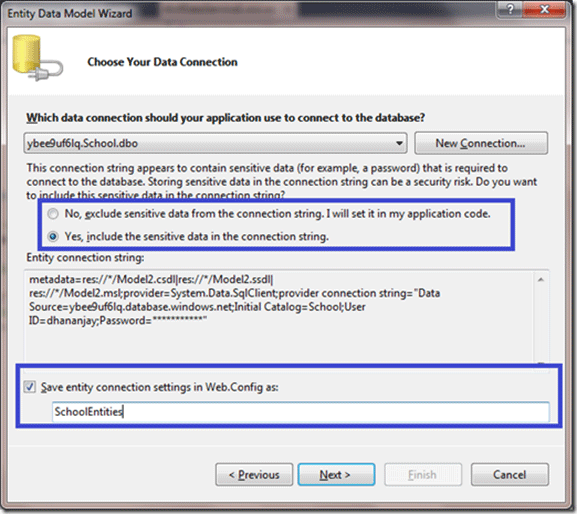
After providing your option, click on the Next button; you can see that all the Tables, Views, and Stored Procedures are available to be chosen as a part of the data model for WCF Data Service.
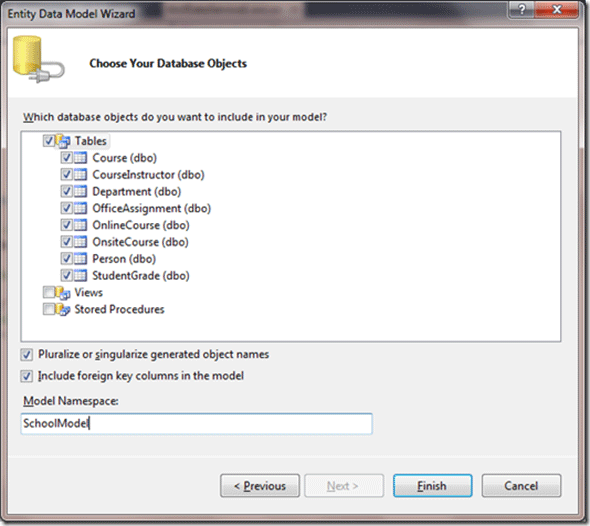
5. Select tables, views and stored procedure from the database you want to make as the part of your data model.
Creating WCF Data Service
- Right-click on the Web Application project and add a new item.
- Select WCF Data Service from the Web tab. Give any meaningful name. I am leaving the default name here.
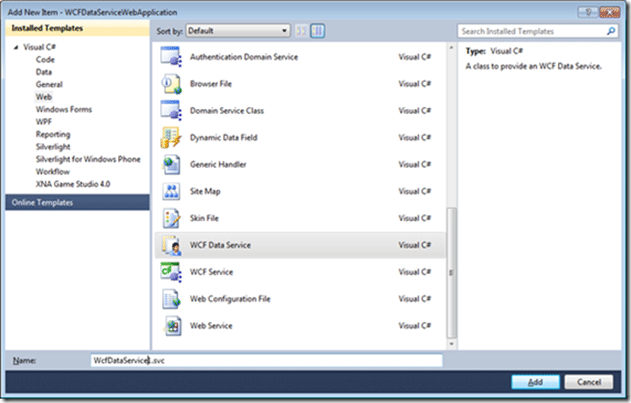
- After adding the WCF Data Service, we can see a service file with extension .svc has been added to the solution explorer.
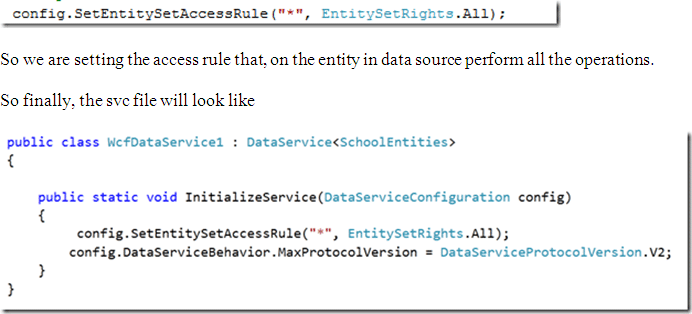
The very first thing to do is to provide a data source name. To do that, uncomment the first commented line and give the data source name. In our case, the name of the model we created in the 2nd step is the data source. Our data model name is SchoolEntities.

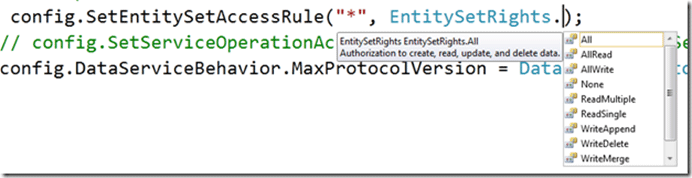
Now we need to set access rules for the entity or entity set. Since we have only one table, we either can give the name of the table explicitly or if we want to set the same access rule for all the table in the data model or data source, we can put *.
Run WCF Data Service
Just press F5 to run the WCF Data Service. The Data Service will be hosted in the default ASP.Net server.
On running, you can see all the table is listed there.
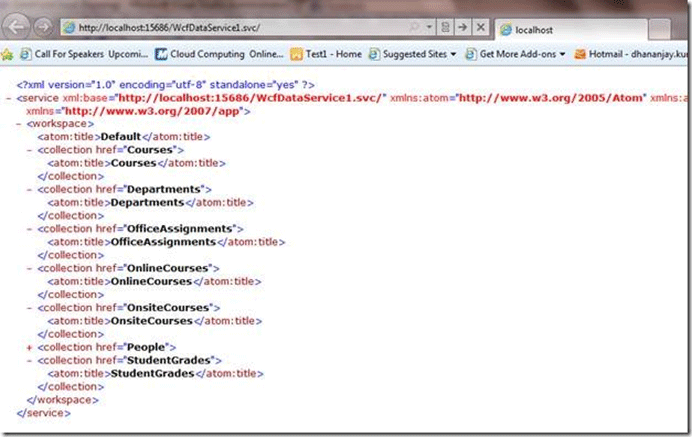
Append the URL with People and you will get all the records from the People table.
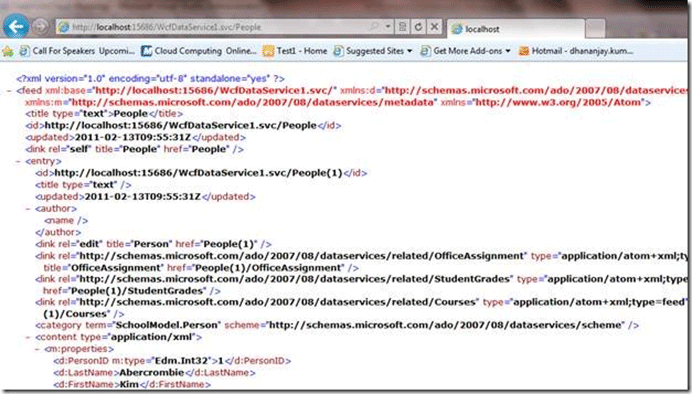
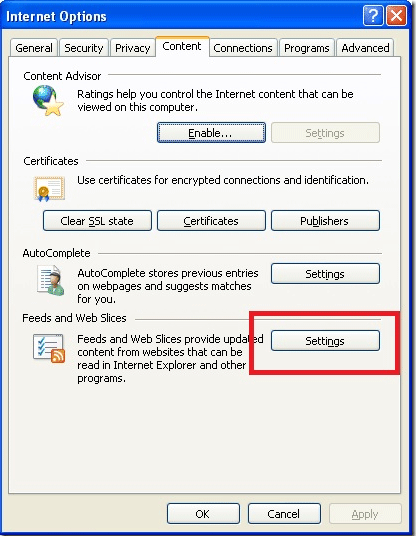
Note: If your browser is not showing the expected result, make sure that the Feed reading of the browser is off. To do so, from the menu of IE, select Tools-> Internet Options -> Content

So we have exposed data from a cloud using WCF Data service. Now any OADTA client can consume the data from the cloud by consuming the WCF Data Service.
Consuming WCF Data Service in Windows 7 Phone
What we need to do first is to create a proxy of WCF Data Service for Windows 7 phone. So to do this:
- Open command prompt in administrator mode.
- Navigate to folder C:\Windows\Microsoft.Net\FrameWork\V4.0.30319 Version of the framework (may vary depending on .Net framework you are working on).
- After navigating to that particular folder, run the following command to create a proxy class. We will add this proxy class to the Windows 7 mobile application.

Explanation of command
- There is a space between all "/out", "/uri" and "/version".
- We are redirecting the output to D drive and Temp folder. So make sure that the Temp folder exists in the D drive.
- School.cs is the name of the proxy class. You can give any name of your choice here. Once the command runs successfully, you will get School.cs class in Temp folder of D drive.
- After uri tag, give the uri of WCF data service.
Now after the execution of this command, we will have School.cs in Temp folder of D Drive.
Download the ODATA client library for Windows 7 phone from the following link and save the dll to the local drive. We will add this DLL to the Windows 7 phone application.
Download OData client library for Windows 7 Phone from here
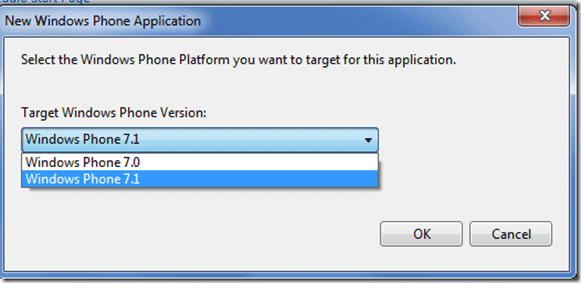
Create a Windows 7.1 phone application. Open Visual Studio and select the Windows Phone Application project template from Silverlight for Windows Phone tab.
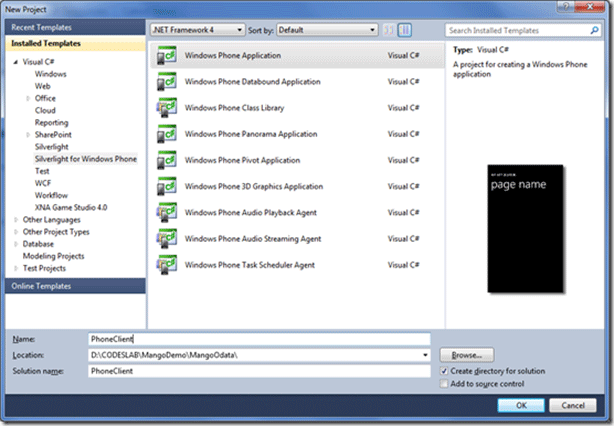
Choose Windows Phone 7.1.
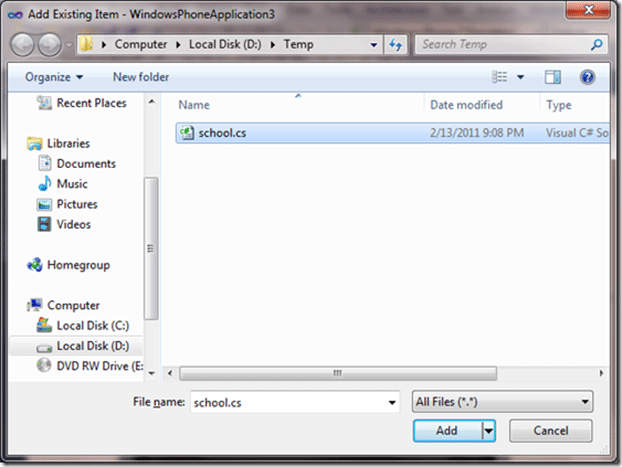
Right-click on the project and Add existing item. Then navigate to the Temp folder where you created the WCF Data Service proxy class. In our case, it is School.cs. We created it in the previous step.
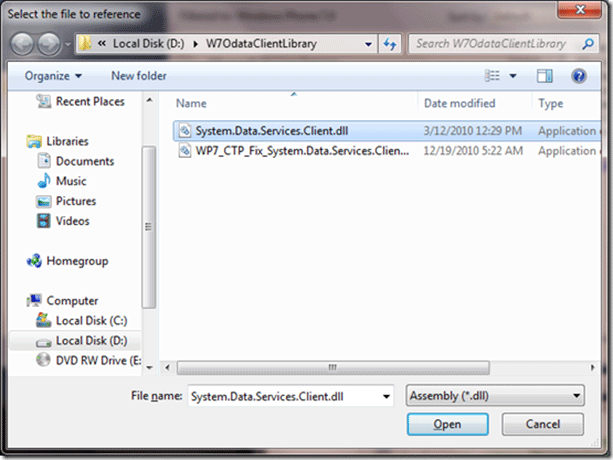
Now we need to add ODATA client library reference in the Windows 7 Phone application. Right-click on the project and Add reference. Navigate to the folder where you saved System.Data.Service.Clientdll
Display Data from Person Table in Windows 7 Phone application
We are going to display records of the Person table in the ListBox. So first, let us create an entity class at client side. Right click and add a class called Person.
Person.cs
namespace PhoneClient
{
public class Person
{
public string PersonID { get; set; }
public string LastName { get; set; }
public string FirstName { get; set; }
}
}
Create a ListBox and we will bind the data to the ListBox. For the Click event of the button, data will be bound to the ListBox.
In the following XAML:
- We are creating a button. For the Click event of the button, data is fetched from the SQL Azure table.
- In the ListBox, we are binding the returned result.
MainPage.xaml
<phone:PhoneApplicationPage
x:Class="PhoneClient.MainPage"
xmlns="http://schemas.microsoft.com/winfx/2006/xaml/presentation"
xmlns:x="http://schemas.microsoft.com/winfx/2006/xaml"
xmlns:phone="clr-namespace:Microsoft.Phone.Controls;assembly=Microsoft.Phone"
xmlns:shell="clr-namespace:Microsoft.Phone.Shell;assembly=Microsoft.Phone"
xmlns:d="http://schemas.microsoft.com/expression/blend/2008"
xmlns:mc="http://schemas.openxmlformats.org/markup-compatibility/2006"
mc:Ignorable="d" d:DesignWidth="480" d:DesignHeight="768"
FontFamily="{StaticResource PhoneFontFamilyNormal}"
FontSize="{StaticResource PhoneFontSizeNormal}"
Foreground="{StaticResource PhoneForegroundBrush}"
SupportedOrientations="Portrait" Orientation="Portrait"
shell:SystemTray.IsVisible="True">
<!--LayoutRoot is the root grid where all page content is placed-->
<Grid x:Name="LayoutRoot" Background="Transparent">
<Grid.RowDefinitions>
<RowDefinition Height="Auto"/>
<RowDefinition Height="*"/>
</Grid.RowDefinitions>
<!--TitlePanel contains the name of the application and page title-->
<StackPanel x:Name="TitlePanel" Grid.Row="0" Margin="12,17,0,28">
<TextBlock x:Name="ApplicationTitle" Text="Mango with SQL Azure" Style="{StaticResource PhoneTextNormalStyle}"/>
<Button x:Name="btnGetData" Height="100" Width="449" Content="Get Data From SQL Azure Table" Background=" blue" />
</StackPanel>
<!--ContentPanel - place additional content here-->
<Grid x:Name="ContentPanel" Grid.Row="1" Margin="12,0,12,0">
<ListBox x:Name="lstDataFromCloud"
ItemsSource="{Binding}" >
<ListBox.ItemTemplate>
<DataTemplate>
<StackPanel Orientation="Horizontal" >
<TextBlock Text="{Binding PersonID}" Margin="20" />
<TextBlock Text="{Binding LastName}" Margin="20" />
<TextBlock Text="{Binding FirstName }" Margin="20" />
</StackPanel>
</DataTemplate>
</ListBox.ItemTemplate>
</ListBox>
</Grid>
</Grid>
</phone:PhoneApplicationPage>
Now for the Click event of the button, we need to call the WCF Data Service and bind the ListBox. We are making an asynchronous call here.
MainPage.xaml.cs
using System;
using System.Collections.Generic;
using System.Linq;
using System.Windows;
using Microsoft.Phone.Controls;
using System.Data.Services.Client;
using SchoolModel;
namespace PhoneClient
{
public partial class MainPage : PhoneApplicationPage
{
// Constructor
SchoolEntities schoolEntity;
List<Person> lstPersonClient;
List<SchoolModel.Person> lstpersonWcf;
public MainPage()
{
InitializeComponent();
schoolEntity = new SchoolEntities(new Uri("http://localhost:27274/WcfDataService1.svc/"));
btnGetData.Click += new RoutedEventHandler(btnGetData_Click);
lstPersonClient = new List<Person>();
lstpersonWcf = new List<SchoolModel.Person>();
}
void btnGetData_Click(object sender, RoutedEventArgs e)
{
MessageBox.Show("Hi");
var query = schoolEntity.CreateQuery<SchoolModel.Person>("People");
query.BeginExecute(ar =>
{
DataLoad(ar);
}, query);
}
private void DataLoad(IAsyncResult result)
{
DataServiceQuery<SchoolModel.Person> query = result.AsyncState as DataServiceQuery<SchoolModel.Person>;
lstpersonWcf = query.EndExecute(result).ToList();
Dispatcher.BeginInvoke(() =>
{
foreach (var r in lstpersonWcf)
{
lstPersonClient.Add(new Person {PersonID = r.PersonID.ToString() , LastName= r.LastName ,
FirstName = r.FirstName});
}
this.lstDataFromCloud.DataContext = lstPersonClient ;
}
);
}
}
}
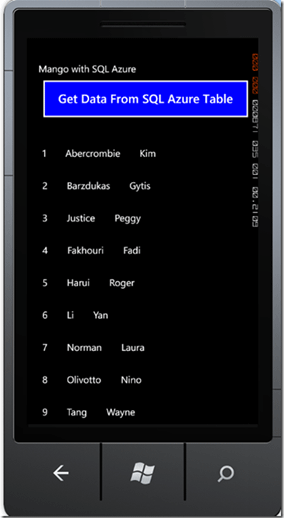
On running you should get output as below:
If this post was useful to you then buy me a coffee. Thanks for reading.