Objective
In this article, I will explain couple of things step by step
- How to work with Progressbar control of Silverlight 3.0
- How to consume WCF service in Silverlight application when both are in same solution.
Step 1
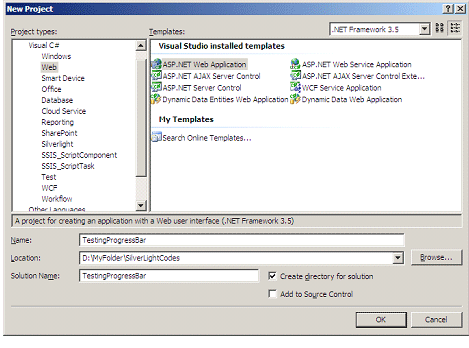
Create a Web Application. Give any name of your choice. I am giving name here TestingProgressBar.
Step 2
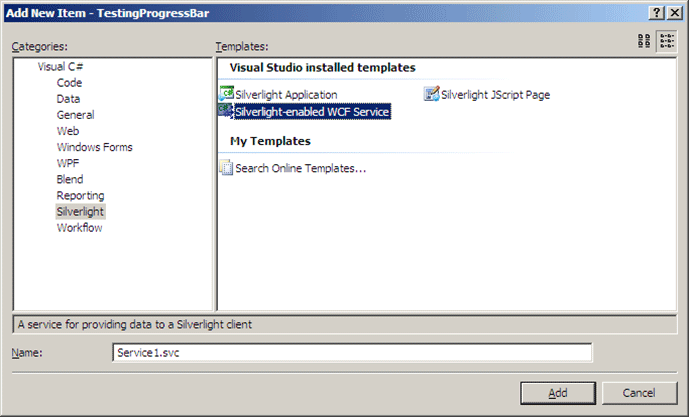
Right click on Web Application project and Add new Item. Go to Silverlight category and choose Silverlight-enabled WCF Service project template. Give any name of your choice. I am leaving the defualt name Service1.svc
Step 3
Write the service. Service is returning a List of Authors. Author is class with properties Name and Article. Service method having very simple functionality, where a list of Author is getting construed and returned.
Service1.svc.cs
using System;
using System.Linq;
using System.Runtime.Serialization;
using System.ServiceModel;
using System.ServiceModel.Activation;
using System.Collections.Generic;
using System.Text;
namespace TestingProgressBar
{
[ServiceContract(Namespace = "")]
[AspNetCompatibilityRequirements(RequirementsMode = AspNetCompatibilityRequirementsMode.Allowed)]
public class Service1
{
[OperationContract]
public List<Author> DisplayAuthor()
{
List<Author> result = new List<Author>();
result.Add(new Author() { Name = "Dhananjay Kumar ", Articles = "100" });
result.Add(new Author() { Name = "Anoj Pillai ", Articles = "1000" });
result.Add(new Author() { Name = "Arun Gopal V ", Articles = "50" });
result.Add(new Author() { Name = "Mubarag Ali ", Articles = "500" });
result.Add(new Author() { Name = "Dipti Maya Patra ", Articles = "100" });
result.Add(new Author() { Name = "Raj KUmar G ", Articles = "300" });
result.Add(new Author() { Name = "Prajith P ", Articles = "10" });
result.Add(new Author() { Name = "Mahesh Chand ", Articles = "400" });
result.Add(new Author() { Name = "VRave ", Articles = "1000" });
result.Add(new Author() { Name = "Mike Gold ", Articles = "1000" });
result.Add(new Author() { Name = "Jessy Liberty ", Articles = "1400" });
result.Add(new Author() { Name = "Nithin Kothari", Articles = "600" });
result.Add(new Author() { Name = "Tim Huer", Articles = "1000" });
result.Add(new Author() { Name = "Jag ", Articles = "1000" });
result.Add(new Author() { Name = "David Paul Prem Kumar", Articles = "100" });
result.Add(new Author() { Name = "Dhilip Sitara ", Articles = "1000" });
result.Add(new Author() { Name = "web Blog", Articles = "700" });
return result;
}
}
[DataContract]
public class Author
{
[DataMember]
public String Name { get; set; }
[DataMember]
public String Articles { get; set; }
}
}
Step 4
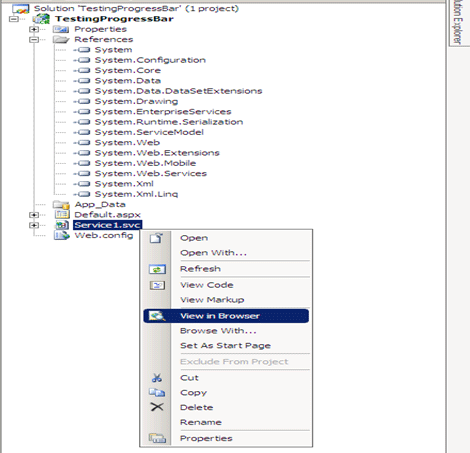
Build the web application project. After successfully compilation right click on service and view in browser to check service is running successfully or not.
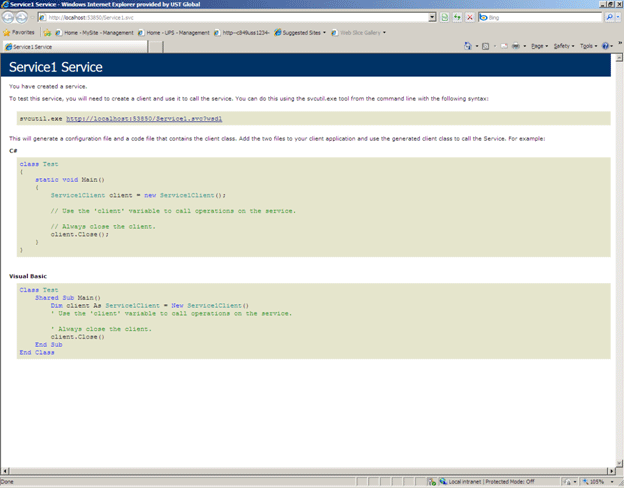
You should get the below output in browser. If you getting below output, it means you have successfully created the service and it is running. If you are not getting below output again cross check the previous said steps.
Step 5
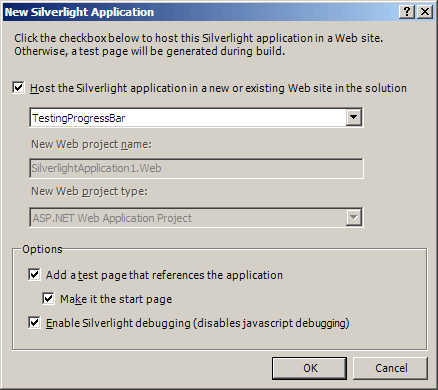
Right click on solution and add new Silverlight application type project. Go to Silverlight category and choose Silverlight Application project template. Give any name, I am leaving here default name i.e. SilverLightApplication1.
Host the SilverLightApplication1 in existing Web Application in solution. We created this web application TestingProgressbar in step 1.
Step 6
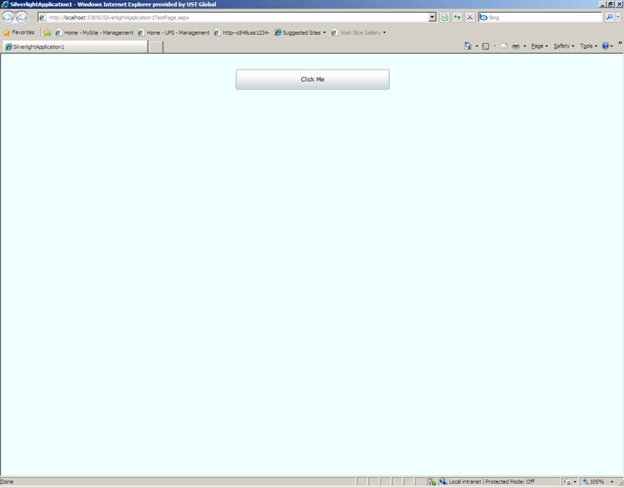
Design the Silverlight page. Add one button like below
<UserControl x:Class="SilverlightApplication1.MainPage"
xmlns="http://schemas.microsoft.com/winfx/2006/xaml/presentation"
xmlns:x="http://schemas.microsoft.com/winfx/2006/xaml"
xmlns:d="http://schemas.microsoft.com/expression/blend/2008" xmlns:mc="http://schemas.openxmlformats.org/markup-compatibility/2006"
mc:Ignorable="d" d:DesignWidth="640" d:DesignHeight="480">
<Grid x:Name="LayoutRoot">
<Grid.RowDefinitions>
<RowDefinition Height="*"/>
<RowDefinition Height="*" />
</Grid.RowDefinitions>
<Button x:Name="myButton" Height="100" Width="300" Click="myButton_Click" Content="Click Me" Grid.Row="0"/>
</Grid>
</UserControl>
In above XAML, drag and drop one DataGrid and Progress Bar just below Button control. To open the tool box, from Menu select View and Tool Box. After dragging and drop modify the XAML for DataGrid and ProgressBar as below.
<data:DataGrid x:Name="myGrid" AlternatingRowBackground="Aqua" Grid.Row="1" Visibility="Collapsed"/>
<ProgressBar x:Name="myProgressbar" Width="400" Height="100" Grid.Row="1" Visibility="Collapsed"/>
Step 7
Add the service reference. To add right click on reference in Silverlight application and select add Service Reference. From window click on Discover, this will discover the service in the solution. Give any name for the service reference; I am leaving the default name.

Step 8
Add property to handle the Progress Bar. This is Boolean property. This is using IsIndeterminate property of Silverlight progress bar control. We are setting progress bar Boolean property .
public bool IsWorking
{
get { return myProgressbar.IsIndeterminate; }
set { myProgressbar.IsIndeterminate = value; }
}
Step 9
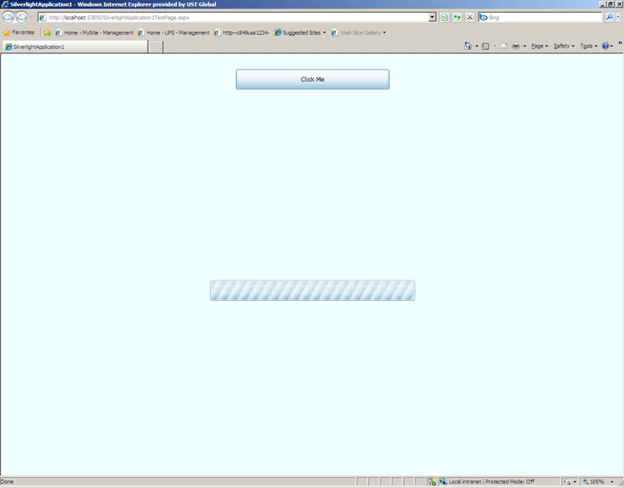
On Button click event, I am creating a proxy of service and just handling the Completed event and calling the Async method. In other work, I am just hiding and displaying the progress bar and grid view. After calling the Async method I am making IsWorking property true.
private void myButton_Click(object sender, RoutedEventArgs e)
{
myGrid.Visibility = Visibility.Collapsed;
myProgressbar.Visibility = Visibility.Visible;
Service1Client proxy = new Service1Client();
proxy.DisplayAuthorCompleted += new EventHandler<DisplayAuthorCompletedEventArgs>(proxy_DisplayAuthorCompleted);
proxy.DisplayAuthorAsync();
this.IsWorking = true;
}
Step 10
On completed event, I am assigning item source of datagrid as e.reult. In other work just making IsWorking property as false. And Hiding the progress bar and displaying the datagrid.
void proxy_DisplayAuthorCompleted(object sender, DisplayAuthorCompletedEventArgs e)
{
this.IsWorking = false;
myProgressbar.Visibility = Visibility.Collapsed;
myGrid.Visibility = Visibility.Visible;
myGrid.ItemsSource = e.Result;
}
Note for cross Domain issue
Since in our sample, both Silverlight application and WCF service is in same solution then there is no cross domain issue will come. But even if you are getting cross domain issue make sure of below things
- Make Startup project to Web Application Project. Right Click on Web Application Project and make it as startup project.
- Make SilverLightApplication1.aspx page as start up page.
Output
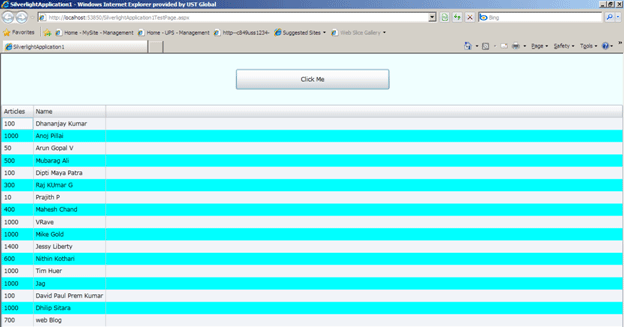
On clicking of button, service will get called and progress bar will show the waiting. After that Datagrid will get populated with the data.
Complete code is available in the source code attached with this article.
Conclusion
In this article, I explained how to consume WCF service in Silverlight application when both are in same solution. I also explained how to work with Progressbar control in Silverlight 3.0. Thanks for reading.