Objective
This article will give step by step walkthrough of hosting a WCF service in windows azure.
Note: Before reading through this walkthrough see this http://djoncloud.cloudapp.net/. We are going to make this application in this walkthrough
Prerequisite
VS 2010 Beta
Windows AZURE SDK should be installed on the system.
Step 1
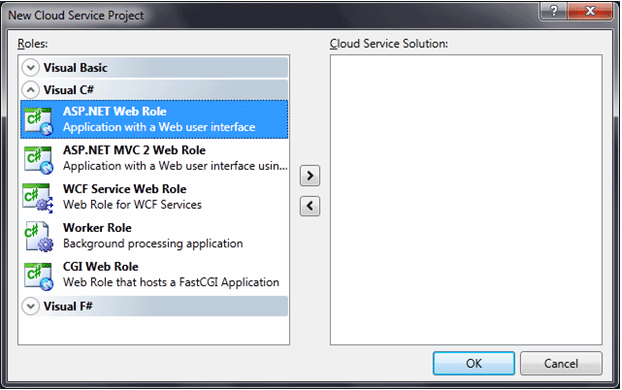
Open Visual Studio 2010 as an administrator. Select File -> New -> Cloud Service. Click on Windows Azure cloud service template. Give name of the cloud service. After creating the cloud service select the type of role. There are many roles to choose from. For our purpose, we will choose ASP.Net Web Role.
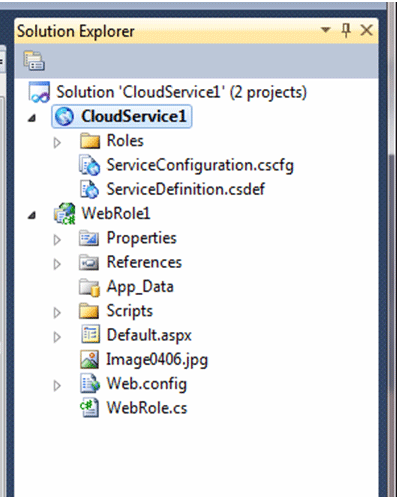
Now examine the solution explorer. There should be 2 projects. Called WebRole1 and CloudServices1. These names may different basis of the name you given at time of creation of cloud service project in step1.
Step 2
Creating the WCF Service
Right click on WebRole1 project and add new item then select WCF service from the WEB project template.
Modify contract and service implementation as per you. For my purpose , I am making it simple service as below.
Contract
[ServiceContract]
public interface IDjService
{
[OperationContract]
string GetMyName(string name);
}
Service Implementation
public class DjService : IDjService
{
public string GetMyName(string name)
{
return "helllo " + name + "to my service hosted in Azure";
} }
Change the Binding to basicHttpBinding. Make sure to do this.
Note : make sure you have set WebRole1 as startup project .
Step 3
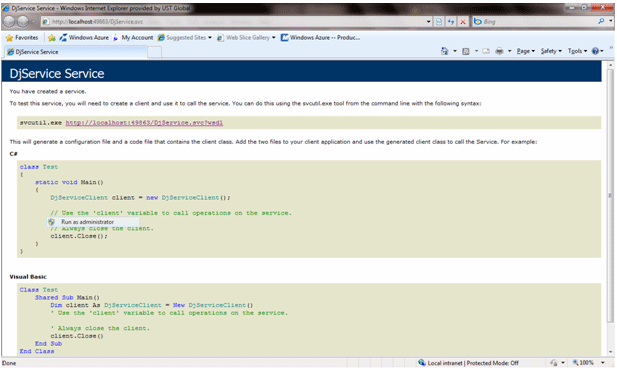
Running on Local Development Fabric (Press F5)
Run the application. This will run on the local development fabric. When we install azure SDK, local development fabric got installed. And when we run the cloud service local development fabric get started and host the application. This provides exactly the same environment as of azure in the cloud. This local development fabric could be used to debug the application before hosting into the cloud.
Running the application on local development fabric
See the URL in address bar of browser, in my case this is
http://localhost:49863/DjService.svc
Step 4
Publishing to cloud (azure)
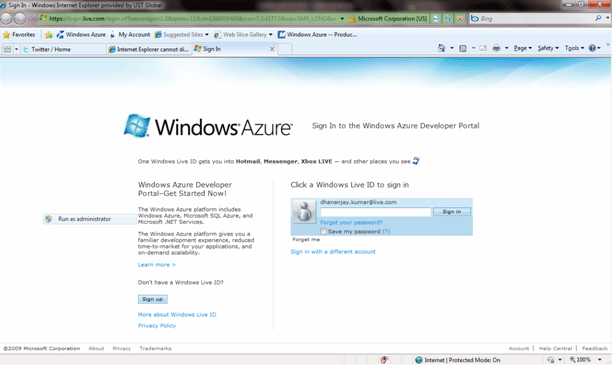
Right Click on Cloud Service 1 project and select Publish.

It will open the azure site and ask for the login.
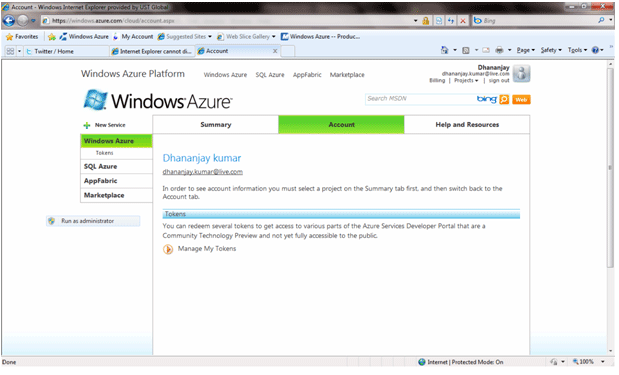
If first time, you are login to azure site for publishing browse to account section to redeem your token.
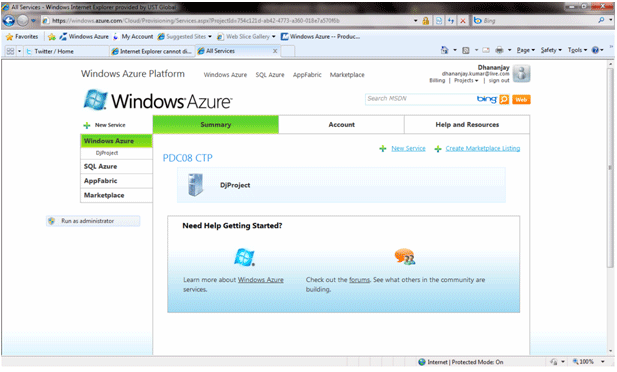
Now either create a project for windows azure or select existing project. I have already a project created with the name of DJProject . I am selecting that.
Since, I have already hosted in the project before. So I am getting the upgrade option. First time, you won't get upgrade option. First time on creation of Windows azure project it will ask you to give an URL for your project . Just give an URL, which you will use to access your application across.
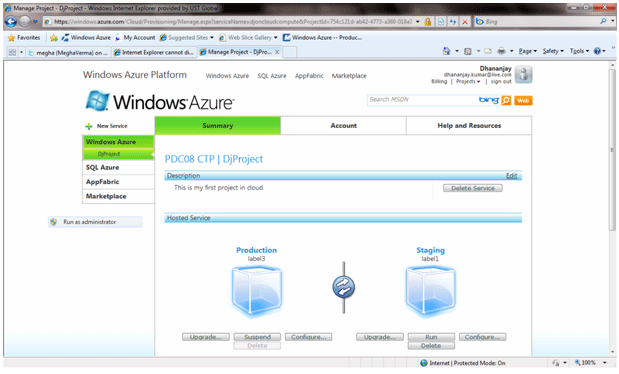
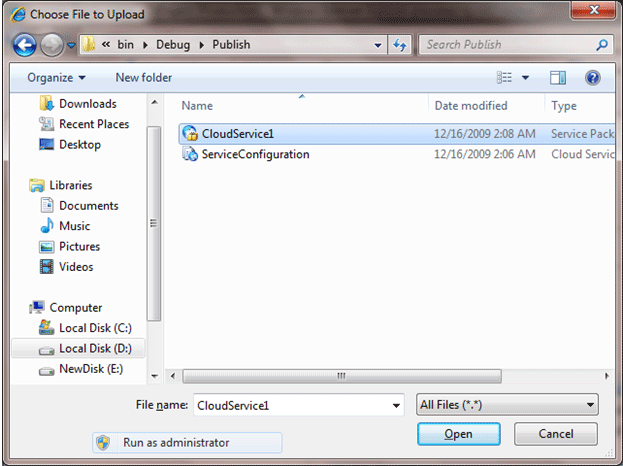
Click on upgrade option . It will ask for the package file and config file. Browse to CloudService1\bin\publish folder. CloudService1 is name of the application. It may be different in your case , depending on what name you have given in step1.
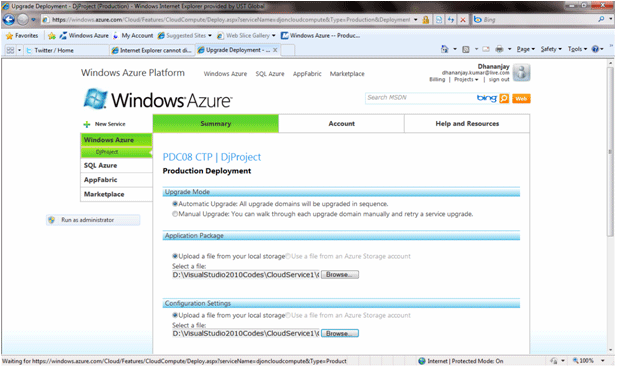
After uploading package and configuration file , give a label name and click on deploy.
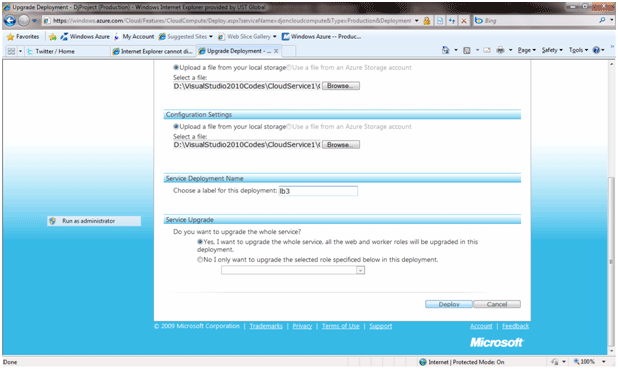
It will take some time for deployment. After successfully deployment you will see a green sign against Web Role saying it is in ready state. You could directly click on Web site URL to test your application on cloud.
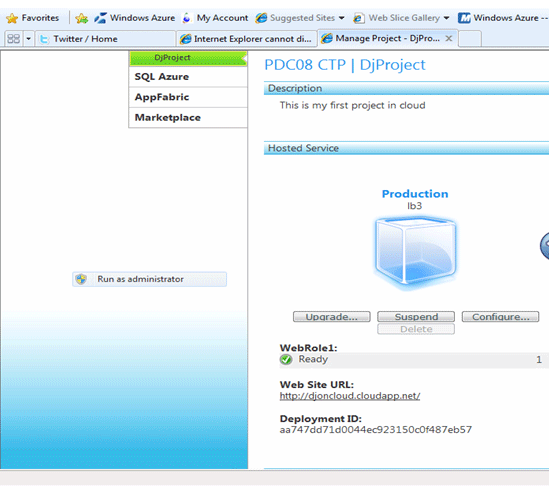
Now when you open the URL , you will get the same page as output you got on the local development fabric. And now you successfully hotsed in cloud.
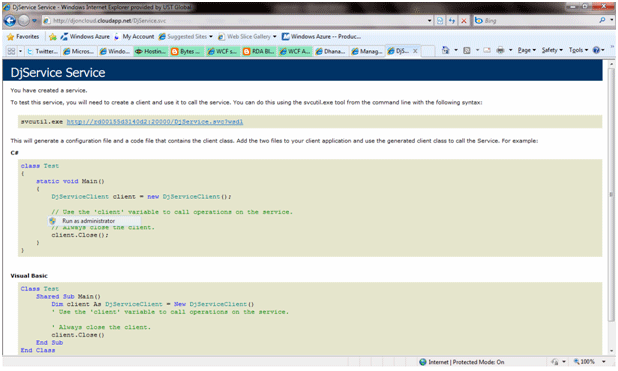
WCF service hosted in Azure
http://djoncloud.cloudapp.net/DjService.svc
Step 4
Consuming the service hosted in Windows Azure
Create a console application to consume the service. There is a known bug with Azure where a proxy cannot be created from the Azure hosted service. So to as a workaround to create proxy
1. While adding service reference first adds URL of the service hosted on local development fabric. Copy the URL from Step 3 and right click on Console application and select Add service reference. In service URL paste the URL from step 3.
Call the service hosted in local development fabric like below,
using testingWcfAzureclient.ServiceReference1;
using testingWcfAzureclient.ServiceReference1;
namespace testingWcfAzureclient
{
class Program
{
static void Main(string[] args)
{
DjServiceClient proxy = new DjServiceClient();
Console.WriteLine(proxy.GetMyName("Dhananjay "));
Console.Read();
}
}
}
Output
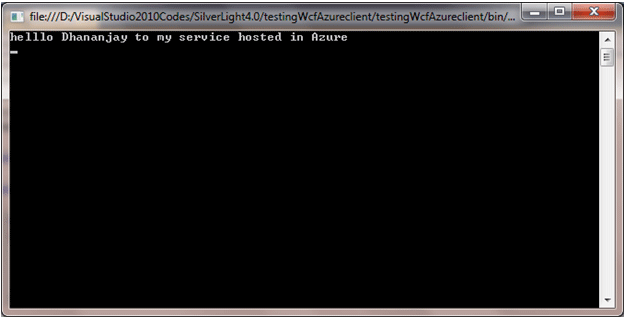
Open the App.config and modify the address to address of service in azure.
<client>
<endpoint address="http://djoncloud.cloudapp.net/DjService.svc" binding="basicHttpBinding"
bindingConfiguration="BasicHttpBinding_IDjService" contract="ServiceReference1.IDjService"
name="BasicHttpBinding_IDjService" />
</client>
Again run the application and you will get the same output.