Introduction:
In addition to providing various controls for user input, text display, image display and so forth, Silverlight also provides several controls to draw shapes. These include the Line, Rectangle and Ellipse controls. These are simple to use and yet can achieve rich functionality through their large set of properties.
Let's have some fun with these controls.
To begin with, create a Silverlight 2 application using Visual Web Developer 2008. Name this application as ShapesDemo.
In the Page.xaml, in Design view, between the <Grid></Grid> tags, drag and drop the Line control from the Toolbox. Configure its properties as shown below:
<Line Stroke="Green" StrokeThickness="3" X1="40" Y1="100" X2="300" Y2="135"></Line>
You will immediately see a thick green line on the drawing surface in Design view.
Next, drag and drop a Rectangle from the Toolbox. Configure its properties as shown.
<Rectangle Stroke="DarkViolet" StrokeThickness="2" Height="40" Width="40">
</Rectangle>
This will render a dark violet box (rectangle) on the screen.
Finally, drag and drop the Ellipse control from the Toolbox onto the Page.xaml file.
Configure its properties as shown.
<Ellipse Stroke="MediumSpringGreen" StrokeThickness="3" Height="145" Width="105"></Ellipse>
A green ellipse will be seen, enclosing the rectangle and with the line passing through it.
The resulting effect would be as shown in Figure 1
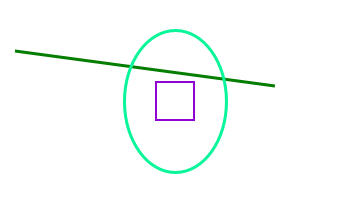
Figure 1: Shapes
Now, if you draw a Canvas by dragging and dropping from the Toolbox, you will find that the position of the entire set of shapes get awry on the screen.
<UserControl x:Class="ShapesDemo.Page"
xmlns="http://schemas.microsoft.com/winfx/2006/xaml/presentation"
xmlns:x="http://schemas.microsoft.com/winfx/2006/xaml"
Width="400" Height="300">
<Grid x:Name="LayoutRoot" Background="White">
<Canvas Background="Lavender" >
<Line Stroke="Green" StrokeThickness="3" X1="40" Y1="100" X2="300" Y2="135"></Line>
<Rectangle Stroke="DarkViolet" StrokeThickness="2" Height="40" Width="40">
</Rectangle>
<Ellipse Stroke="MediumSpringGreen" StrokeThickness="3" Height="145" Width="105"></Ellipse>
</Canvas>
</Grid>
</UserControl>
The rendered result would be as shown in Figure 2:
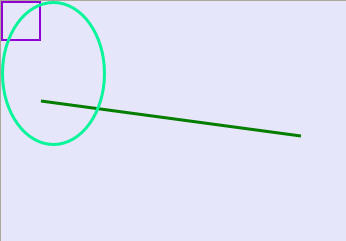
Figure 2: After adding Canvas
Eventually, with some experimentation, you almost get the original positioning by specifying the Canvas.Left and Canvas.Top properties for all the 3 controls.
The resulting code might turn out like this:
<Canvas Background="Lavender" >
<Line Stroke="Green" StrokeThickness="3" X1="40" Y1="100" X2="300" Y2="135" Canvas.Left="10" Canvas.Top="-9" ></Line>
<Rectangle Stroke="DarkViolet" StrokeThickness="2" Height="40" Width="40" Canvas.Left="180" Canvas.Top="120">
</Rectangle>
<Ellipse Stroke="MediumSpringGreen" StrokeThickness="3" Height="145" Width="105" Canvas.Top="60" Canvas.Left="150"></Ellipse>
</Canvas>
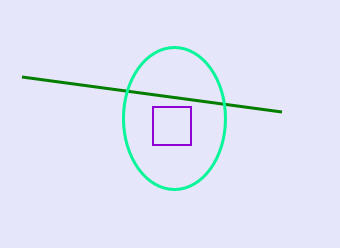
Figure 3: Re-positioning the shapes
Conclusion:
Thus, in this article, you learnt how to work with the shape controls of Silverlight 2.