In this article we will see how to load AutoCompleteBox with sample date in Blend 3 in our silverlight application.
Open Blend 3 and name your project. Here the project name is "AutoCompleteBoxinSL".
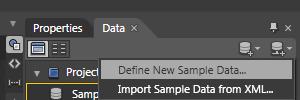
Let's start by creating a sample data for our application. For creating a sample data, click on the data tab and select "Define New Sample Data".
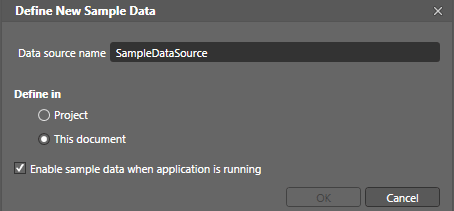
Give some name to your data source name as shown below:
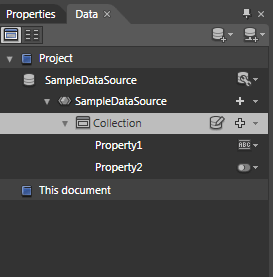
The default structure of your source will look like this:
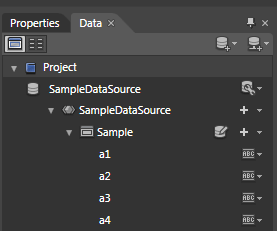
After some changes, it will look like this:
To enter some values in our fields click on the icon shown below:
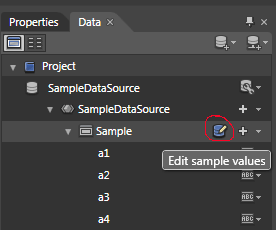
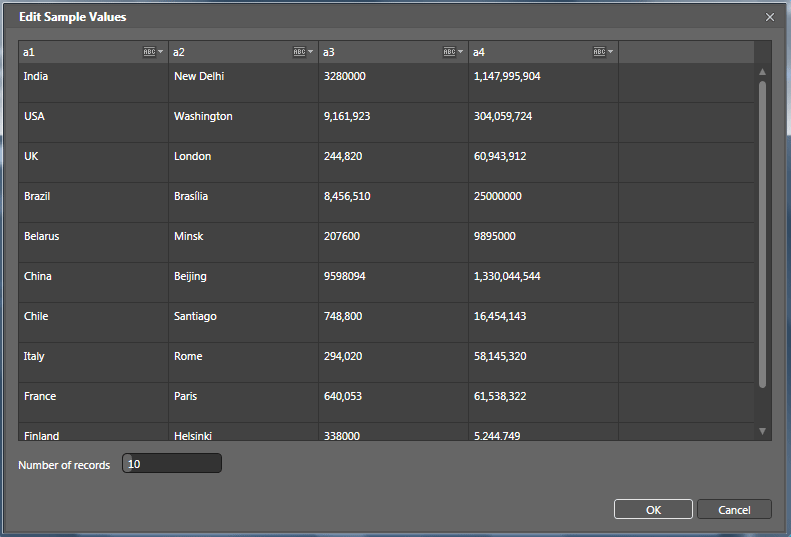
We will get the "Edit Sample Values" window which allows us to enter values to our predefined fields. The figure is shown below:
Now we have created our sample data and ready to be consumed in our application.
Drag a AutoCompleteBox control to our work area. You can see the control if you aleady installed the "Silverlight Toolkit". If not, you can do it from here.
Now all you have to do is to drag the sample collection to our control.

Our task is not finished yet. You will not be getting the desired result by running the application.
Simply drag the sample collection to your work area.
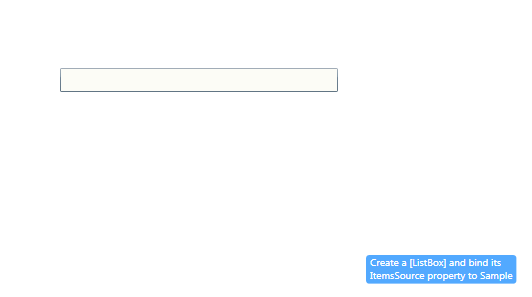
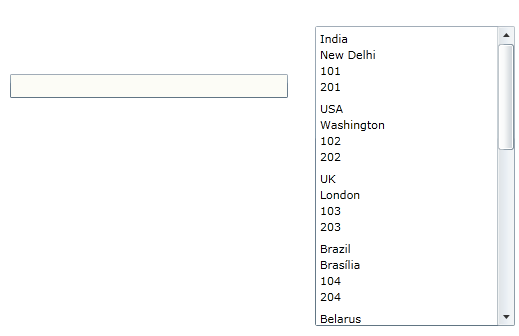
This will create a ListBox with the data source name as created by us.
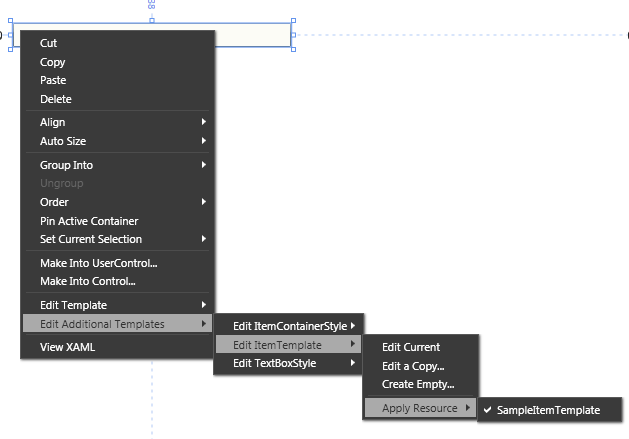
Now set the ItemTemplate of our AutoCompleteBox as shown below:
Now you can delete the autogenerated ListBox.
The code for our AutoCompleteBox will look like this.
<input:AutoCompleteBox Margin="18,38,0,0" VerticalAlignment="Top" ItemsSource="{Binding Sample}" DataContext="{Binding}" ItemTemplate="{StaticResource SampleItemTemplate}" HorizontalAlignment="Left" Width="278" />
Now open the SampleDataSource.xaml.cs file and do the changes shown below
public override string ToString()
{
return a1;
}
Also some changes are made in this file for the desired output.
Like for showing the area in this format we have made changes as shown below:
public string a3
{
get
{
return "Area: " + this._a3 + " Sq. Km.";
}
set
{
if (this._a3 != value)
{
this._a3 = value;
this.OnPropertyChanged("a3");
}
}
}
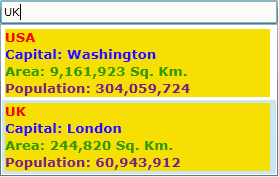
The final product will look like below after some styling for our control:
I am not going through the styles in this article. You can refer the source code attached with this article.
Note: The figures shown in this example is only for demonstration purpose.