As a Visual C++ user for 10 years I can say that Microsoft deserves praise for their new ListView class. The MFC ListView class was, well, unpleasant to use. C# makes life a bit easier with a richer property and method set for ListViews. Also, you can now, set the ListView to select an entire row in report mode, something that in Visual C++ you had to write a whole custom ListView control to do. Note also the nice grid lines.
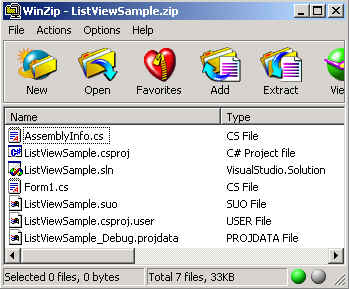
Below are the files included for the Visual.NET Project. Form1.cs contains all the code in this article:
The above mini application shows you how to create a ListView in report mode and make it persistent with streams. The ListView's columns are initialized with the following code:
public
void InitializeListView()
{
ColumnHeader header1 = this.listView1.InsertColumn(0, "Name", 10*listView1.Font.SizeInPoints.ToInt32() , HorizontalAlignment.Center);
ColumnHeader header2 = this.listView1.InsertColumn(1, "E-mail", 20*listView1.Font.SizeInPoints.ToInt32(), HorizontalAlignment.Center);
ColumnHeader header3 = this.listView1.InsertColumn(2, "Phone", 20*listView1.Font.SizeInPoints.ToInt32(), HorizontalAlignment.Center );
}
The routine uses the font sizes to determine the width of the column and the alignment flags to determine where to put the header text. The property for making the ListView a ReportView is called View and is set in the property window. Setting the FullRowSelect property allows the user to select the entire row of a ListView.
In this example, we use the edit box fields to populate the rows in our listview. Below is the routine for inserting rows into our contact list:
protected
void addbutton_Click (object sender, System.EventArgs e)
{
// create the subitems to add to the list
string[] myItems = new string[]{textBox2.Text, textBox3.Text};
// insert all the items into the listview at the last available row
listView1.InsertItem(listView1.ListItems.Count, textBox1.Text, 0, myItems);
}
Populating a ListView is similar to how it was in Visual C++. Unfortunately, there is still exists the concept of subitems, where the first column is populated separately from the rest of the ListView. But its not really such a big deal, because it's still much easier to do in C# than in the past as you can see in the code above. The first parameter is the row index we want to insert the text. The second parameter is the first column string (textBox1.Text). The third parameter is the imageindex of the imagelist. Since we are not using an image list here, we just set it to 0. myItems are the subitems in columns 2 and 3. (Or columns 1 and 2, if you count the first column as column #0.). The ListView class also has a few other versions of InsertItem so that you can pick the one that best suits your needs for the particular view.
Another function of this ListView Example is the ability to delete rows. In this example we trap the KeyDown event and look for the delete key. If the delete key is pressed, the program will remove the selected rows:
protected
void Form1_KeyDown (object sender, System.WinForms.KeyEventArgs e)
{
// determine the value of the key pressed. If the value is delete (46), remove all selected rows
int nKeyValue = e.KeyData.ToInt32();
if (nKeyValue == 46)
{
for (int i = listView1.SelectedItems.Count - 1; i >= 0; i--)
{
ListItem li = listView1.SelectedItems[i];
listView1.ListItems.Remove(li);
}
}
}
Persistence using Streams:
Several articles on this site already cover streams, so I'll only talk briefly about them here.
The FileStream allows you to read or write to a file. You can use the StreamWriter class to manipulate this stream for writing. In this example we use the SaveFileDialog component to prompt the user for the file we want to save too. The programmer can set this component for the extensions, defaults, Title and other specifics for the appearance of this dialog:
The code for writing the ListView out to a tab-delimited text file is shown below:
protected
protected
void readbutton_Click (object sender, System.EventArgs e)
{
try
{
if (this.openFileDialog1.ShowDialog() == DialogResult.OK)
{
FileStream fs = new FileStream(openFileDialog1.FileName , FileMode.Open, FileAccess.Read);
StreamReader m_streamReader = new StreamReader(fs);
// Read to the file using StreamReader class
m_streamReader.BaseStream.Seek(0, SeekOrigin.Begin);
string strLine = m_streamReader.ReadLine();
int nStart = 0;
int count = 0;
// Read each line of the stream and parse until last line is reached
while (strLine != null)
{
int nPos1 = strLine.IndexOf("\t",nStart);
string str1 = strLine.Substring(0, nPos1); // get first column string
nStart = nPos1 + 1;
int nPos2 = strLine.IndexOf("\t",nStart);
string str2 = strLine.Substring(nStart, nPos2 - nStart); // get second column string
nStart = nPos2 + 1;
string str3 = strLine.Substring(nStart); // get last column string
listView1.InsertItem(count, str1, 0, new string[]{str2, str3}); // Add the row to the ListView
count++; // increment row
nStart = 0; // reset
strLine = m_streamReader.ReadLine(); // get next line from the stream
}
// Close the stream
m_streamReader.Close();
}
}
catch(Exception em)
{
System.Console.WriteLine(em.Message.ToString());
}
}