Introduction:
In this article we will see what SQL Server Integration Services (SSIS) is; the basics of what SSIS is used for, how to create a SSIS Package and how to debug them.
SSIS is an ETL tool (Extract, Transform and Load) which is very necesary for Data warehousing applications. Also SSIS is used to perform the operations like loading the data based on the need, performing different transformations on the data like doing calculation's (Sum, Average, etc.) and to define a workflow of how the process should flow and perform some tasks on the day to day activity.
Prior to SSIS, Data Transformation Services (DTS) in SQL Server 2000 performs the tasks with fewer features. With the introduction of SSIS in SQL Server 2005 many new features can be used. To develop your SSIS package you need to get installed with the SQL Server Business Intelligence Development Studio which will be available as a client tool when installing SQL Server Management Studio (SSMS).
SSMS provides various options to develop your SSIS package starting with Import and Export wizard with which you can copy the data from one server to the other or from one data source to the other. With these wizards we can create a structure of how the data flow should happen and make a package and deploy it based on our needs to execute in any environment.
Business Intelligence Development Studio (BIDS) is a tool which can be used to develop the SSIS packages. BIDS is available with SQL Server as an interface that provides the developers to work on the work flow of the process that can be made step by step. Once the BIDS is installed with the SQL Server installation we can locate it and start our process as shown in the steps below.
Now let's take an example of importing data from a text file to the SQL Server database using SSIS. Let's have the step by step process of how to achieve this task using SSIS.
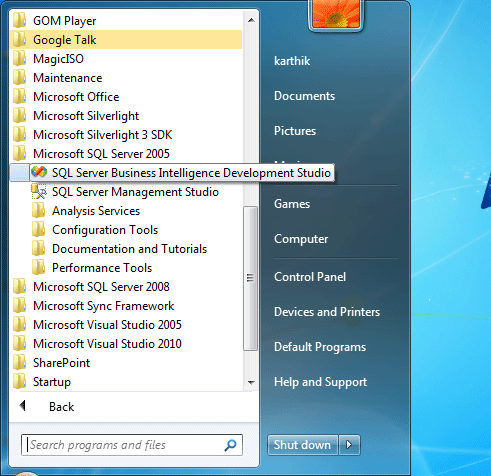
Step 1 - Go to Start -> Programs -> Microsoft SQL Server 2005 -> SQL Server Business Intelligence Development Studio as shown in the figure shown below.
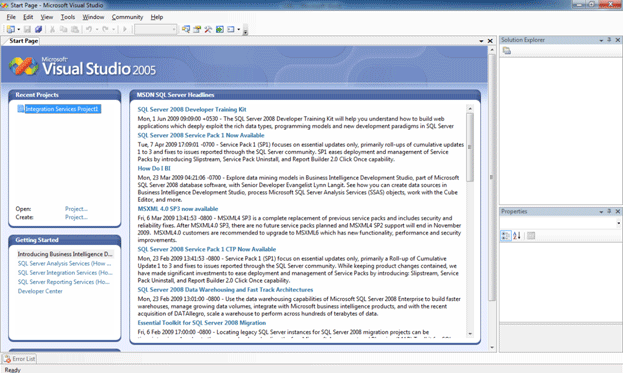
It will open the BIDS as shown in the following figure. This is similar to the Visual Studio IDE where we normally do the startup projects based on our requirements.
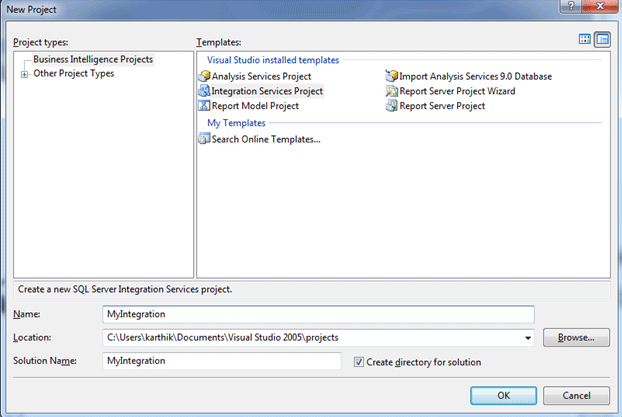
Step 2 - Once the BID studio is open, now we need to create a solution based on our requirement. Since we are going to start with the integration services just move on to File -> New Project or Ctrl + Shift + N. It will open a pop up where we need to select Integration Services Project and give the project name as shown in the following screen.
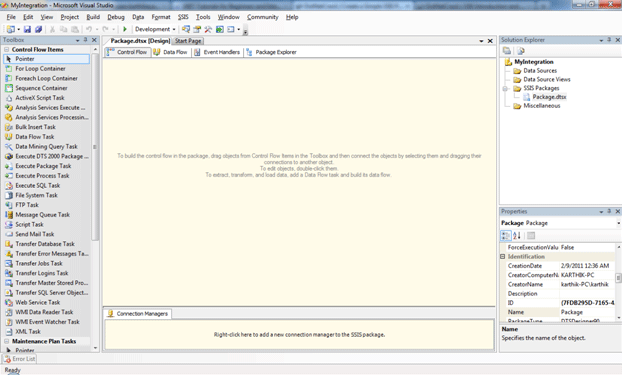
After creating this new project we can see that by default a new SSIS package is added (Package.dtsx) when you create an Integration Services Project; you can right click on it and rename it. Now the designer will show the empty workflow tabs as shown below.
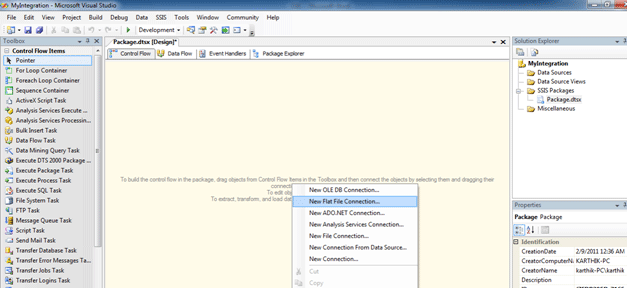
Step 3 - Since our task is to load the text file into the database, we need to create a new connection or otherwise in simple words we need to create a data source. Right click on the connection manager pane and select "New Flat File Connection" as shown in the following image.
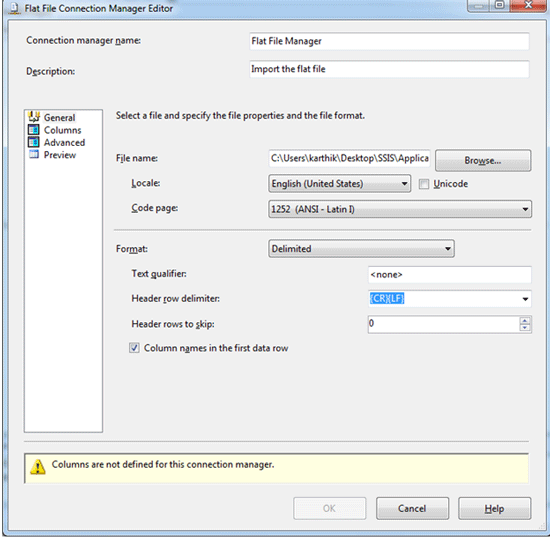
Step 4 - It will open a window as shown in the following image. We need to fill in the details like the path of the text file, and Format of the text file. If the text file first row contains the columns then we need to select the "Column names in the first data row" check box as shown in the following image.
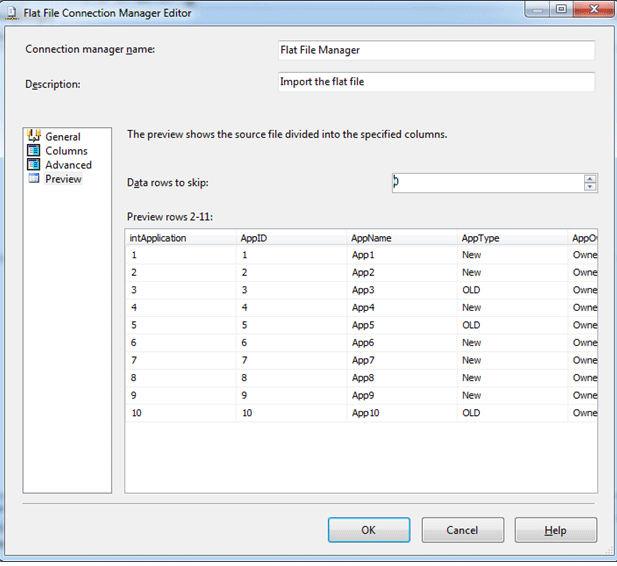
Step 5 - You can see the columns that we are trying to import from the text file by going to the columns tab or the preview tab in the following image. In the preview tab we can see the data as per our requirement like say a huge amount of data is available in the source such as 1 million records. In the preview tab it shows only 100 records at a time. To see the records from 500 to 600 you need to specify "Data rows to skip" = 500 in the preview tab. So we can see the records from 501 to 600. Click on the ok button to complete this task.
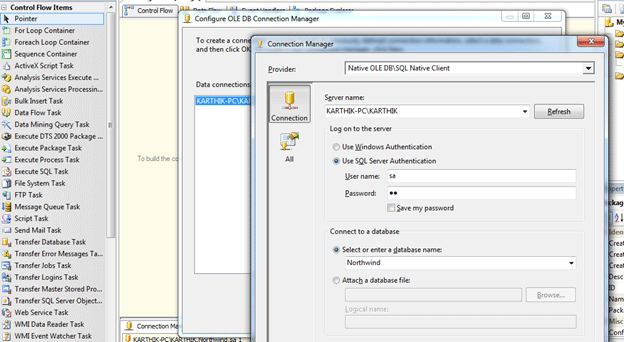
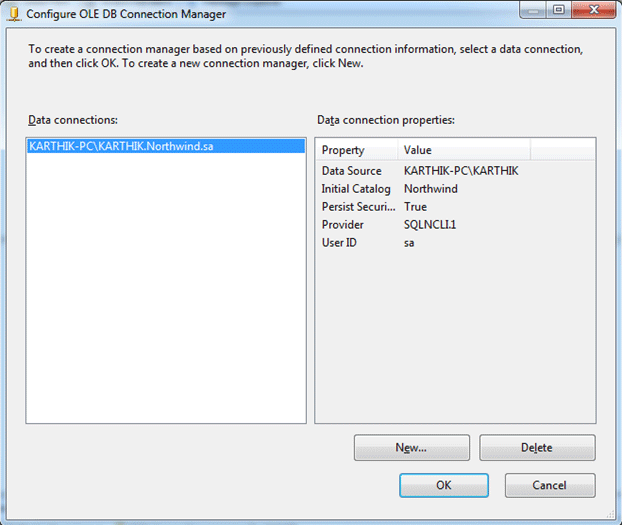
Step 6 - Now we are done with the source section defined; we need to so the similar steps to make the destination section. Now right click on the connection manager pane and select "New OLEDB Connection". It will pop up a window to get the connection details as shown below. Fill in all the connection details and test the connection.
After clicking on Ok we will see the connection details in the connection manager as shown in the following screen.
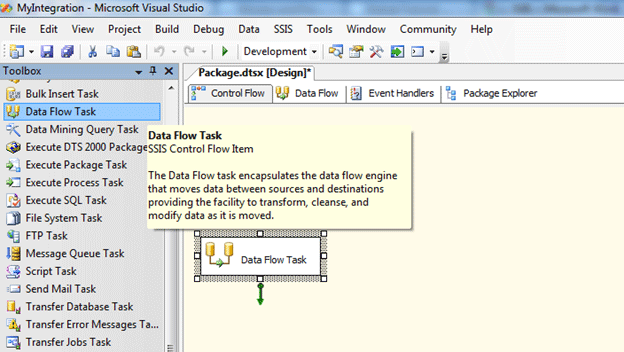
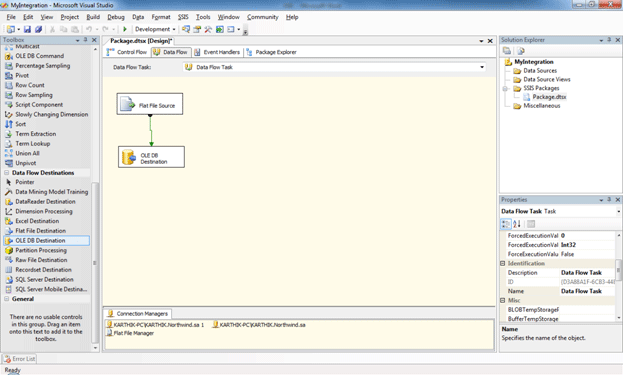
Step 7 - Now we need to create the data flow task in order to achieve our requirement to import the data from the text file to the database. SSIS uses the work flow tasks in order to process the request as a step by step process. Most of our tasks will be completed here with writing coding to make it done. So in the tool box at the left pane Click on the "Data Flow Task" item, and drag it to the screen. You'll see an icon as shown in the following screen. Double-click on that icon to open it.
Step 8 - Double click on the Data Flow Task, it will redirect to the Data Flow tab where we need to place our logic; how the data flows as per our requirement. Since our requirement is to import the text file, drag and drop the "Flat File Source" from the tool box to the data flow tab screen. Again double click on the Flat File Source task; it will pop up a window which has the connection which we set up at the initial stage as shown in the following screen.

Notice that there is an option "Retain null values from the source as null values in the data flow." This is disabled by default, which means that null values defined in the source will be treated as empty strings. You can click on the Preview button to double-check your structure.
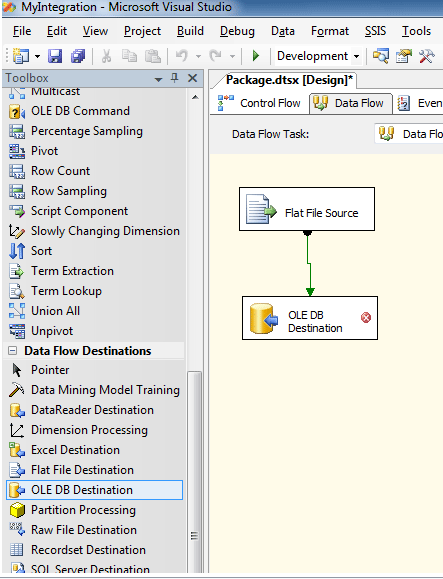
Step 9 - Now we need to set the destination flow; i.e. untill now we read the data and now we need to insert it to the database as per our requirement. Go to the tool box and click on the data flow destination section and drag and drop the "OLE DB Destination". Now we need to map the source and the destination in order to tell SSIS how the map works. So click on the Flat file Source and drag the green arrow to the Ole DB destination as shown in the following screen.
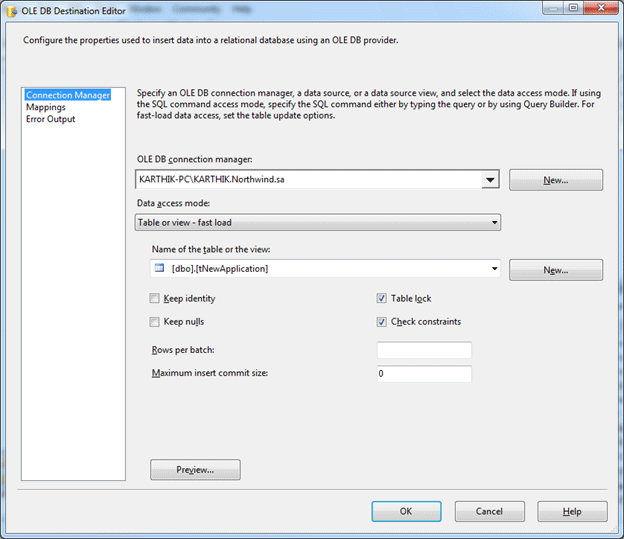
Step 10 - Now click on the destination task to configure it. Double click on the Destination task to configure it. Notice that this also allows you to keep nulls. In our example, we're going to create a new table, but if you have a table already created, you can select it from the table drop-down menu available. I have created a new table in my Database with the following structure before doing the above steps. So I can see the table name in the list as shown in the following screen.
create table tNewApplication
(
[intApplication.] int identity(1,1),
AppID uniqueidentifier default newid(),
AppName varchar(100),
AppType varchar(100),
AppOwner varchar(100),
AppCompany varchar(100),
AppState varchar(100),
AppCountry varchar(100)
)
GO
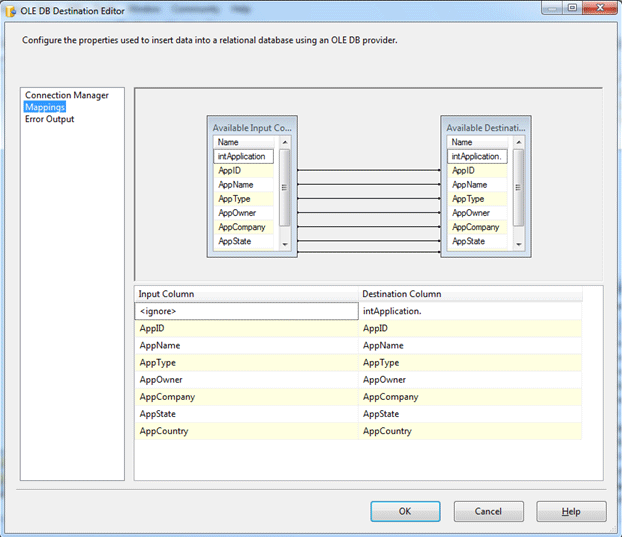
Step 11 - Now we need to do the mapping I.e. we are going to map the columns from the Source (Flat File Schema) to the destination (DB Schema) as shown in the following screen.
Step 12 - Finally once everything is configured click on the Ok button. You should see the screen similar to the one below.
Step 13 - Press F5 to start the execution of the SSIS package. We should see each step turn green as the data is read and written. And you can see the data that has been imported from the Text file to the Database.
Conclusion:
We will go over the different sections of SSIS in the upcoming articles.