In this article we will expose a cloud or SQL Azure database as a WCF Data Service.
The two steps mainly involved in this
- Creating local Database and migrating to SQL Azure
- Exposing SQL Azure Database as WCF DATA Service
Step 1: Creating local Database and migrating to SQL Azure
Creating Database
The first step is to create a database. We are going to use a School database. The script for a sample School Database can be copied from here.
Generate Database Script for SQL Azure
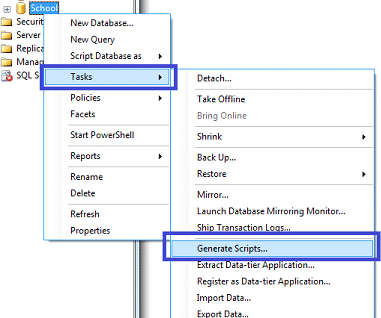
Right click on School Database and select Tasks. From Tasks select Generate Script.
From Pop up select Set Scripting option.
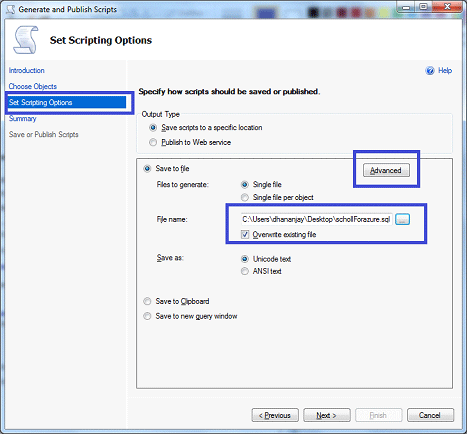
Give the file name by selecting Save to file option.
Now the main thing to be noticed here is we need to change an advanced setting. For that click on Advanced options.
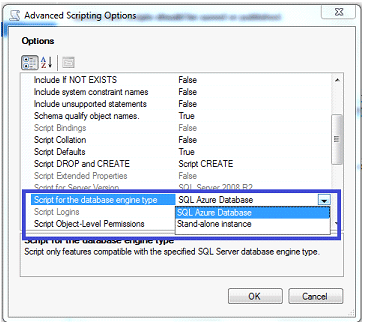
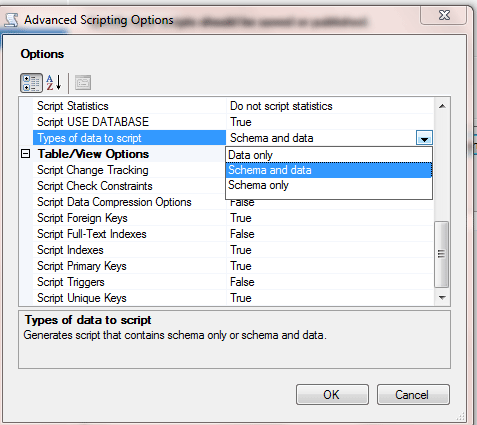
And in types of data to script select Script and Data both option.
After that click Next and Finish. You will see that a SQL file is created and we will be using this script to migrate our in-house school database to SQL Azure.
Create School Database in SQL Azure
Login to SQL Azure portal with your live credential.
https://sql.azure.com/
Click on SQL Azure tab. You will get the project that you created for yourself.
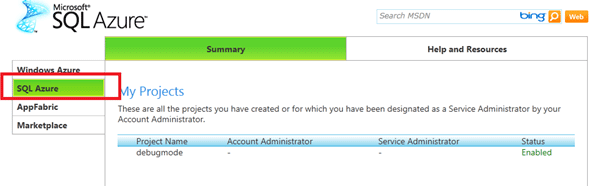
Click on the project. In my case the project name is debugmode. After clicking on project, you will get listed the entire database created in your SQL Azure account.
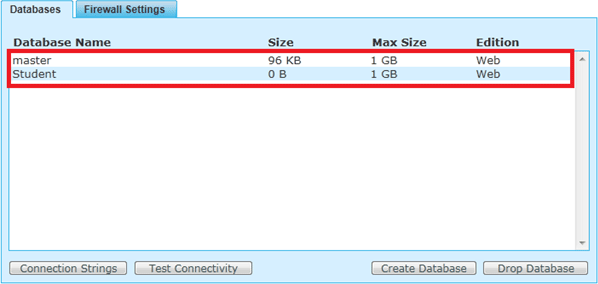
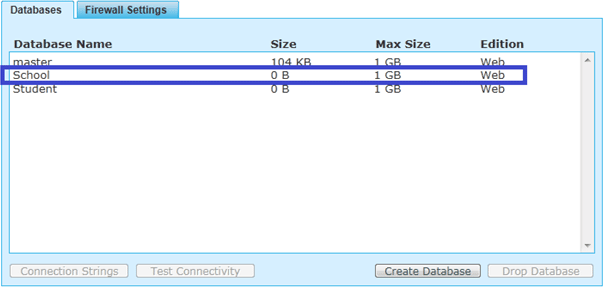
Here in my account there are two databases already created. They are master and student database. Master database is default database created by SQL Azure for you.
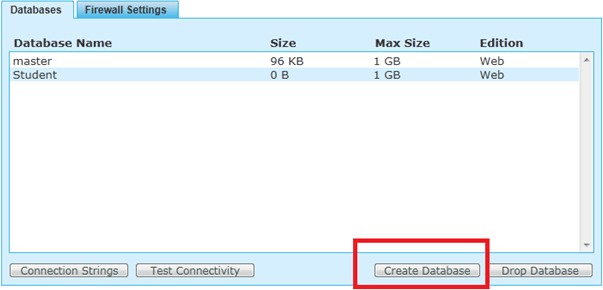
Click on Create Database
Give the name of your database. Select the edition as Web and specify the max size of database.
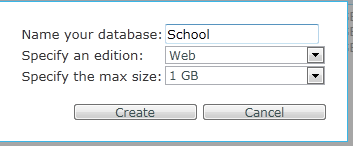
You can select other option also for the edition as business
After that click on Create you can see on Databases tab that Demo1 database has been created.
Run the Script in SQL Azure
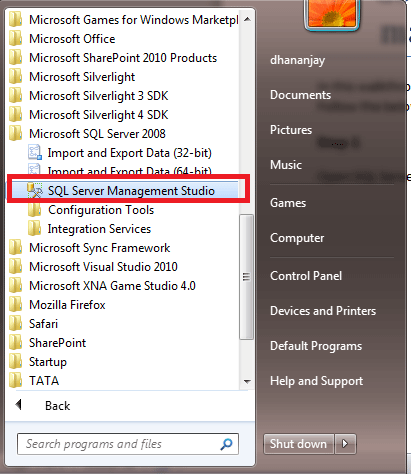
Open SQL Server management studio
You will get Connected to server dialog box. Click cancel on that.
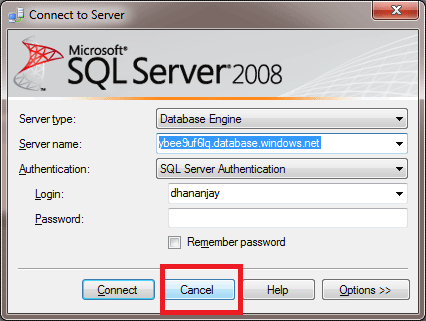
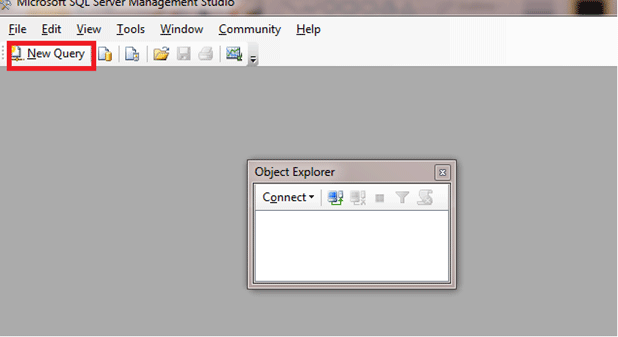
After canceling the dialog box click on New Query from left top
On clicking New Query, you will get the connect to server dialog box again.
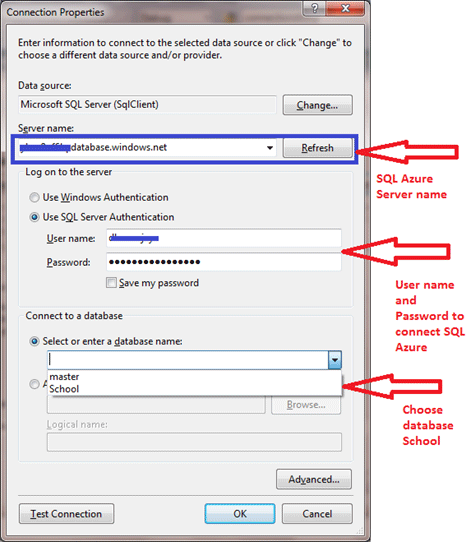
Now here you need to provide, Server name of SQL Azure and Login credential of SQL Azure.
To know what is database server name of SQL Azure portal, login to Windows Azure portal with your live credential and then click on SQL Azure tab
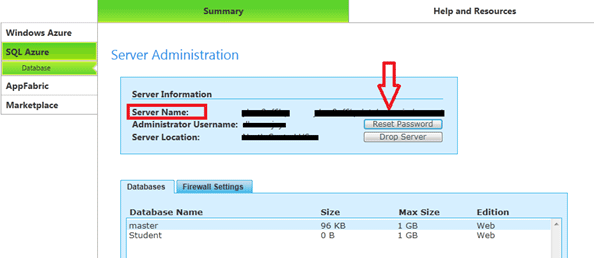
You will get the server name in the form of
abc.database.windows.net
Where abc is name of your SQL Azure server. We need to provide this server name at local sql server management studio.
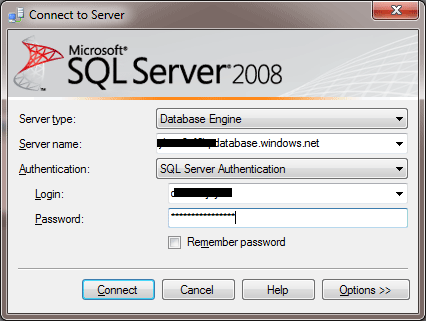
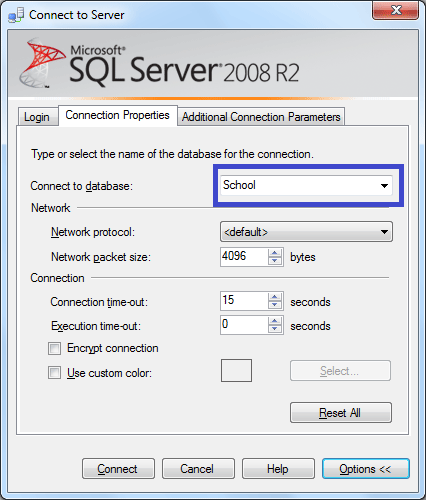
Make sure to select SQL Server Authentication and provide login user name and password of your SQL Azure database portal.
After that before clicking Connect click on Option
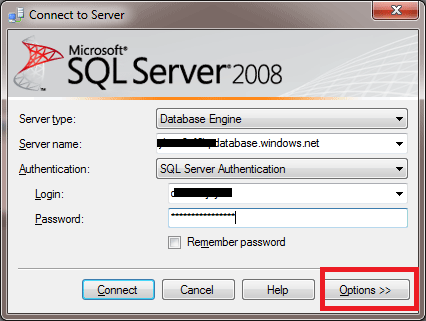
From Option select School database.
Run the Script
Now once you successfully got connected to School Database in SQL Azure. Copy the script and Run like below.
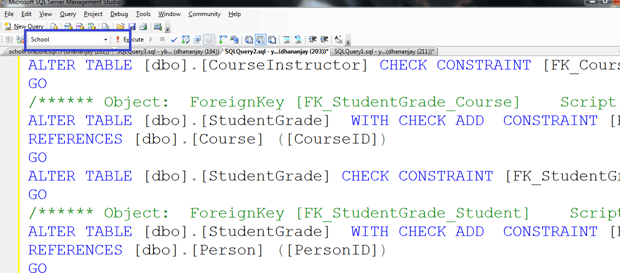
After successfully running of script, run the below command and all the tables name will get listed.

In this way you successfully migrated database to SQL AZURE.
Step 2: Exposing SQL Azure Database as WCF DATA Service
Create a Web Application
Create a new project and select ASP.Net Web Application project template from Web tab. Give a meaning full name to the web application.

Create a Data Model
We can create a Data Model, which can be exposed as WCF Data Service in three ways
- Using ADO.Net Entity model.
- Using LINQ to SQL class.
- Custom Data Model.
For our purpose, I am going to use ADO.Net Entity model to create the data model. So to create an entity model
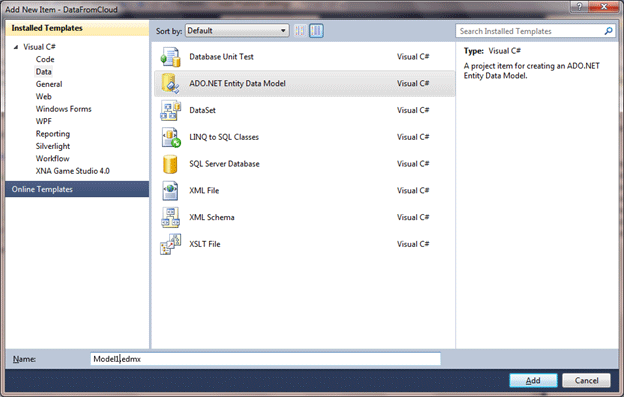
- Right click on web application and add a new item
- Select ADO.Net Entity model from Data tab.
- Since we have table in SQL Azure Dat aBase. So we are going to choose option, select from database.

- Choose a new connection.
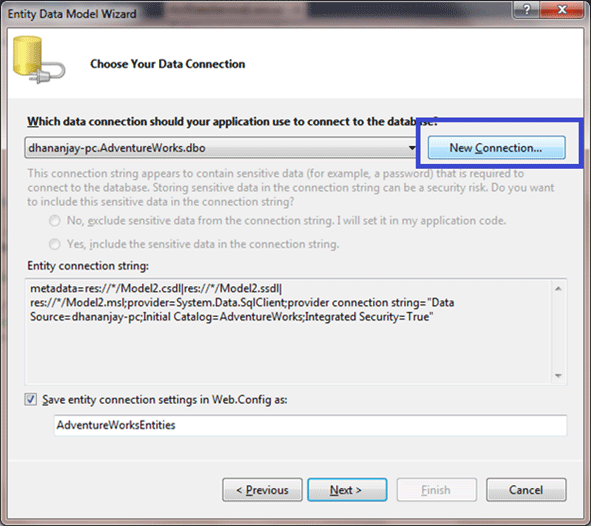
After clicking on New Connection, this is the more important step. We need to give extra care here.
So provide the information as below,
Click on Test Connection to test connection established successfully or not? After that you will get prompted as Connection string contains sensitive data, do you want to keep that in configuration file or mange through program. Which to use is your choice.

After selecting your option, click on the Next button; you will then see all the Tables, Views and Stored Procedures available as part of a data model for WCF Data Service.
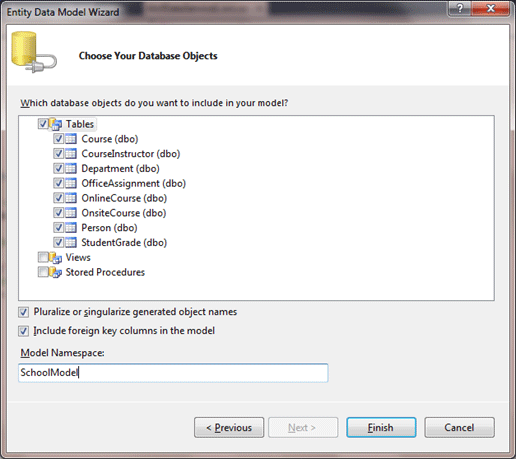
- Select the tables, views and stored procedure from the data base that you want to make as the part of your data model.
Creating WCF Data Service
- Right click on Web Application project and add a new item.
- Select WCF Data Service from Web tab. Give any meaningful name. I am leaving the default name here.
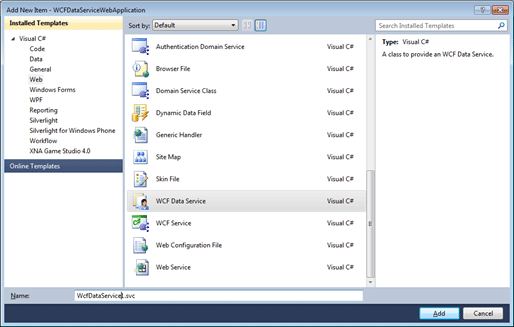
- After adding the WCF Data Service, we can see a service file with extension .svc has been added to the solution explorer.
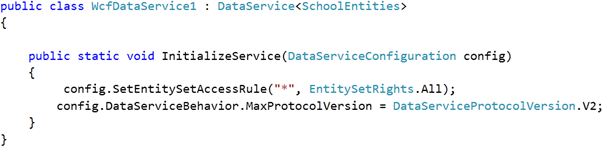
The first thing to do is to provide a data source name. To do that, uncomment the first commented line and give the data source name. In our case we are using the name of the model, which we created in the second step; the data source. Our data model name is SchoolEntities.

Now we need to set access rules for entity or entity set. Since we have only one table, either we can use the name of the table explicitly or if we want to set the same access rule for all the tables in the data model or data source we can use *.
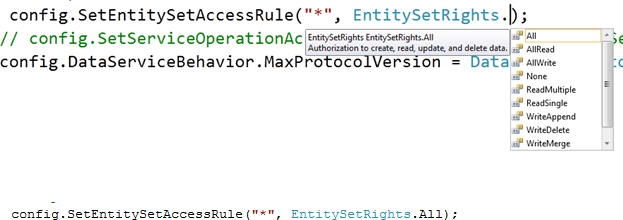
So we are setting the access rule that, on the entity in the data source performs all the operations.
So finally the svc file looks like:
Run the WCF Data Service
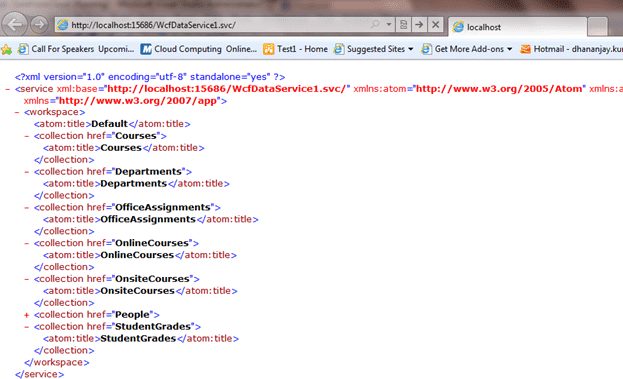
Just press F5 to run the WCF Data Service. Data Service will be hosted in the default ASP.Net server.
When running you will see all the tables listed there.
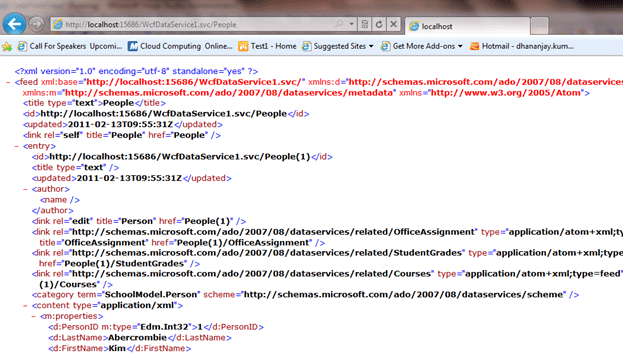
Append the URL with People and you will get all the records from People table
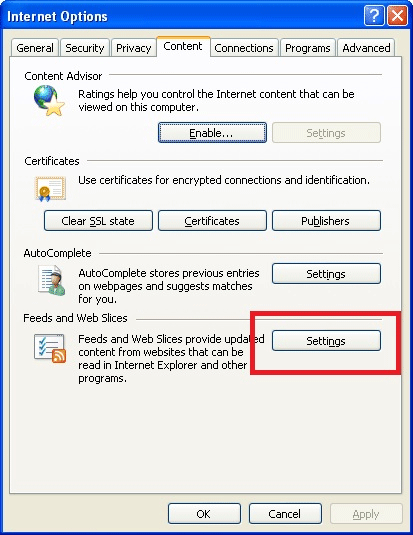
Note: If your browser is not showing the expected result, make sure Feed reading of browser is off. Do that from the menu of IE and select tool and then Internet Option then Content.

So we have exposed data from cloud using WCF Data service. Now any OADTA client can consume the data from cloud by consuming WCF Data Service.
Thanks for reading; I hope this article was useful.