Objective
In this article, we will see how to work with LINQ to SharePoint. I have tried to address all the common errors we encounter when we start using LINQ against SharePoint.
We will see:
- How to insert an item in SharePoint list using SPLinq
- How to update an item in SharePoint list using SPLinq
- How to delete an item in SharePoint list using SPLinq
- How to fetch items from SharePoint list using SPLinq
Advantage
- SPLinq supports Visual Studio intellisense
- SPLinq provides strong typecasting and data typing
- SPLinq works without CAML query
- Using SPLinq , existing knowledge of LINQ can be applied to SharePoint development
- SPLinq provides completely language dependent development of SharePoint
- Multiple list item insertion and deletion can be performed very easily with one syntax
- Join operation can be performed very easily on the related list
Using CAML, performing an operation against a SharePoint list was the biggest challenge. CAML does not provide developer friendly syntax. SPLinq is a more useful alternative to CAML.
SPLinq can be used with
- Managed applications, such as windows or console or WPF
- With SharePoint client object models
- With SharePoint webparts
- With SPGridView
Challenge
The main challenge of working with SPLInq is the creation of an Entity class on command prompt. SPMetal creates a partial Entity class to apply Linq against that.
Assumption
We have a custom list:
- Name of the list is Test_Product
- Columns of the list are as below:

- There are two items in the list:

- The URL of the SharePoint site is:
http://dhananjay-pc/my/personal/Test1
Now we need to fetch the list items in a managed console application using Linq to Sharepoint or SPLinq.
Follow the following steps:
Step 1:
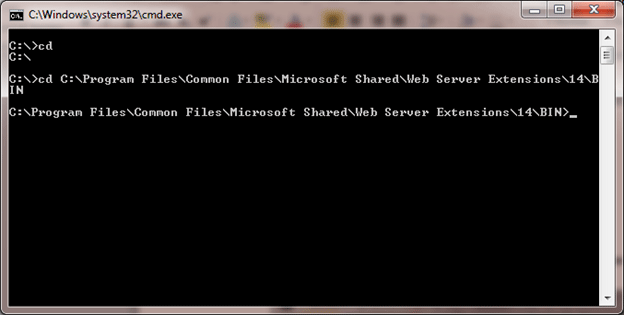
Open the command prompt and change the directory to:
C:\Program Files\Common Files\Microsoft Shared\Web Server Extensions\14\BIN
Type the command: CD C:\Program Files\Common Files\Microsoft Shared\Web Server Extensions\14\BIN
Step 2:
Now we need to create the class for corresponding list definitions.
C:\Program Files\Common Files\Microsoft Shared\Web Server Extensions\14\BIN> spme
tal.exe /web:http://dhananjay-pc/my/personal/Test1 /namespace:nwind /code:Product.cs
In the above command we are passing a few parameters to spmetal.exe, they are as below:
1. /web:Url
Here we need to provide URL of SharePoint site:
/web:http://dhananjay-pc/my/personal/Test1 /
://dhananjay-pc/my/personal/Test1 / is the URL of the SharePoint site, I created for myself. You need to provide your SharePoint site URL here.
2. /namespace:nwind
This would be the namespace under which the class of the list will get created. In my case the name of the namespace would be nwind.
3. /code:Product.cs
This is the file name of the generated class. Since we are giving the name Product for the file then the class generated will be ProductDataContext.
Step 3:
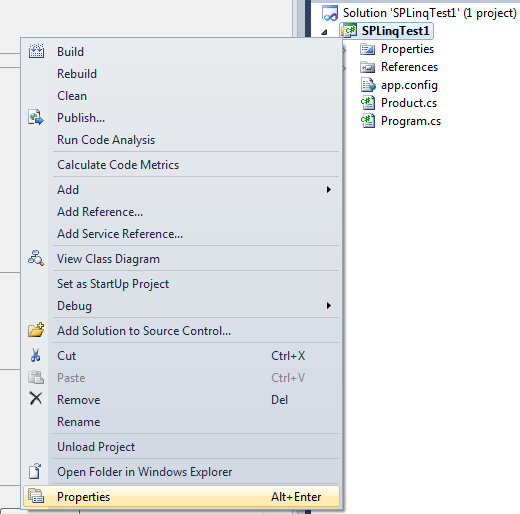
Open Visual Studio and create a new project of type console. Right click on the Project and select Properties.
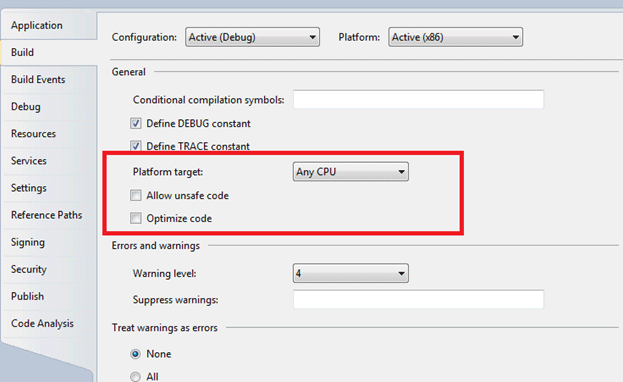
Click on the Build tab and change Platform Target to Any CPU.
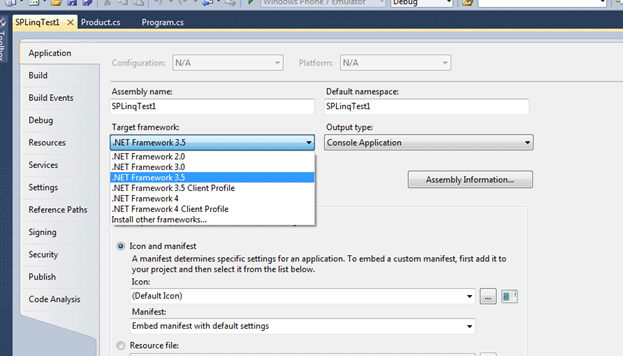
Click on the Application tab and change the Target framework type to .Net Framework 3.5.
Step 4:
The class we created in Step 2 will by default get saved in the same folder with SPMetal.exe. So to see where the class got created we need to navigate to the folder:
C:\Program Files\Common Files\Microsoft Shared\Web Server Extensions\14\BIN
Add created class to the Project
Now add this class to the project. To do this, right click on the project and select "Add | Existing Item". Then browse to the above path and select Product.cs.
Add references to the Project
Microsoft.SharePoint
Microsoft.SharePoint.Linq
Right click on Reference and select Add Reference. To locate the Microsoft.SharePoint and Microsoft.SharePoint.Linq DLLs browse to C:\Program Files\Common Files\Microsoft Shared\Web Server Extensions\14\ISAPI. All the SharePoint DLLs are there.
Step 5:
Add the namespace

Nwind is the name of the namespace of the class we created in Step 2.
Now the console application project is ready for the CRUD operation on SharePoint 2010 list using SPLinq.
Fetch the items from the list using SPLinq.
a. First we need to create an instance of ProductContext class

Here we need to provide the URL of the SharePoint site as a parameter to the constructor.
b. Now we can use simple LINQ to access the list, such as below:

c. There is one more way to access the list.

Code for fetching list items:
using System;
using System.Collections.Generic;
using System.Linq;
using System.Text;
using Microsoft.SharePoint.Client;
using Microsoft.SharePoint.Linq;
using Microsoft.SharePoint;
using nwind;
namespace SPLinqTest1
{
class Program
{
static void Main(string[] args)
{
ProductDataContext context = new ProductDataContext("http://dhananjay-pc/my/personal/Test1");
//EntityList<Test1_ProductItem> products = context.GetList<Test1_ProductItem>("Test1_Product");
var res = from r in context.Test1_Product select r;
foreach (var r in res)
{
Console.WriteLine(r.ProductId + ":" + r.ProductName + ":" + r.ProductPrice); }
Console.ReadKey(true);
}
}
}
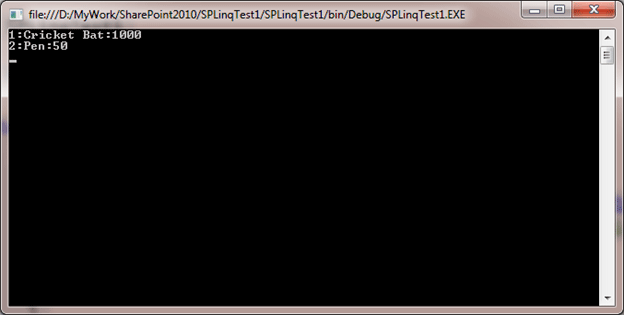
Output
Insert to SharePoint list using SPLinq.
-
Create the instance of Data Context

-
Get the entity list where item would get inserted

-
Create instance of List item to be inserted

-
Call the InsertOnsubmit on the instance of Entity list.

-
Call sumitchange on the context

Code for inserting a list item :
ProductDataContext context = new ProductDataContext("http://dhananjay-pc/my/personal/Test1");
EntityList<Test1_ProductItem> products = context.GetList<Test1_ProductItem>("Test1_Product");
Test1_ProductItem itemToInsert = new Test1_ProductItem()
{ ProductId="9",
ProductName ="Soccer Ball",
ProductPrice =600};
products.InsertOnSubmit(itemToInsert);
context.SubmitChanges();
Update a Particular list item in SharePoint list
-
Create instance of Data Context

-
Fetch the list item to be updated using SPLInq

-
Modify the list item property wished to be updated. I am updating Product name to Dhananjay of Product Id 1

-
Call the submit change on the context

Code for updating a list item
ProductDataContext context = new ProductDataContext("http://dhananjay-pc/my/personal/Test1");
var itemToUpdate = (from r in context.Test1_Product where r.ProductId == "1" select r).First();
itemToUpdate.ProductName = "Dhananjay";
context.SubmitChanges();
Delete a Particular item from the list
-
Create the instance of Data Context

-
Get the entity list where item would get inserted

-
Fetch the list item to be deleted using SPLInq

-
Call deleteonsubmit to delete a particular item from SharePoint list

-
Call the submit change on the context

Code for deleting a list item
ProductDataContext context = new ProductDataContext("http://dhananjay-pc/my/personal/Test1");
EntityList<Test1_ProductItem> products = context.GetList<Test1_ProductItem>("Test1_Product");
var itemToDelete = (from r in context.Test1_Product where r.ProductId == "1" select r).First();
products.DeleteOnSubmit(itemToDelete);
context.SubmitChanges();